City
Introduction/Purpose
The City module, found under Other Masters > Geographical Locations, is the most granular level of geographical data managed in RockEye Trade. For businesses dealing with oil or white products, precise city-level information is paramount for:
- Last-Mile Logistics: Planning exact delivery points, optimizing routes for tankers and distribution vehicles, and managing local distribution hubs.
- Customer Locations: Accurately mapping customer base, service areas, and potential market expansion.
- Local Permitting & Regulations: Ensuring compliance with city-specific permits, zoning laws, and local environmental regulations for storage, transport, and sales of petroleum products.
- Sales & Distribution Planning: Analyzing localized demand, setting up sales territories, and identifying key retail or industrial consumption points.
- Detailed Reporting: Generating highly specific reports on sales, inventory movement, and operational performance by city.
This module completes the geographical hierarchy, providing the essential detail for operational efficiency and regulatory adherence.
How To Navigate
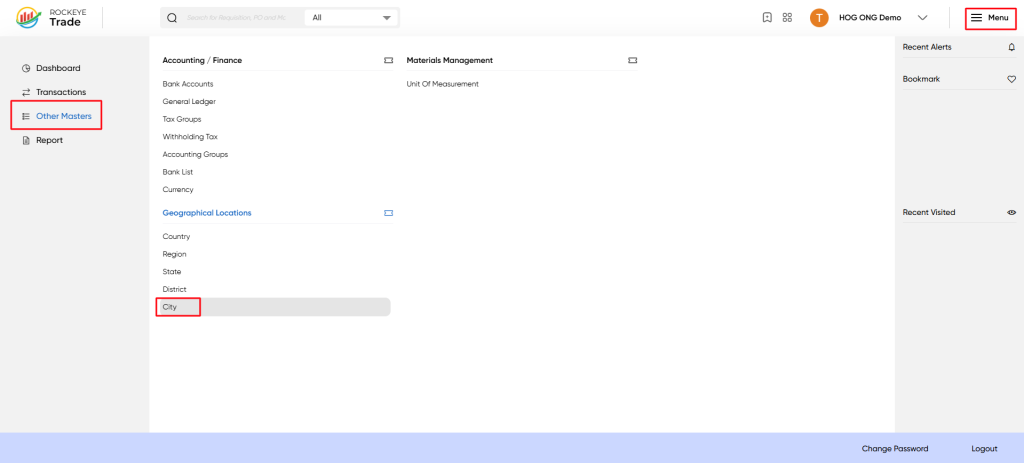
- Click on the Menu icon (☰) in the top-right corner.
- Navigate to Other Masters > Geographical Locations > City.
Listing
The City interface displays a comprehensive list of defined cities and their associated geographical hierarchy. Key columns include:
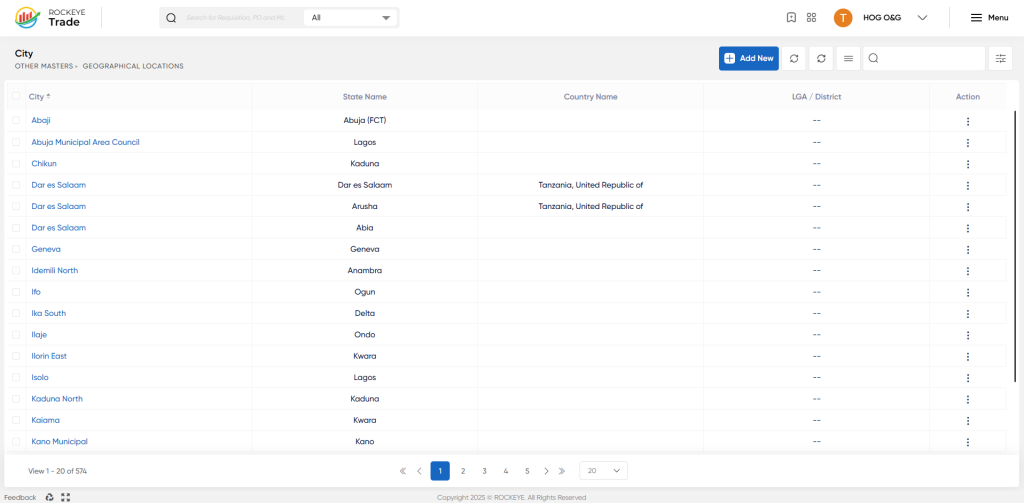
- City Name*: The official name of the city (e.g., Abaji, Dar es Salaam, Geneva).
- State Name: The state or province to which the city belongs.
- Country Name: The country to which the city ultimately belongs.
- LGA / District: (Local Government Area / District) - The specific district or local government area within the state/country where the city is located, providing an even finer level of detail where applicable.
- Action: A dropdown menu (⋮) offering options such as:
- View / Edit: To view the city's details or make modifications.
- Activity Log: To review a historical record of changes made to the city entry.
Editing a City Entry
To modify an existing city's details:
- Locate the desired city in the City list, using the search or filter options if necessary.
- Click on the Action button (⋮) next to the city you wish to edit.
- Select View / Edit from the dropdown menu.
- Make the necessary changes to the city's details (e.g., correcting a name, updating its associated state or district).
- Click Save to apply the updates or Discard to cancel any changes.

