Services
Introduction/Purpose
The Services master allows you to define non-material, chargeable items that are part of your trade operations. This is essential for billing clients for activities beyond the physical product, such as tank cleaning, inspection fees, documentation charges, or other specialized services related to white product (oil) handling.
Once a service is created in this master, it can be easily added to transactions like Sales Orders and Sales Invoices, ensuring accurate and comprehensive billing.
How To Navigate
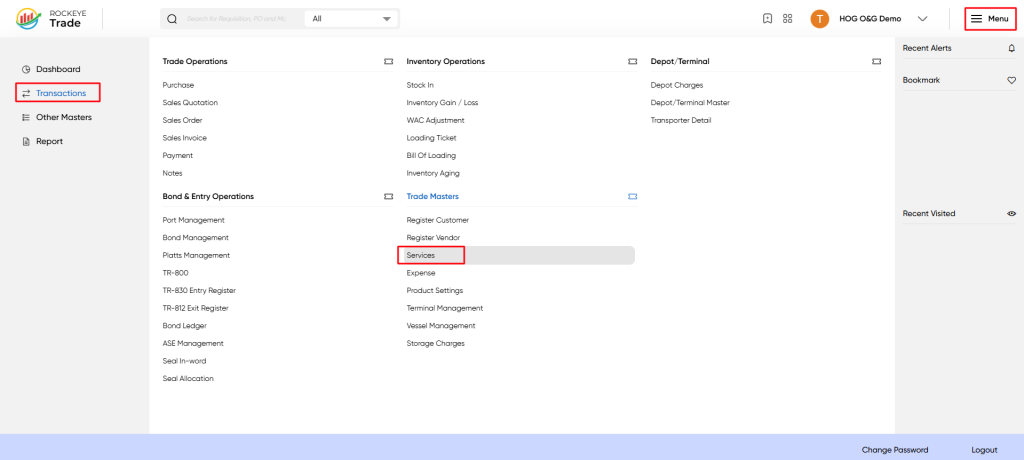
- From the main dashboard, click the ☰ Menu icon in the top-right corner.
- In the navigation panel, go to Transactions.
- Under the Trade Masters section, click on Services.
Listing
When navigating to Services, you view a centralized list of all configured services.
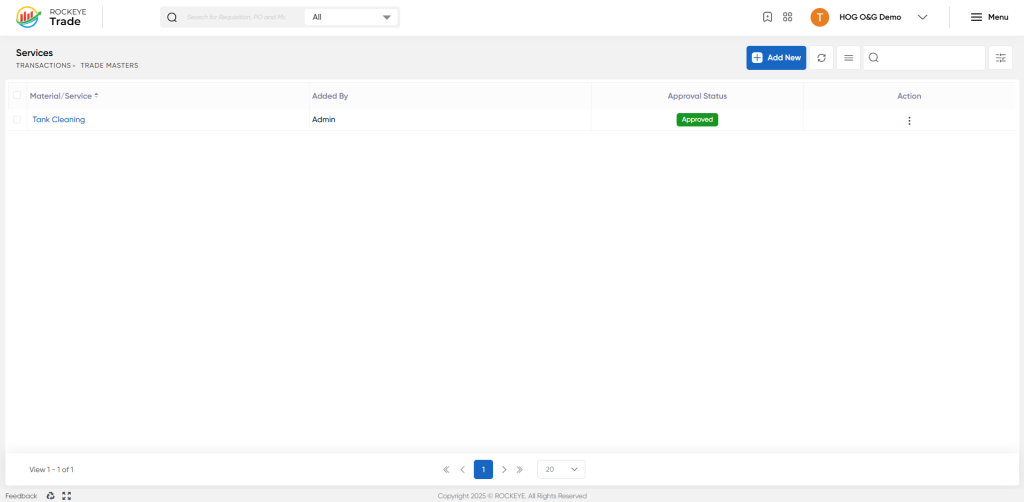
Key Columns:
- Material/Service – The name of the defined service (e.g., Tank Cleaning).
- Added By – User who created the service.
- Approval Status – Indicates whether the service is approved and ready for transactions.
- Action – Options to edit or update service details.
You can also use:
- Add New → to create a new service.
- Search/Filter → to quickly locate existing services.
How To Add Services
Click Add New to create a service. The White Product - Special Service page will open. Complete the fields as described:
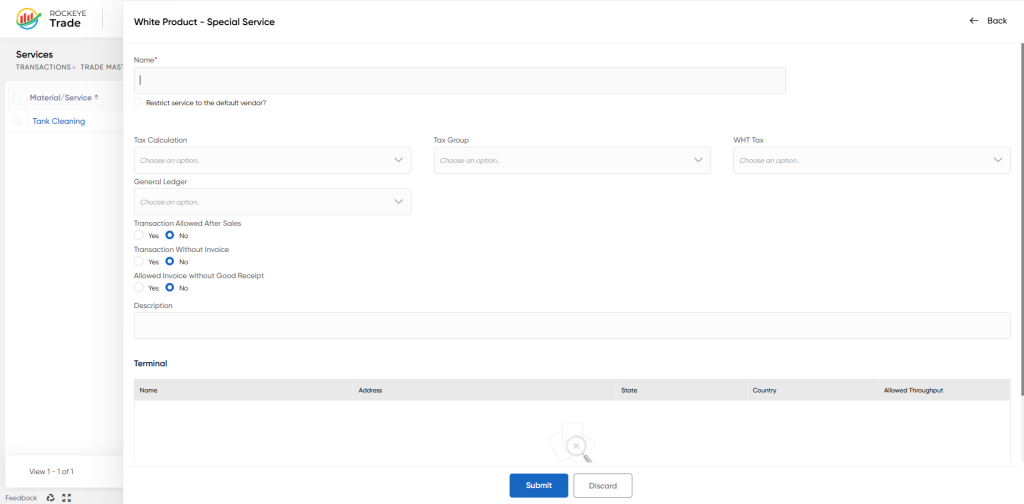
Service Information
- Name* – Enter a unique service name (e.g., “Tank Cleaning”, “Pipeline Transfer Fee”).
- Restrict Service to the Default Vendor? – Select if the service can only be provided by a predefined vendor.
Tax & Accounting Details
- Tax Calculation – Choose the applicable tax rule for the service.
- Tax Group – Assign the relevant tax group for compliance.
- WHT Tax – Define if the service is subject to Withholding Tax.
- General Ledger – Map the service to the correct GL account for expense or revenue tracking.
Transaction Controls
- Transaction Allowed After Sales – Enable if this service can be billed after a sales transaction.
- Transaction Without Invoice – Choose if the service can proceed without an invoice.
- Allow Invoice without Goods Receipt – Enable if invoices can be entered even in absence of physical service confirmation.
Additional Information
- Description – Provide explanatory notes about the service (scope, applicability, etc.).
Submit the Service
- After filling in all the necessary details, review the information for accuracy.
- Click the Submit button at the bottom of the page.
Refrence Video Link

