Terminal Management
Introduction/Purpose
The Terminal Management master allows you to define and manage the physical locations where your white products (oil) are stored, received, or dispatched. These terminals act as key logistical points in your supply chain.
Creating a comprehensive list of terminals is a fundamental step, as these locations are referenced in various transactions, including purchases, sales orders, inventory movements, and depot management. This ensures accurate tracking of product flow and inventory levels across all your operational sites.
How To Navigate
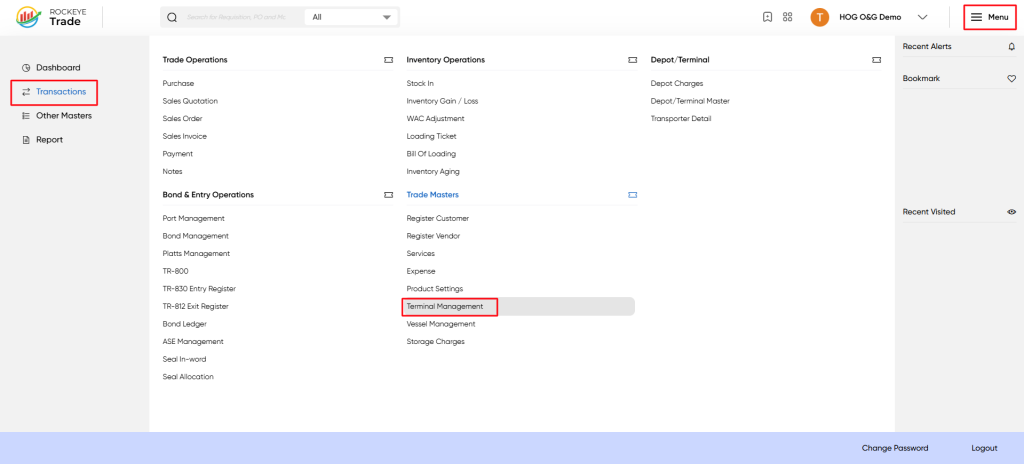
- From the main dashboard, click the ☰ Menu icon in the top-right corner.
- In the navigation panel, go to Transactions.
- Under the Trade Masters section, click on Terminal Management.
Listing
When you open Terminal Management, you will see a list of all registered terminals.
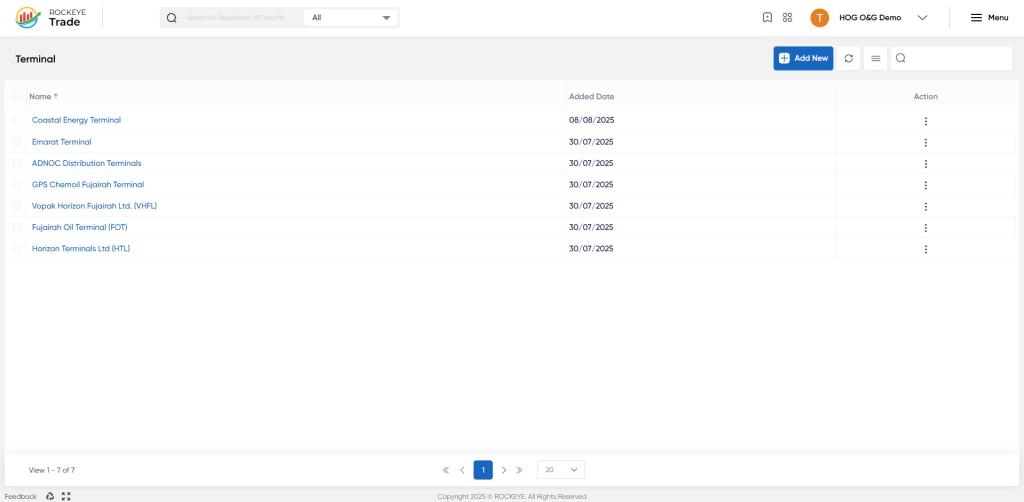
Columns on the List Screen:
- Name – The terminal’s official registered name (e.g., Fujairah Oil Terminal, Coastal Energy Terminal).
- Added Date – Creation date of the terminal record.
- Action – Edit/update options for the terminal.
Actions available:
- Add New → Register a new terminal.
- Search/Filter → Quickly find specific terminals.
- Edit/Delete → Update or remove an existing terminal entry.
Add New Terminal Management
- Click the + Add New button located at the top of the screen.
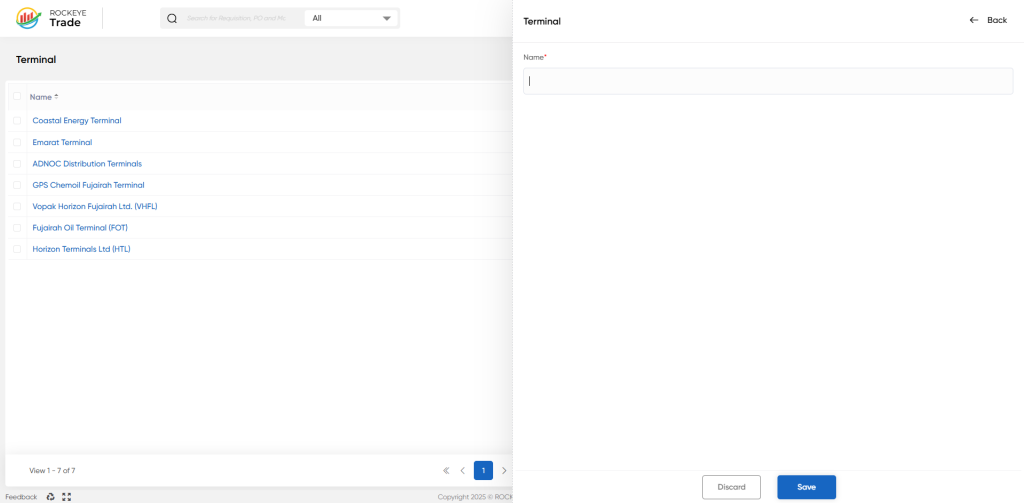
The Terminal creation form will slide out from the right side of the screen.
- Fill in the required information for the new terminal.
Field Description
- Name*: (Required) Enter the full, unique name of the terminal. This name should be easily recognizable as it will be used to identify the location throughout the application.
- Example: Coastal Energy Terminal, ADNOC Distribution Terminals, Fujairah Oil Terminal (FOT).
- After entering the name, click the Save button at the bottom of the form to create the terminal.
- The new terminal will now appear in the list on the main Terminal page, ready to be associated with products, services, and transactions.

