District
Introduction/Purpose
The District module, located under Other Masters > Geographical Locations, is used to define and manage a further administrative subdivision within a State or Region. For businesses involved in the trade of oil or white products, accurate district-level data is essential for highly granular operations, including:
- Precise Logistics & Delivery: Pinpointing specific delivery zones, optimizing last-mile distribution for tankers and trucks, and managing local depots.
- Local Compliance: Adhering to specific district-level permits, road restrictions, or environmental regulations pertinent to fuel storage and transport.
- Market Segmentation: Analyzing demand patterns and establishing sales strategies for specific local markets.
- Incident Management: Responding to local incidents (e.g., spills, accidents) with accurate geographical context.
- Detailed Reporting: Generating reports on sales, distribution, and compliance down to the district level.
This module helps maintain the deepest level of geographical hierarchy, ensuring precise location data for all trade-related activities.
How To Navigate
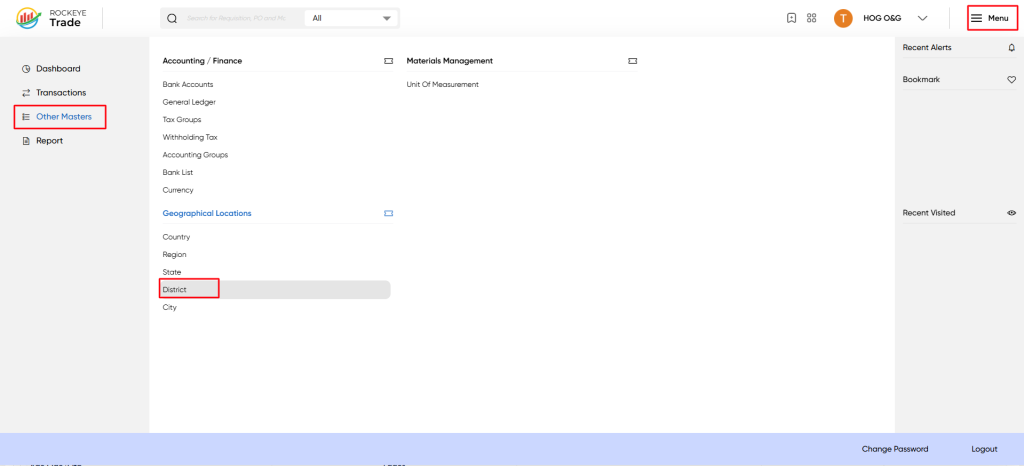
- Click on the Menu icon (☰) in the top-right corner.
- Navigate to Other Masters > Geographical Locations > District.
Listing
The District interface displays a list of defined districts and their associated details. Key columns include:
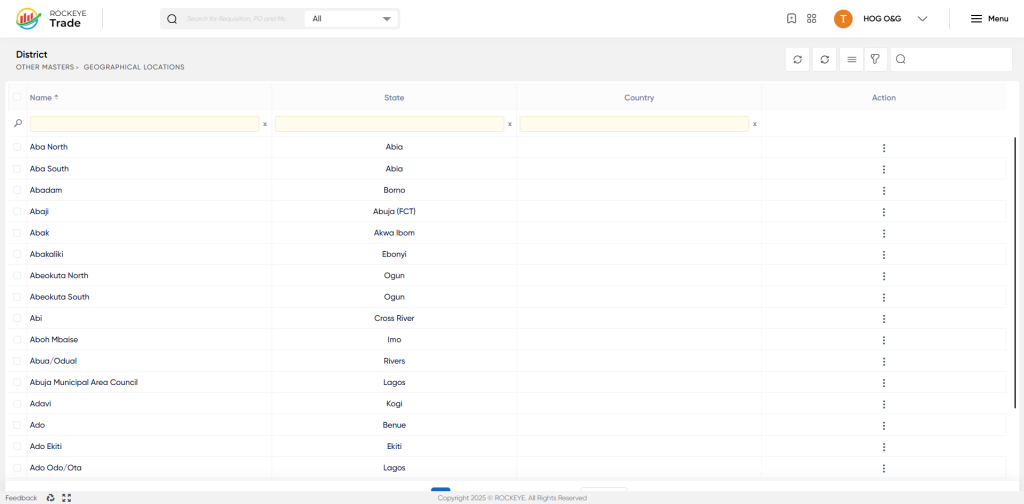
- Name*: The official name of the district (e.g., Abo North, Abadam, Abuja Municipal Area Council).
- State: The state or province to which the district belongs, establishing the next level in the geographical hierarchy.
- Country: The country to which the state and thus the district ultimately belong, providing broader context.
- Action: A dropdown menu (⋮) offering options such as:
- View / Edit: To view the district's details or make modifications.
- Activity Log: To review a historical record of changes made to the district entry.
Editing a District Entry
To modify an existing district's details:
- Locate the desired district in the District list, using the search or filter options if necessary.
- Click on the Action button (⋮) next to the district you wish to edit.
- Select View / Edit from the dropdown menu.
- Make the necessary changes to the district's details (e.g., correcting a name, updating its associated state).
- Click Save to apply the updates or Discard to cancel any changes.

