User Management
Introduction
The User Management module in ROCKEYE CRM enables organizations to efficiently create, manage, and control access for all system users. It ensures proper role-based access, improves data security, and streamlines user administration across departments.
The User Management module in ROCKEYE CRM acts as the foundation for controlling how individuals interact with the system. It is designed to ensure that the right users have the right level of access to the right information at all times.
User Management not only simplifies onboarding and user setup but also plays a critical role in data security, operational efficiency, and compliance. It provides visibility into user activity, ensures secure authentication, and supports seamless collaboration across teams by aligning system access with organizational hierarchy.
How To Navigate:
The navigation to record an users in a CRM system typically involves the following steps:
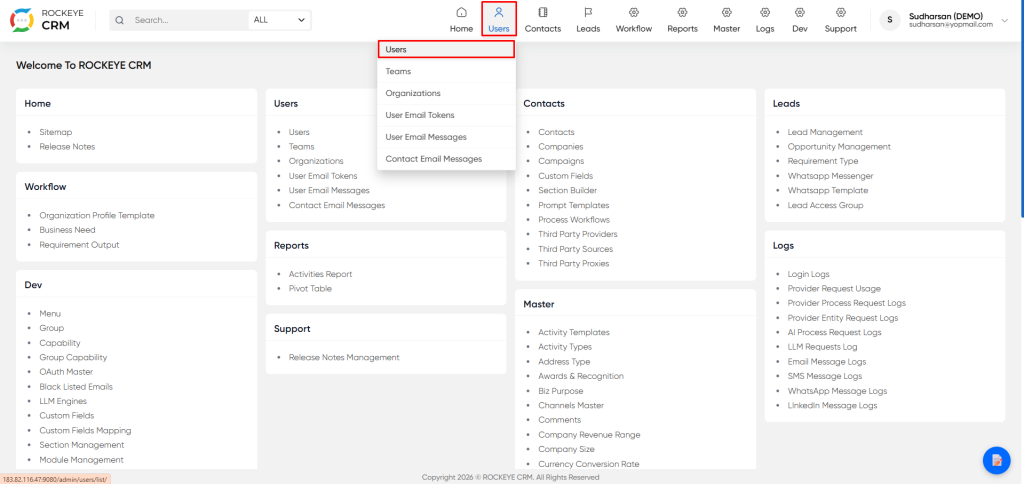
Click on the Users icon in the top navigation bar.
Select Users from the dropdown menu.
How To Add Users
Click the blue Add User button in the top right corner to open the creation modal.
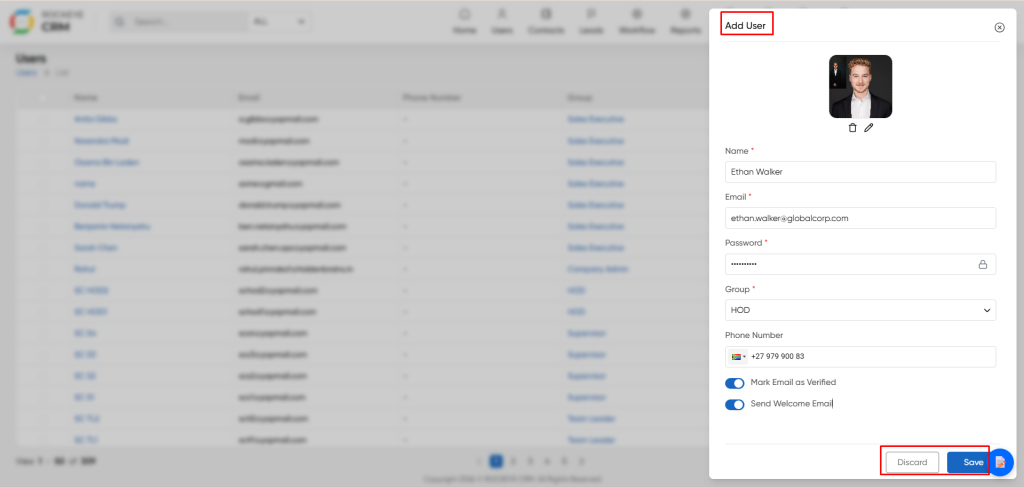
- Profile Picture: Click the camera icon to upload a photo
- Name: Enter the full name of the user
- Email: Enter a valid email address. This will serve as the User ID for logging in.
- Password: Set an initial password for the user.
- Group: Select the user's role from the dropdown (e.g., HOD, Supervisor, Sales Executive). This determines their access permissions.
- Phone Number: Enter the user's mobile or landline number. You can select the country code from the flag icon.
- Mark Email as Verified Toggle this ON if you want to bypass the email verification step
- Send Welcome Email Toggle this ON to automatically send an email to the new user with their login credentials.
- Discard: Clears the form and closes the window without saving.
- Save: Creates the user account immediately.
Listing
The table displays the following information for each user:
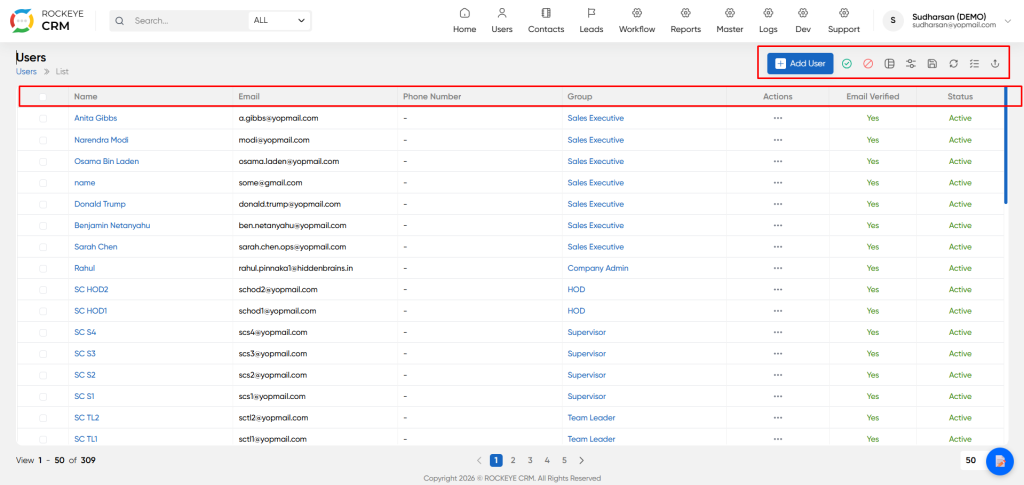
- Name: The user's full name (clickable to view profile).
- Email: The user's login email address.
- Phone Number: Contact number.
- Group: The assigned role (e.g., Sales Executive, HOD, Company Admin).
- Actions: A menu (three dots) to Edit, View, or Delete specific user details.
- Email Verified: Indicates if the user has confirmed their email address (Yes/No).
- Status: Indicates if the account is currently Active or Inactive.
Toolbar Actions
Located at the top right of the list, these buttons allow you to manage the view and data:
- View Toggle: Switch between Table View (standard spreadsheet), List View, or Grid View (card layout).
- Filters: Opens a side panel to search for specific users based on criteria like Name, Group, or Status.
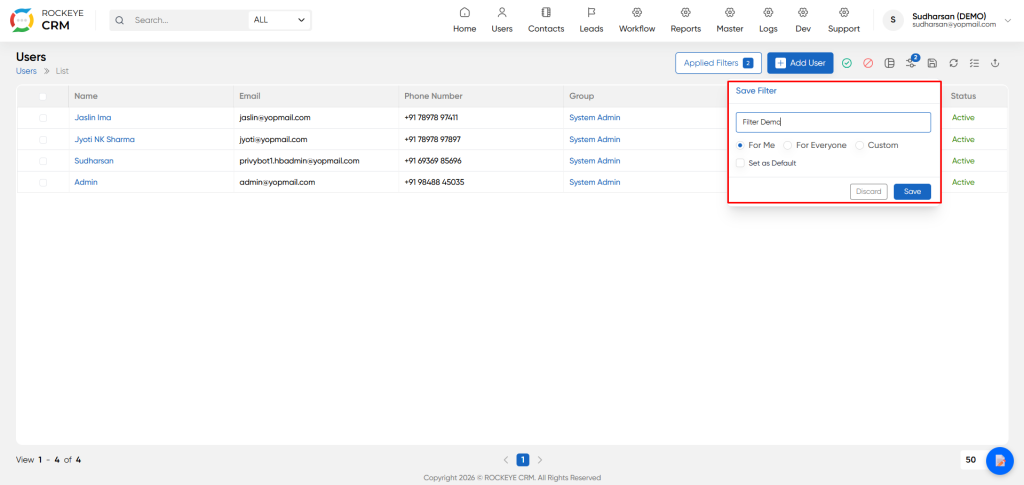
- Click the Save Filter icon (floppy disk symbol) located in the top toolbar, next to the Add User button.
- Enter Filter Name Give your filter a descriptive name (e.g., "Active Sales Executives" or "Unverified Users").
- Visibility Options
- For Me: Only you can see and use this saved filter.
- For Everyone: All users in the system can see and use this filter.
- Custom: Restrict visibility to specific users or groups.
- Set as Default Check this box to automatically apply this filter every time you open the Users page.
- Discard / Save Click Discard to cancel, or Save to store the filter.
- Column Manager: Allows you to hide or show specific columns (e.g., hide Phone Number if not needed).
- Export: Download user data. You can choose to export Selected records or All records, choose specific columns, and download as CSV or PDF.

