Channel
Introduction
The Lead Channel Master in ROCKEYE CRM is used to define and manage the different sources through which leads are generated. It helps businesses track where leads are coming from, such as Website, WhatsApp, Social Media, or Online platforms.
By configuring lead channels, organizations can better analyze marketing performance, identify high-performing sources, and optimize their lead generation strategies. This module ensures that every lead is properly categorized based on its origin, enabling improved reporting and decision-making.
How To Navigate Lead Channel
To manage lead channels, navigate through the main menu:
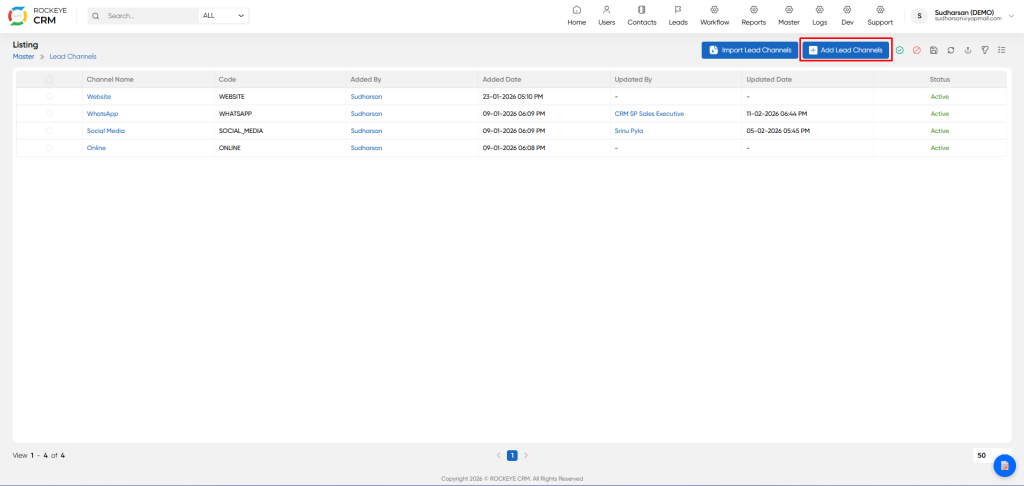
- Click on the Master icon in the top navigation bar.
- From the dropdown menu, select Lead Channels.
How To Add New Lead Channel
Click the blue Add Lead Channels button on the listing page.
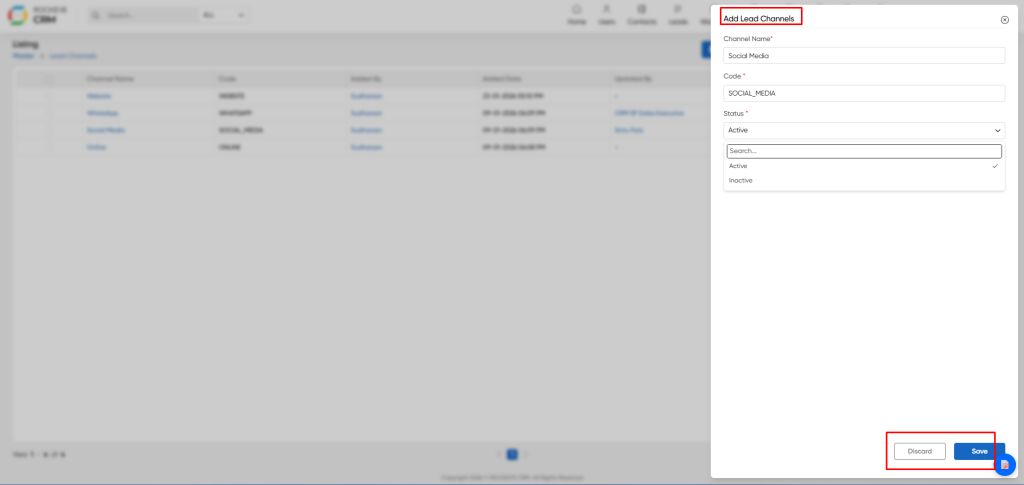
- Channel Name: Enter a clear and descriptive name for the new channel.
- Code: Enter a unique, uppercase code for the system to identify this channel.
- Status: Select the initial status for the channel from the dropdown (
ActiveorInactive). It is recommended to set it asActiveupon creation. - Action Buttons:
- Save: Creates the new lead channel and adds it to the list.
- Discard: Cancels the operation and closes the window without saving.
Viewing and Editing an Existing Lead Channel
- You can view the full details of any lead channel and make changes if needed.
- Click on the Channel Name (e.g., "Social Media") in the list. A summary panel will slide out from the right.
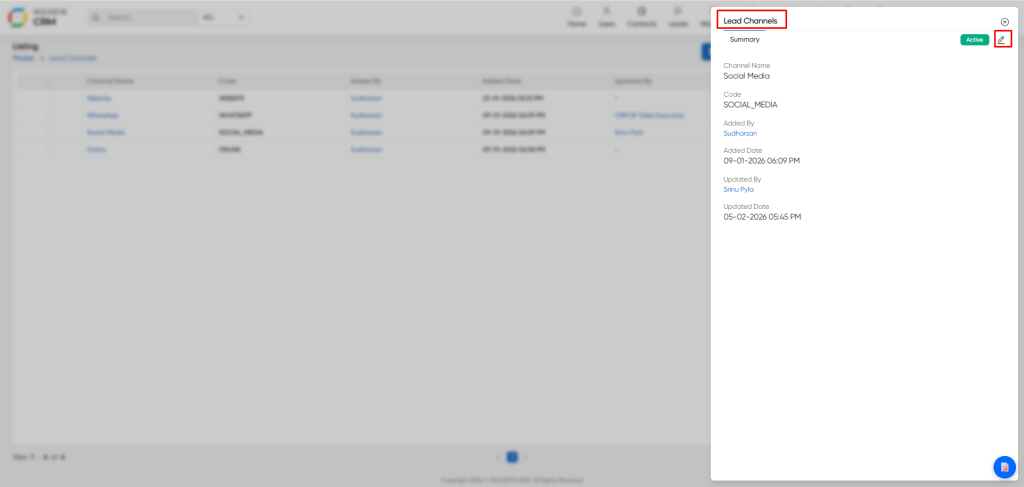
- Summary Panel Details: This panel displays all the information for the selected channel, including its name, code, and audit trail (who added/updated it and when).
- Editing a Channel:
- Click the Edit (pencil icon) in the top-right corner of the summary panel.
- This will open the same form used for adding a channel, pre-filled with the current data.
- Modify the
Channel Name,Code, orStatusas required and click Save.
Listing
The listing page provides a comprehensive table of all configured lead channels.
View all available lead channels and their key details at a glance.
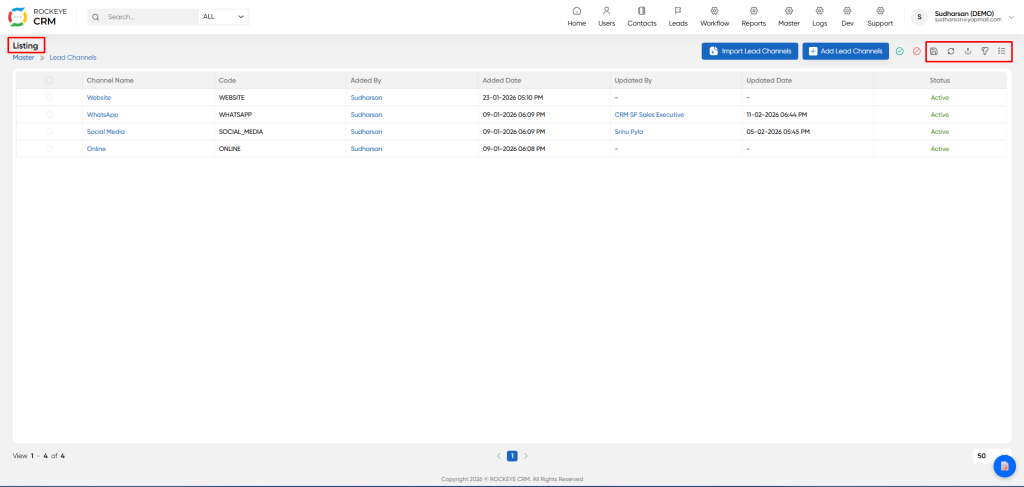
- Channel Name: The user-friendly name of the channel (e.g.,
Website,WhatsApp). - Code: A unique system identifier for the channel (e.g.,
WEBSITE,WHATSAPP). - Added By / Updated By: Shows which user created or last modified the record.
- Added Date / Updated Date: Timestamps for when the record was created or last modified.
- Status: Indicates if the channel is currently
ActiveorInactive. Inactive channels are typically hidden from selection lists when creating new leads.
- List Actions Toolbar: The toolbar above the list provides several utilities:
- Add New: Create a single new channel manually.
- Import: Bulk upload multiple channels from a file.
- Other Icons: Provide functions like refresh, delete, download, filter, and view options.
Importing Lead Channels in Bulk
For setting up many channels at once, use the import feature.
- How to Access: Click the Import Lead Channels button on the listing page.
- Functionality: This screen allows you to upload a file containing multiple lead channel records.
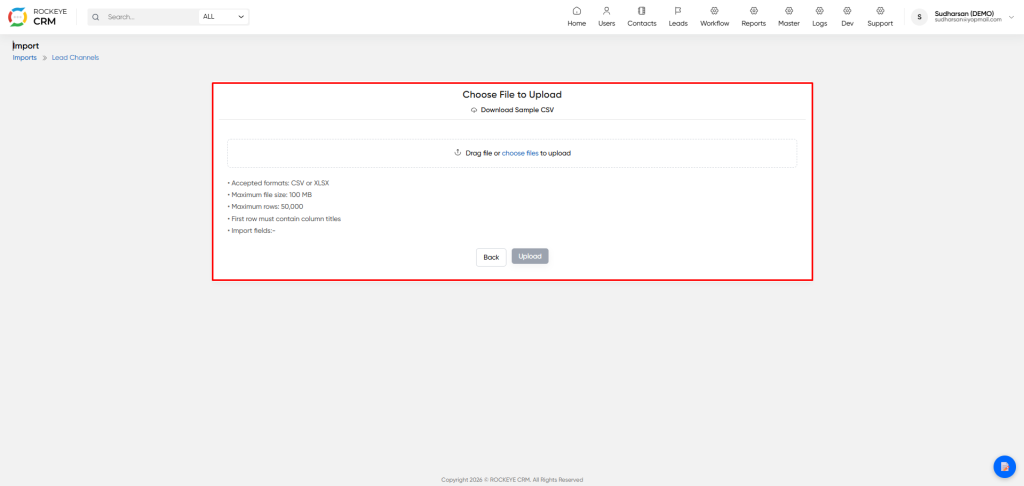
- Download Sample CSV: It is highly recommended to first click the "Download Sample CSV" link. This provides a template with the correct column headers (Channel Name, Code, Status).
- Prepare Your File: Fill in the sample file with your lead channel data. Ensure you follow the specified
- Accepted Formats: .CSV or .XLSX
- Maximum File Size: 100 MB
- Maximum Rows: 50,000
- Column Titles: The first row must contain the exact column titles from the sample file.
- Upload File: Drag and drop your prepared file into the designated area or click "choose files" to browse your computer.
- Execute Import: Click the Upload button to process the file and add the new channels to your CRM. Use the Back button to cancel the import process.

