Requirement Type
Introduction
The Requirement Type module in ROCKEYE CRM is used to define and manage different categories of customer or lead requirements, such as Support Issues, Corporate Sales, Operational Leads, or Product Enquiries.
It helps classify and organize incoming requirements, ensuring that each request is properly categorized and routed to the appropriate team. This improves response time, workflow efficiency, and overall customer handling.
How To Navigate
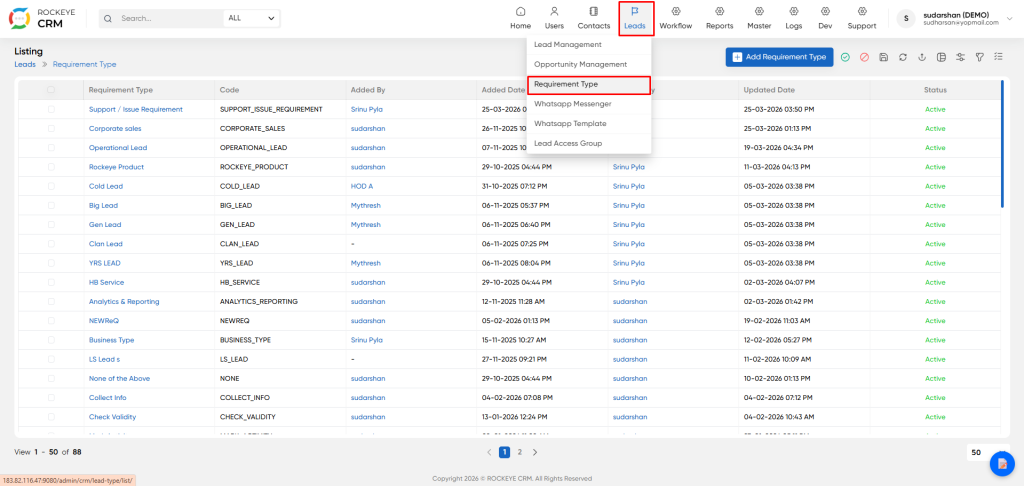
Click Leads icon in top navigation bar → Select Requirement Type from dropdown menu.
How To Add
Click Add Requirement Type to open the creation modal.
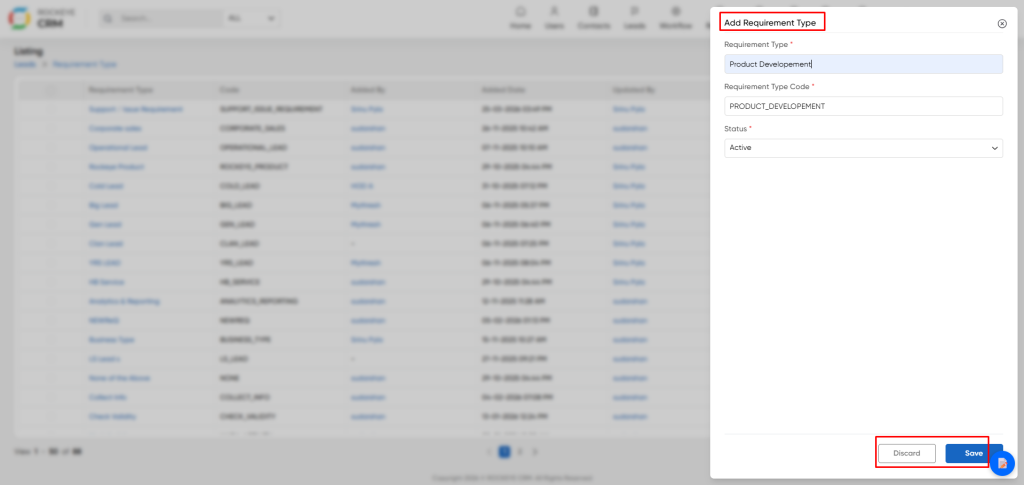
- Requirement Type: Display name for the category (e.g., "Product Development", "Corporate Sales").
- Requirement Type Code: Unique system code in uppercase with underscores. Auto-populates based on name but can be manually edited.
- Status: Active (available for use) or Inactive (hidden from selection).
Action Buttons:
- Discard: Closes modal without saving.
- Save: Creates the requirement type and makes it available in the system.
Editing Requirement Types
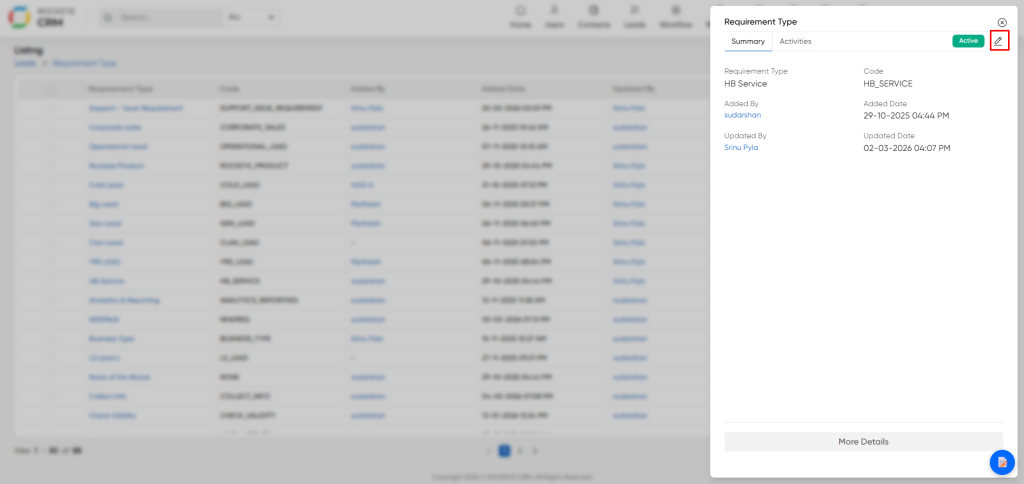
- Click any Requirement Type name in the list to open a preview panel.
- Summary: Displays Requirement Type name, Code, Added By/Date, Updated By/Date, and Status badge.
Activities: Audit trail showing who made changes and when.
Actions:
- Edit Icon (✎): Opens the Update Requirement Type modal with fields identical to the Add modal (Name, Code, Status).
- More Details Button: Expands to the full configuration page.
- Click More Details or navigate via breadcrumb to access the complete configuration interface.
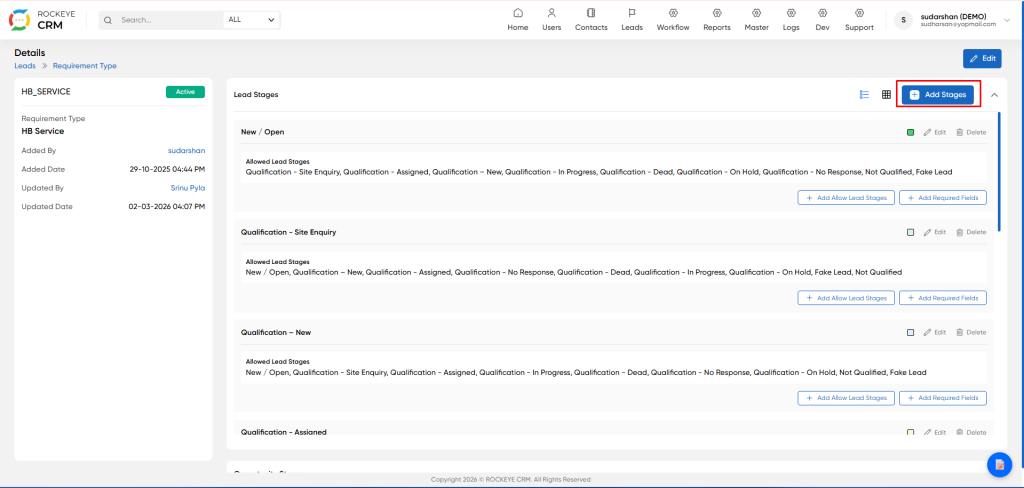
- Left Panel - Details:
- Static information display:
- Requirement Type: Name (e.g., "HB Service")
- Code: System code (e.g., "HB_SERVICE")
- Added By/Date: Creator and timestamp
- Updated By/Date: Last modifier and timestamp
- Status: Active/Inactive badge
- Right Panel - Lead Stages Configuration:
- This section manages the pipeline workflow specific to this requirement type.
- Header Actions:
- View Toggle: Switch between list view and grid view of stages.
- Add Stages: Button to add new pipeline stages.
Lead Stages Configuration
Each requirement type can have multiple stages defining the lead lifecycle.
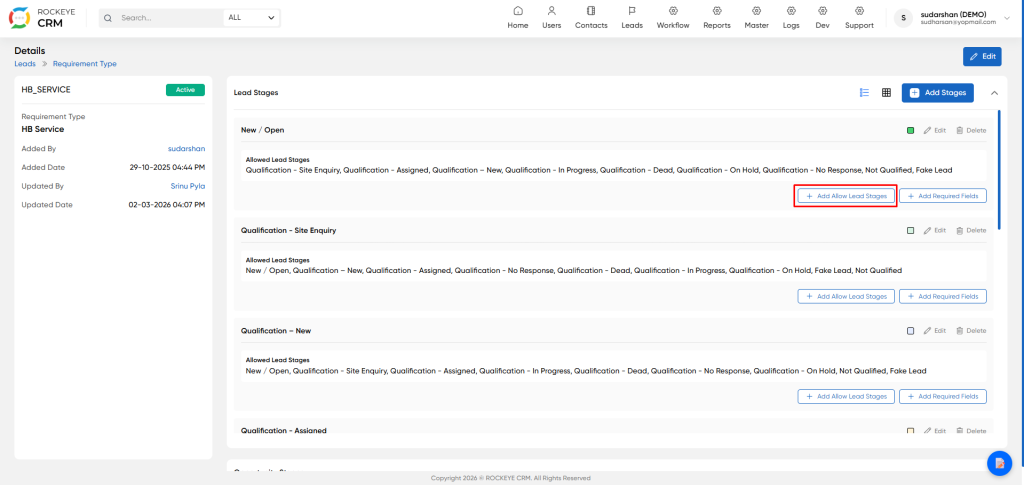
Stage Entry Structure:
Each stage card displays:
- Stage Name: (e.g., "New / Open", "Qualification - Site Enquiry", "Qualification - New", "Qualification - Assigned")
- Allowed Lead Stages: Comma-separated list of valid next stages (workflow permissions).
Add Allow Lead Stages
Defines which stages a lead can move to from the current stage.
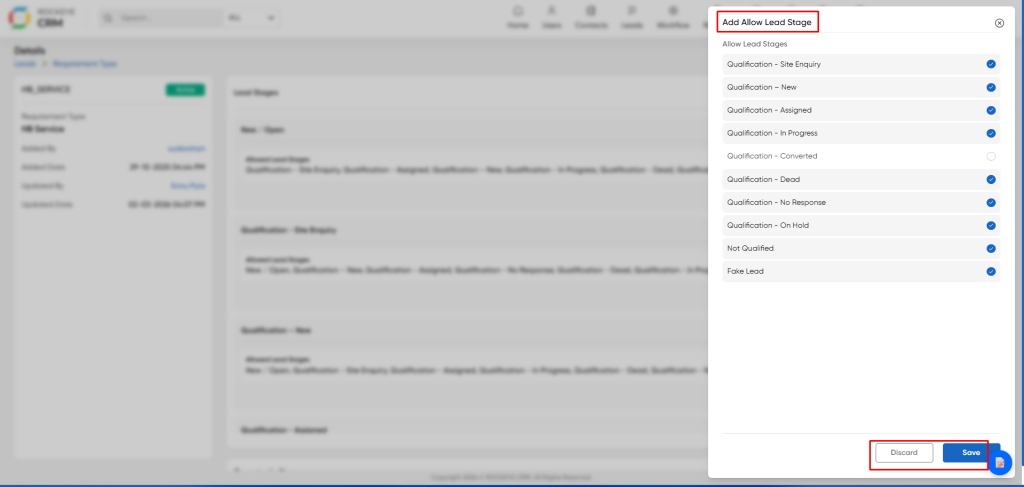
- Stage List: Multi-select checkbox
- Checkboxes: Blue filled circle = Allowed. Empty circle = Not allowed.
- Discard: Cancel changes.
- Save: Apply allowed stage configuration.
Add Required Fields
Specifies mandatory data fields that must be completed before a lead can enter or exit this stage.
- Fields Dropdown Multi-select search dropdown containing available lead fields
- Search Box Filter fields by typing keywords.
- Discard Cancel without saving.
- Save Apply field requirements.
Listing
Upon navigation, the system displays a grid of all configured requirement types.
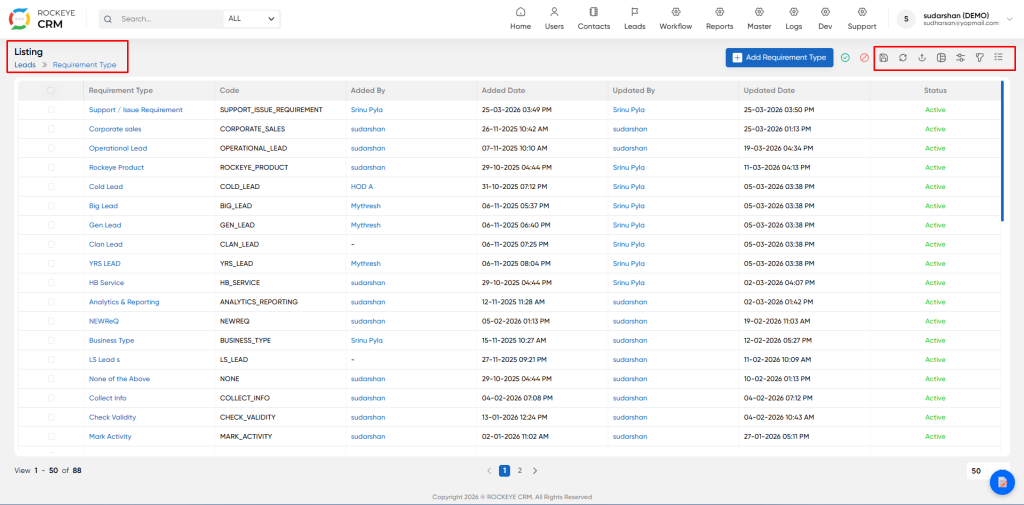
Toolbar Actions (Top Right)
- Save Filter Saves current filter criteria as a preset.
- Filters Opens side panel to filter by Name, Code, Status, or Date.
- Refresh Reloads the list with latest data.
- Export Downloads data as CSV or PDF.
- Column Manager Customize which columns are visible in the grid.

