Seniority Level
Introduction
The Seniority Level Master in ROCKEYE CRM is used to define and manage different levels of hierarchy within an organization, such as Entry Level, Mid-Level, Senior, Lead, Supervisor, Manager etc.
It helps classify users or contacts based on their position and decision-making authority, enabling better lead qualification, communication targeting, and reporting. By identifying seniority levels, businesses can focus on key decision-makers and improve engagement strategies.
How To Navigate
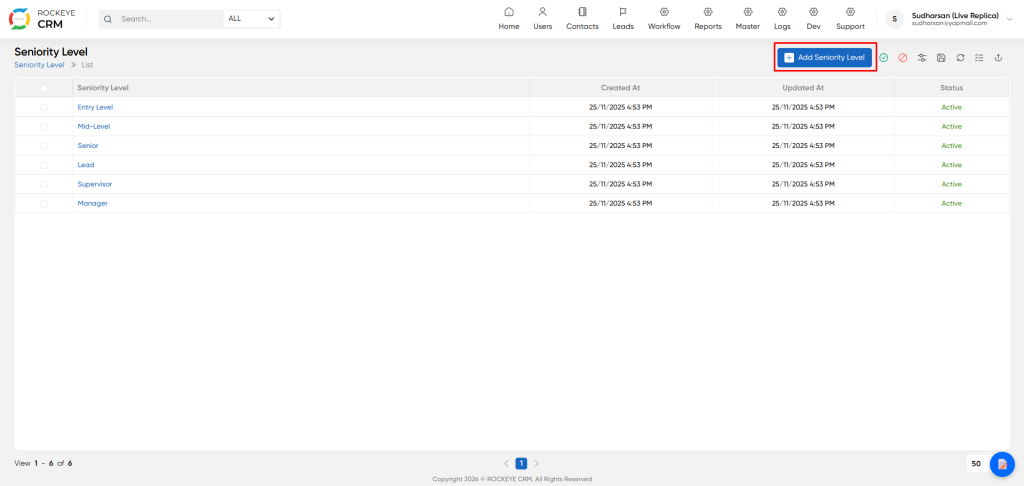
- Click on the Master icon in the top navigation bar.
- From the dropdown menu, select Seniority Level.
How To Add Seniority Level
Click the Add Seniority Level button on the listing page.
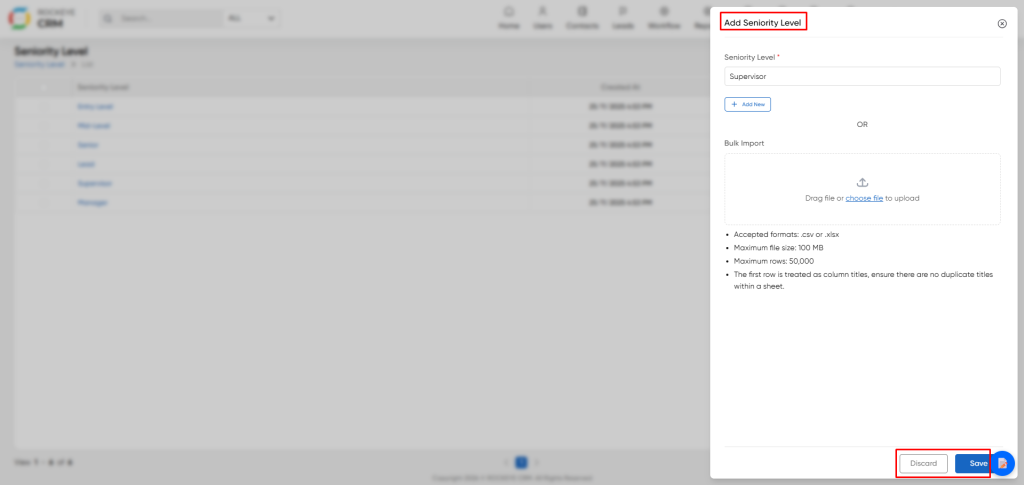
- Seniority Level: Enter the name for the new level (e.g.,
Supervisor,Director,VP). This field is mandatory. - Add New Button: After entering one level, you can click this button to save it and immediately add another without closing the window.
- Bulk Import:
- Drag file or choose file to upload: Use this option to upload a
.csvor.xlsxfile containing a list of seniority levels. - Import Requirements:
- Accepted formats: .csv or .xlsx
- Maximum file size: 100 MB
- Maximum rows: 50,000
- Column Titles: The first row of your file must contain column titles, and there should be no duplicate titles.
- Drag file or choose file to upload: Use this option to upload a
- Action Buttons:
- Save: Commits the new seniority level(s) to the system.
- Discard: Cancels the operation and closes the window without saving any changes.
Editing an Existing Seniority Level
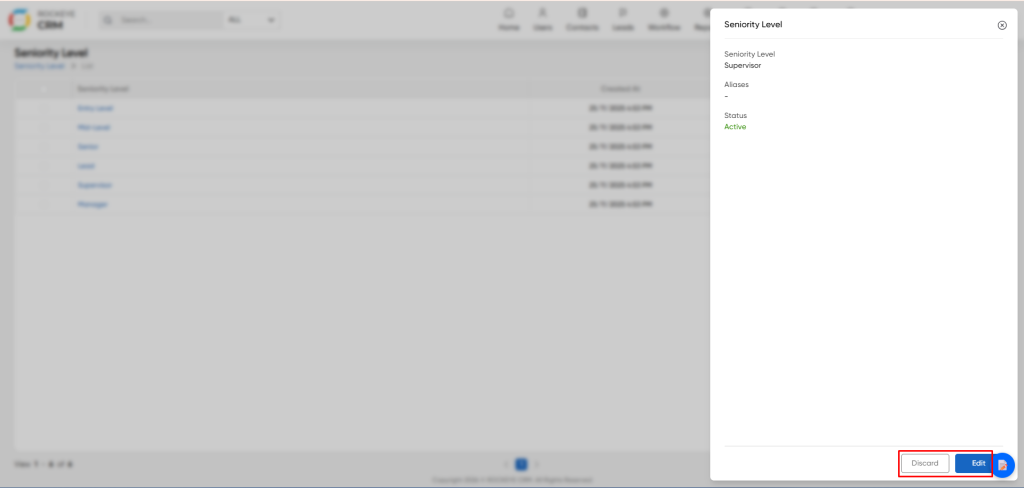
- Click on the Seniority Level name in the list. A summary panel will slide out from the right.
- Summary Panel Details: This panel displays the key information for the selected level:
- Seniority Level: The name of the level.
- Aliases: Any alternative names associated with this level (currently shows
-if none are set). - Status: The current active/inactive status.
- Editing a Seniority Level:
- Click the Edit button at the bottom of the summary panel.
- This will open the "Update Seniority Level" form, pre-filled with the current data.
- You can modify the
Seniority Levelname, addAliases(alternative names for searching/matching), and change theStatus. - Click the Update button to save your changes. Use the Discard button to cancel.
Listing
The listing page provides a clear table of all configured seniority levels.
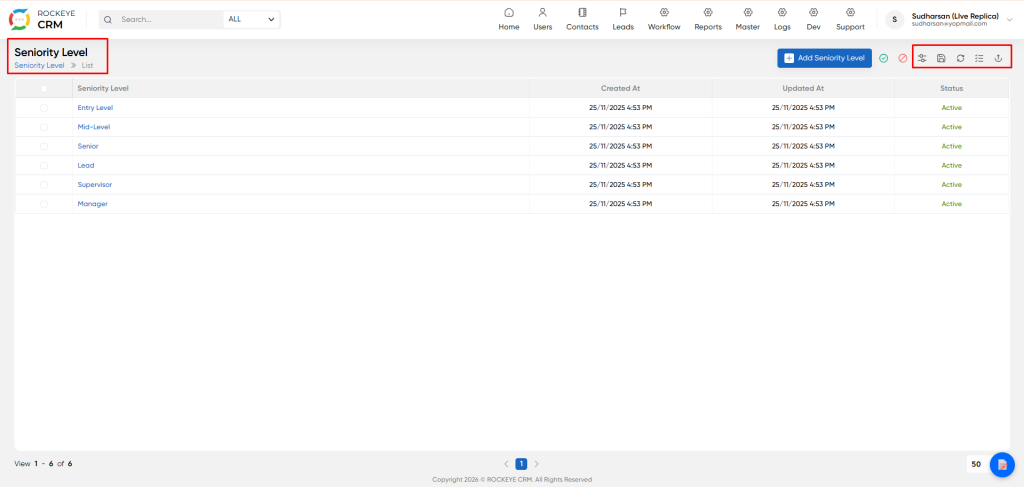
- View all available seniority categories and their details.
- Table Columns:
- Seniority Level: The name of the level (e.g., Entry Level, Mid-Level, Manager).
- Created At / Updated At: Timestamps indicating when the record was created and last modified.
- Status: Shows whether the seniority level is Active or Inactive. Inactive levels are typically hidden from selection lists.
- List Actions Toolbar: The toolbar above the list provides several utilities:
- Add Seniority Level: Create new seniority levels manually or via bulk import.
- Other Icons: Provide functions like refresh, delete, download, filter, and view options.

