Activity Type
Introduction
The Team Management module in ROCKEYE CRM enables organizations to structure users into well-defined teams aligned with business functions, departments, or regions. It helps establish a clear hierarchy typically consisting of HOD, Supervisor, and Team Lead to ensure smooth communication, accountability, and control.
This module simplifies how teams are organized and managed by linking users to specific teams and roles. It ensures that tasks, leads, and activities are efficiently distributed among the right team members, reducing confusion and improving execution.
By implementing structured team management, businesses gain better visibility into team performance, streamline workflows, and maintain clarity in reporting lines. It also supports scalability, allowing organizations to easily expand teams while maintaining consistent control and coordination.
Overall, the module acts as a backbone for collaboration, task ownership, and operational efficiency, ensuring that every user operates within a clearly defined team structure.
How To Navigate Activity Type
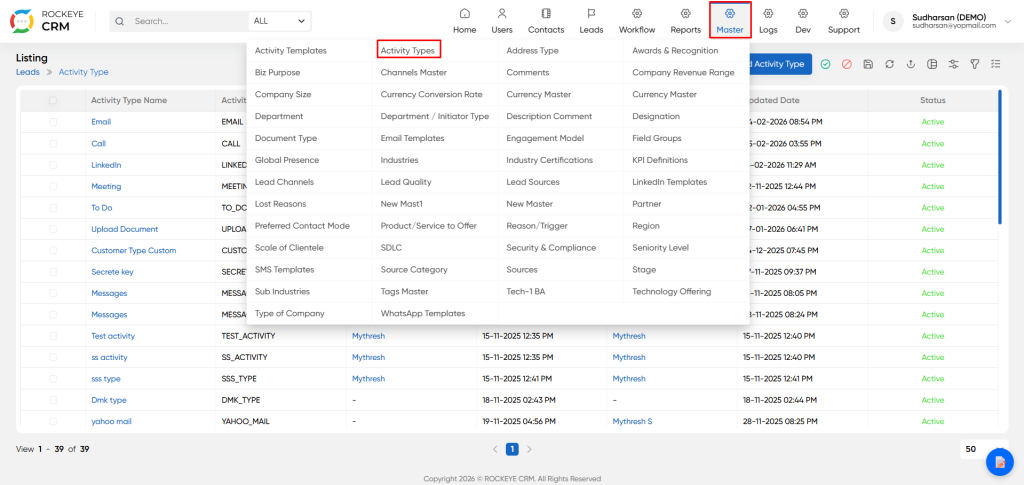
- Click the Master icon in the top navigation bar.
- Select Activity Types from the dropdown menu (located under the Leads section).
How to How to Add a New Activity Type
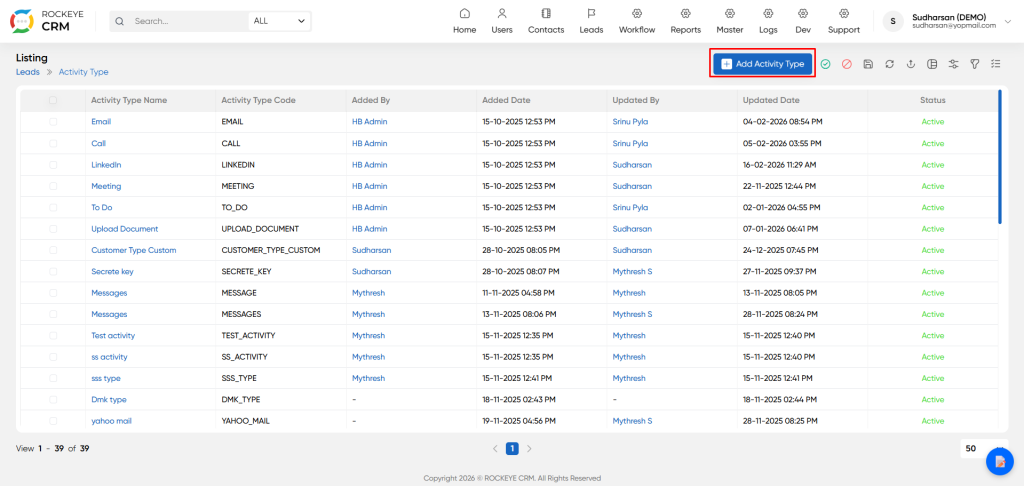
Click the Add Activity Type button to define a new interaction type.
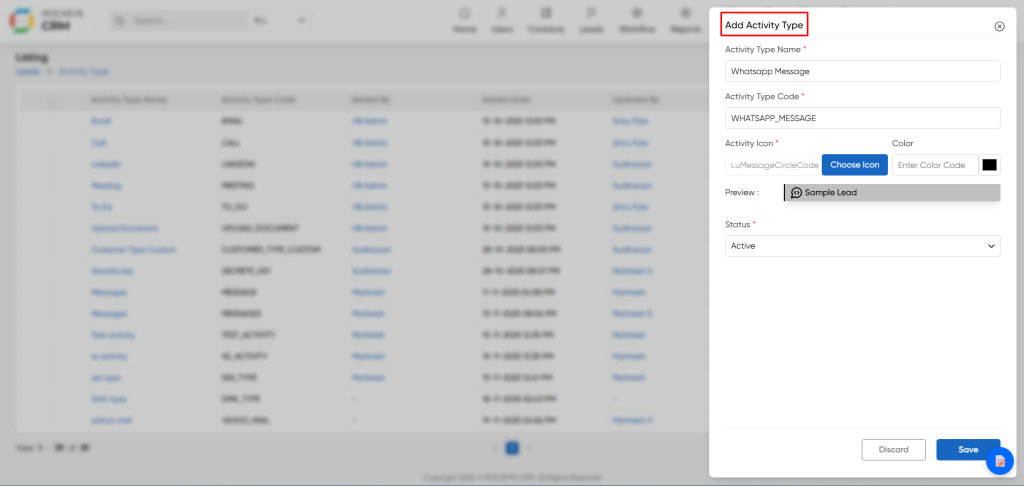
- Activity Type Name: Enter the display name for this activity (e.g., "Whatsapp Message", "Site Visit"). This is what users will see in dropdown menus.
- Activity Type Code: Enter a unique system code.
- Activity Icon: Select a visual icon to represent this activity. You can either click Choose Icon to browse an icon library or manually enter an icon code (e.g., LuMessageCircleCode).
- Color: Enter a hex color code or use the color picker to define the color associated with this activity type. This helps with visual identification in activity timelines and calendars.
- Preview: Displays a live preview of how the activity will appear in the system, showing the selected icon and color with sample text.
- Status: Select Active to make this type available for selection immediately, or Inactive to hide it from users.
Actions:
Discard: Closes the modal without saving any changes.
Save: Creates the new Activity Type and makes it available throughout the CRM.
Adding a New Activity Sub-Type
This section of the ROCKEYE CRM allows administrators to define and manage Activity Types and their corresponding Sub-Types. This hierarchical structure helps in categorizing all interactions with leads and contacts (like Emails, Calls, Meetings) for better tracking, reporting, and workflow automation. The process flows from viewing a list of main activity types to drilling down into their specific sub-types.
How To Add Activity Sub-Type
Select the Acitivity type click on more details button likely expands to show additional configuration options or related data not shown on the main summary.
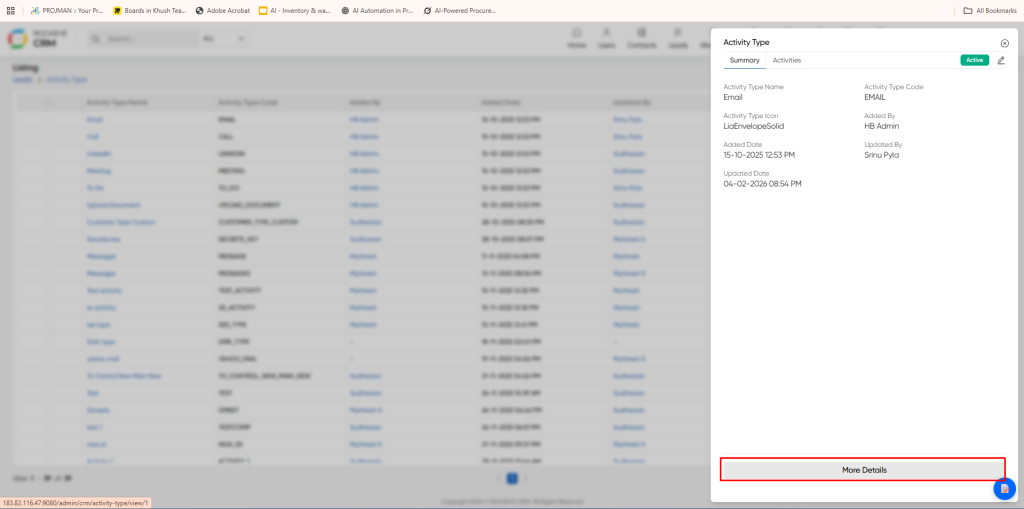
To define a new sub-category for an existing activity. For example, under the "Email" activity type, you can add sub-types like "Email - Interested" or "Follow-up Email Sent"
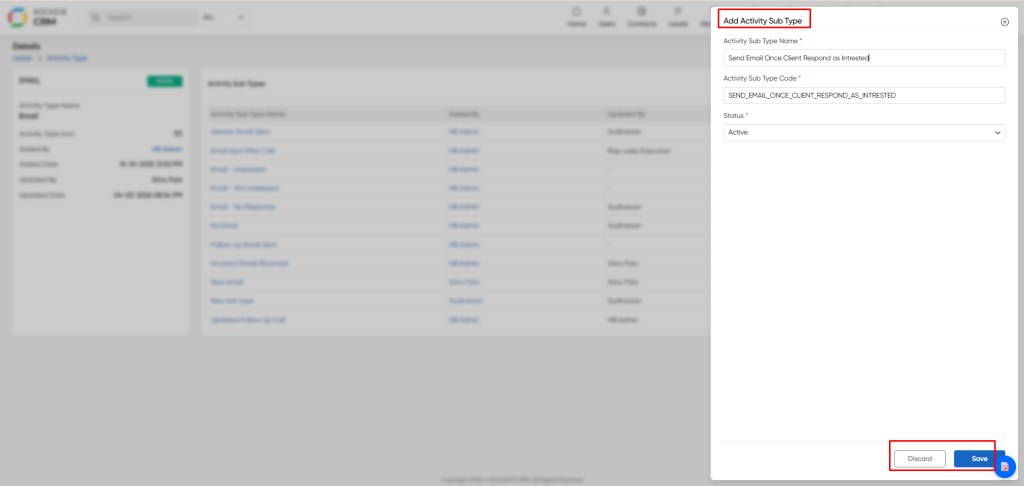
- Activity Sub Type Name: A descriptive name for the sub-type this is what users will see when logging an activity.
- Activity Sub Type Code: A unique, system-friendly identifier code.
- Status: A dropdown to set the initial status of the new sub-type, typically "Active" or "Inactive".
- Action Buttons
- Save: Commits the new Activity Sub-Type to the database.
- Discard: Closes the modal without saving any changes.
Sub-Activty Listing
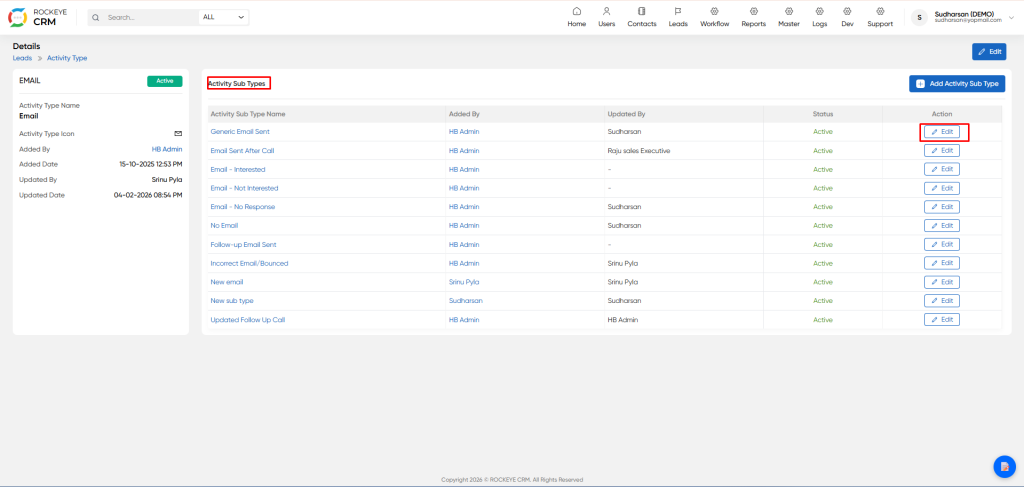
- Shows all existing sub-types with columns for Name, who added/updated it, and its current Status.
- Edit Button (per row): Allows an administrator to modify the details (Name, Code, Status) of that specific Activity Sub-Type.
Activity Type Listing
The listing page displays all configured activity categories available in the system.
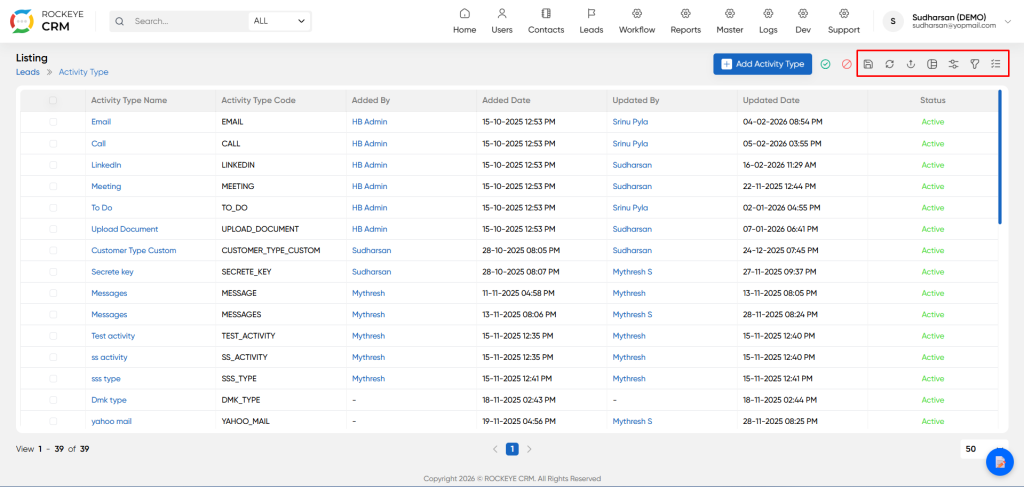
- Activity Type Name: The display label for the activity (e.g., "Email", "LinkedIn", "Meeting").
- Activity Type Code: The unique system identifier, typically in uppercase with underscores (e.g., "EMAIL", "LINKEDIN").
- Added By/Date: The user who created this type and the timestamp.
- Updated By/Date: The user who last modified this type and the timestamp.
- Status: Indicates if the type is Active (available for use) or Inactive.
Toolbar Actions
- Add Activity Type: Create a new custom activity category.
- Save Filter: Store frequently used filter configurations for quick access.
- Filters: Filter the list by Name, Code, or Status.
- Column Manager: Show/hide specific columns in the grid.
- Export: Download the activity type definitions (CSV/PDF).
- Refresh: Reload the list to see recent changes.
Saving Filters for Activity Types
You can save frequently used filter combinations to quickly access specific subsets of activity types
To save a filter:
- Apply your desired filters using the Filters panel.
- Click the Save Filter icon (floppy disk with notification badge) in the toolbar.
- Configure the save options in the dialog.
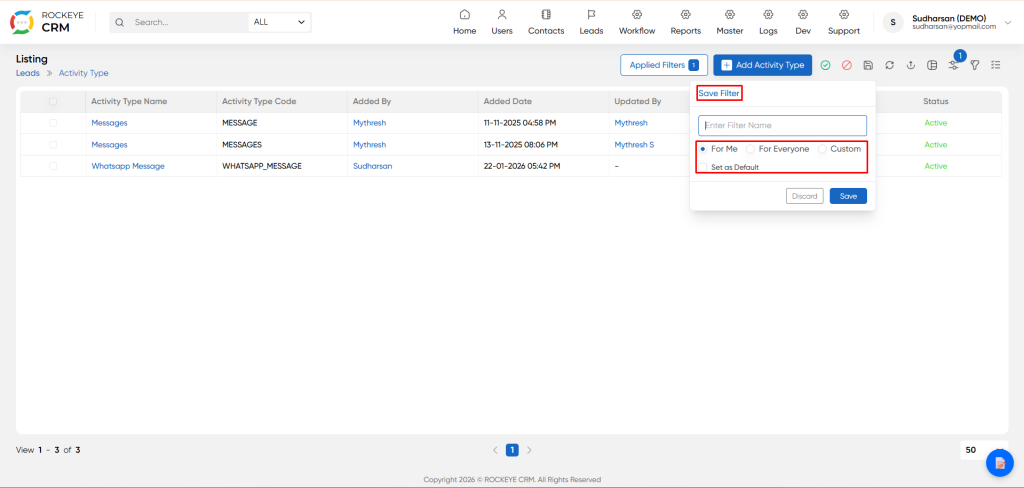
- Enter Filter Name Assign a meaningful name
- Visibility
- For Me: Private to your user account.
- For Everyone: Shared across the organization.
- Custom: Restrict to specific user groups.
- Set as Default Check this to automatically apply this filter every time you open the Activity Types page.
- Discard / Save Click Discard to cancel, or Save to store the filter preset.

