Care Of Circle
Introduction
This guide explains how to add new contacts to your Circle of Care, edit existing contact details, and remove contacts when necessary.
How To Add Care of Circle
Use the + button to add trusted people to your Circle of Care. After you save, the contact appears in the list. Tap a contact to view details, edit their info, or delete them from your Circle.
Accessing the Circle of Care: From the main Circle of Care screen (accessed from the dashboard), tap the + icon
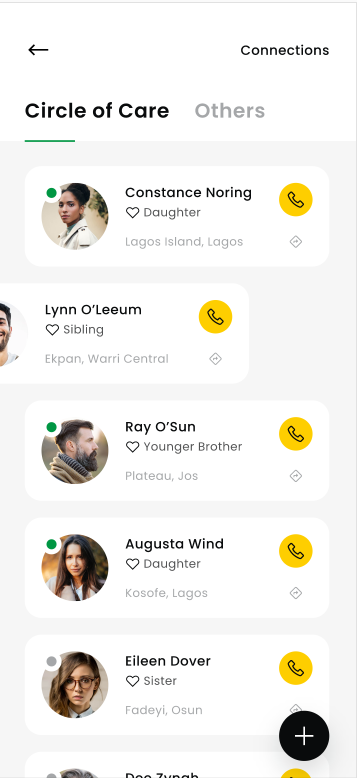
- From the dashboard, tap View My Circle of Care.
- You’ll see two tabs: Circle of Care (primary contacts) and Others (additional contacts).
- Actions on each card:
- Phone icon: call the contact
Add Care Of Circle
Phone No: Enter the 10-digit mobile phone number of the contact.
Your Full Name: Enter the full name of the contact.
Gender: Select the contact’s gender (Male or Female).
Date of Birth: Enter the contact’s date of birth.

Other Details: The next screen requires additional information:
Relations: Select the contact’s relationship to you (e.g., Care Taker, Sibling, Friend).
Blood Group: Select the contact’s blood group.
Location: Enter the contact’s street address.
Area: Select the area where the contact lives.
Nearby Police Station: Select the nearest police station to the contact’s location.
Circle Type: Select the appropriate circle type for the contact.

ID Proof: You will be prompted to upload a photo of the contact’s ID proof (e.g., National Identity Card, Driver’s License).

Saving the Contact: After completing all required fields, the contact will be added to your Circle of Care list.
Viewing & Editing Contact Details:

- Selecting a Contact: From the Circle of Care list, tap on the contact you wish to view or edit.
- Contact Details Screen: This screen displays all the information you entered for the contact, including SOS request history and connection details.
- Editing a Contact: Tap the Edit Connection button. This will take you back to the edit form, where you can modify any of the contact’s details.
Deleting a Contact:


- Deleting a Connection: From the Contact Details screen, tap the Delete Connection button.
- Confirmation: A confirmation dialog will appear. Confirm your decision by tapping Yes.
- Deleting ID Proof: A confirmation dialog will appear. Confirm your decision by tapping Yes.