Expense Claim
Introduction/Purpose:
The expense claim feature in ESS (Employee Self-Service) is a functionality designed to streamline and simplify the process of submitting expense claims within an organization. The feature provides a centralized platform for employees to record, track, and get reimbursed for their business-related expenses.
The purpose of the expense claim feature is to automate and optimize the expense management process, enabling efficient tracking, review, and approval of employee expenses. By implementing this feature, organizations aim to enhance transparency, accuracy, and timeliness in expense reporting, ensuring compliance with company policies
Process Flow:

How to Navigate:
The navigation to an expense claim in an employee self-service typically involves the following steps:
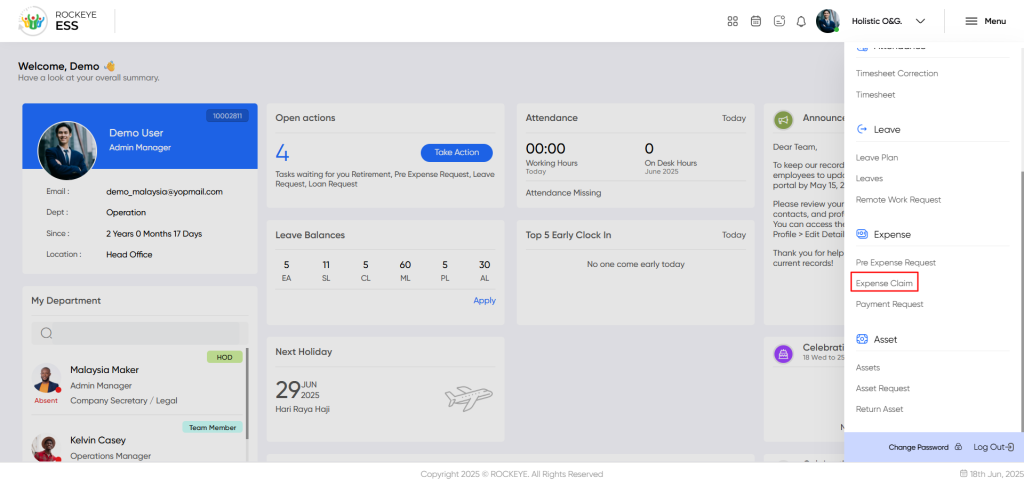
- Click on the menu icon. The menu icon is located in the top right corner of the screen. Clicking on this icon will open the navigation menu, which typically includes links to various sections of the employee self-service system.
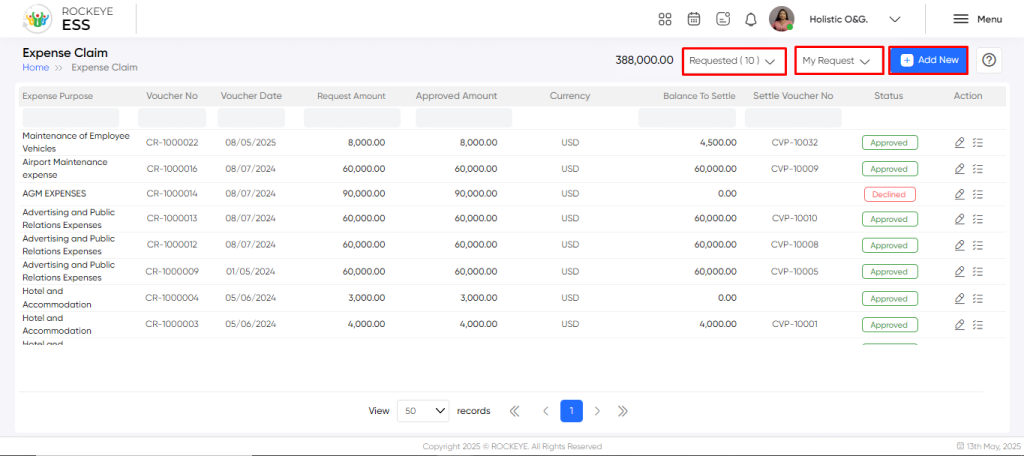
- Click on the Expense Claim: The expense claim is located under the expense section. By clicking on the expense claim, it will display a previously created request with their details like expense purpose, voucher no, voucher date, request amount, approved amount, currency, balance to settle, settle voucher no, status, action
Listing:
- Help: In this section, employees can view the PDF employee manual for the respective module.
- Filter: The employee can filter between the My Request and Team Request options. Team request is only available if the employee has the senior role in the organization.
- My Request: This filter enables the employee to view expenses specifically requested by themselves. By choosing this option, the employee can view their own submitted expense claim requests, and the employee can filter their expense requests based on the following categories:
- Requested: This allows employees to view expense claim requests that have been submitted. By selecting this option, employees can easily view all the requests created by the employee.
- Pending: This filter enables employees to display the list of expense claims that are currently under review by seniors. By selecting this filter, employees can quickly identify which claims are still waiting for a decision.
- Approved: This filter allows employees to view expense claims that have been successfully reviewed and approved. By selecting this option, employees can easily access the details of approved claims, including the approved amount, and proceed with the reimbursement process.
- Declined: This filter helps employees identify expense claims that have been rejected or declined. By selecting this filter, employees can review the reasons for the declined claims and take appropriate action, such as making corrections, providing additional information, or resubmitting the claim for reconsideration.
- My Request: This filter enables the employee to view expenses specifically requested by themselves. By choosing this option, the employee can view their own submitted expense claim requests, and the employee can filter their expense requests based on the following categories:
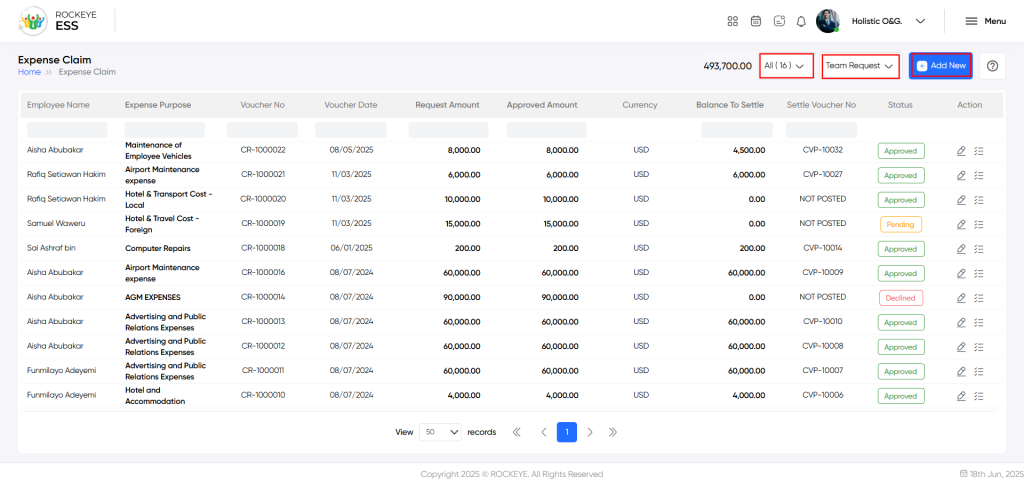
- Team Request: The user can view all the team members expense claim requests, and if it has approval rights, it can accept or reject the team member expense requests. In a team request, the user can filter the team requests based on the following categories:
- All: It includes all the expense claim requests generated by their team members.
- Pending On My Desk: The user can view all the pending team request, which has to be approve or reject by user.
- Approved By Me: The user can view all the approved team members expense claim requests.
- Declined By Me: The user can view all the declined team members expense claim requests.
Recording & Update :
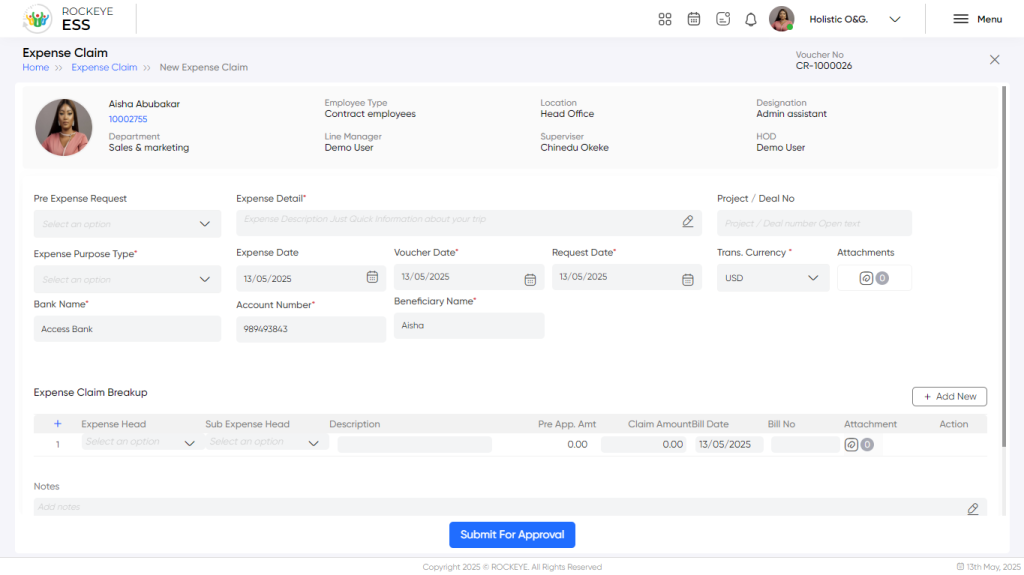
The expense claim requests in employee self-service typically include :
- Pre-Expense Request: This field helps the employee select the previously created pre-expense request.
- Expense Detail*: This field contains detailed information about the expense.
- Project/Deal No.: This field refers to the specific project or deal associated with the expense claim. It helps track expenses related to a particular project or deal.
- Expense Purpose Type*: This field categorizes the purpose of the expense claim, such as travel, accommodation, meals, entertainment, etc. It helps classify expenses for reporting and analysis purposes.
- Expense Date: This field indicates the date on which the expense was incurred by the employee.
- Voucher Date*: The date on which the expense claim voucher was generated or submitted.
- Request Date*: This field represents the date on which the employee submits the expense claim for reimbursement.
- Trans. Currency*: This field specifies the currency in which the expense was incurred.
- Attachment: This field allows employees to attach relevant documents, such as receipts or invoices, as supporting evidence for the expense claim.
- Bank Name*: This field allows the employee to add the bank name.
- Account Number*: This field allows the employees the account number of the bank.
- Beneficiary Name*: This field allows you to enter the name of the beneficiary for the selected bank.
Add Expense Claim Breakup: The employee can add the multiple expense claim breakup rows.
- Expense Head: This field identifies the specific category or type of expense, such as travel expenses, accommodation expenses, etc.
- Sub Expense Head: In case there are further subcategories within an expense head, this field allows employees to specify the subcategory of the expense.
- Description: This field provides a brief description or explanation of the expense.
- Pre-App. Amt.: The pre-approved amount refers to the amount authorized in advance for the expense.
- Claim Amount: This field indicates the amount being claimed for reimbursement.
- Bill Date: This field represents the date on the bill or invoice associated with the expense.
- Bill No.: This field contains the bill or invoice number for reference.
- Attachments: This field allows employees to attach relevant documents, such as receipts or invoices, as supporting evidence for the expense claim.
- Action: The employee can perform the action on the expense claim breakup row.
- Notes: This field helps the employee to add some notes on the expense request.
Note: “*” represents the mandatory fields to be entered by the employee.
The employee can perform the following actions in this section:
- Submit for approval: This option allows the employee to submit the request for approval. The employee will submit the information, and it will be sent for approval.
Note: After approval, the employee can’t update the details.