All Employee
Introduction/purpose:
The purpose of “all employee” aspects within an HR operation in a Human Resource Management System is to streamline and optimize various HR processes to ensure effective human resource management and improve overall organizational performance.
In All Employees, the user can view all employees, such as current, contract, permanent, and terminated employees, and manage them.
How To Navigate:
The navigation required to record All Employee in a HRMS system typically involves the following steps:
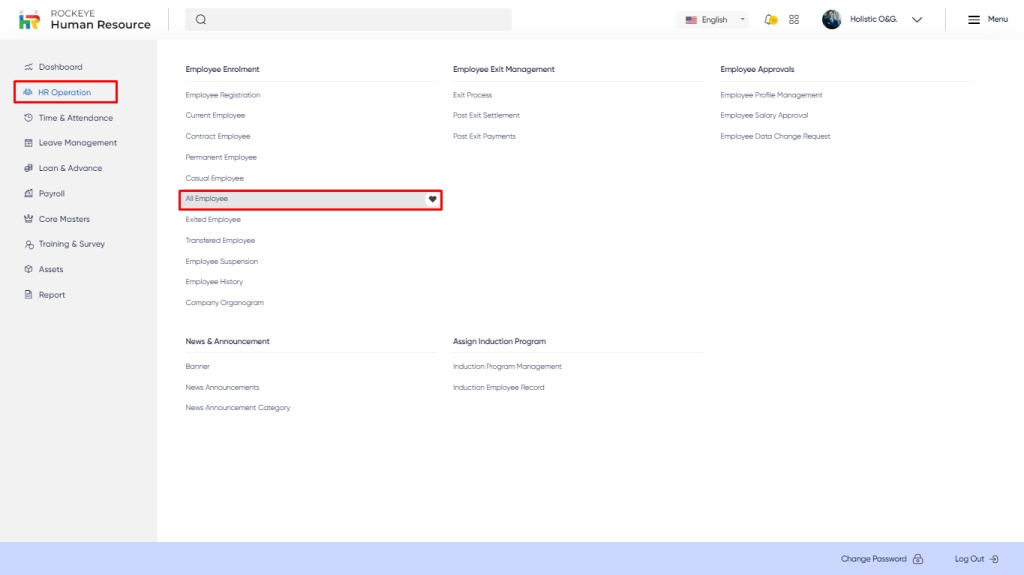
- Click on the main navigation icon: the main navigation icon is located in the top right corner of the screen. Clicking on this icon will open the navigation menu, which typically includes links to various sections of the HRMS system.
- Click on the HR Operations section. The HR Operations section is located under the left section of the screen. Clicking on this section will display a list of HR operations related to employee enrollment.
- Find the Employee Registration section. The Employee Registration section is located in the list of Employee Enrollment under the HR Operations section.
- Click on the All Employee link. The All Employee link is located under the Employee Enrollment section. After clicking on this link, It will open up the All Employee data record
Listing:
The All Employee listing allows users to view all active employees. The key features of the all-employee listing are listed below:
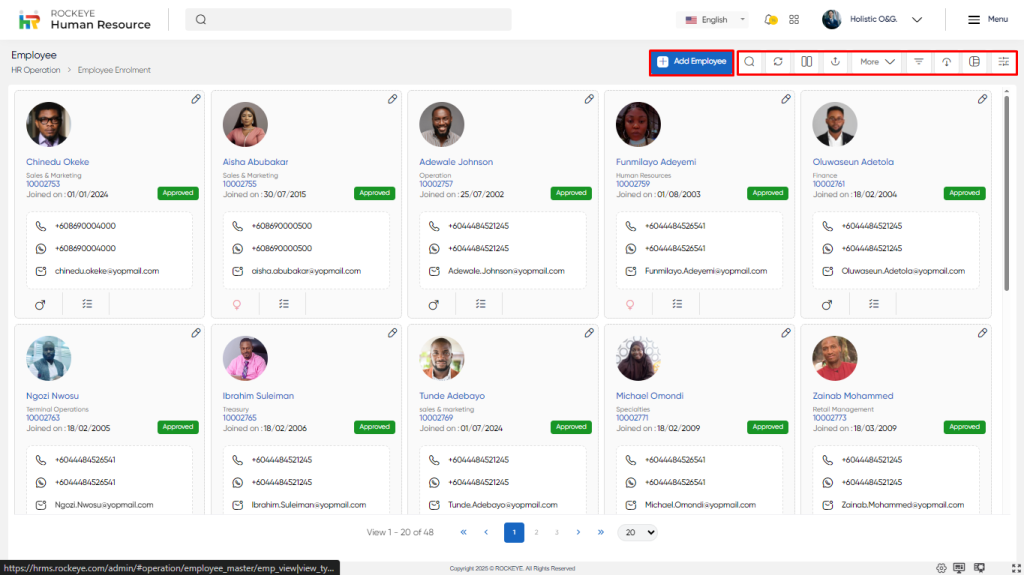
- Filter Record Allows users to filter the list of records based on visible columns, such as Employee Name, Mobile Number, WhatsApp Number, Employee Code , Gender , Joining Date, Employee Type, Job Status, Location, and Approval Status.
- Change view option allows users view Employee list as below
- Grid View (Block View)
- Table View: User can View column-wise list with certain Action option on the right, such as Edit Profile, & Activity Logs to view who had added, Updated and Approved the record and Approval Status
- List View: Almost Similar to Table view with additional option under Action to Allow/Remove Access of Employee to ESS
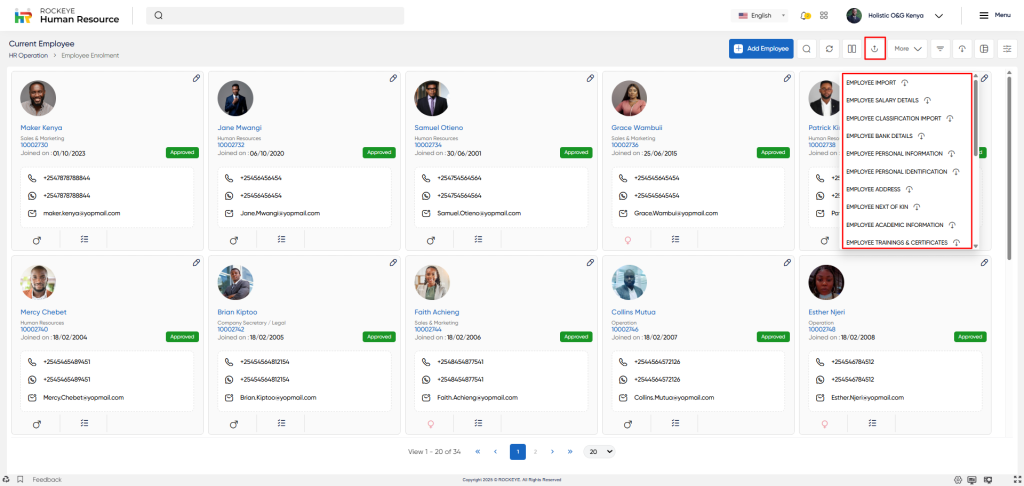
- Import Option User can Import module wise Multiple Employee data into HRMS system
- Employee Import
- Employee Salary Details
- Employee Classification Import
- Employee Bank Details
- Employee Personal Information
- Employee Personal Identification
- Employee Address
- Employee Next of Kin
- Employee Academic Information
- Employee Trainings & Certificates
- Employee CV
- Employee Virtual Access
- Employee Medical History
- Employee Languages
- HR Memos
- Employee Attachments
- Employee Payee Agency
- Employee Absconded List
- Employee Advance Settings
- Employee Exit Process
- Employee Salary Slip
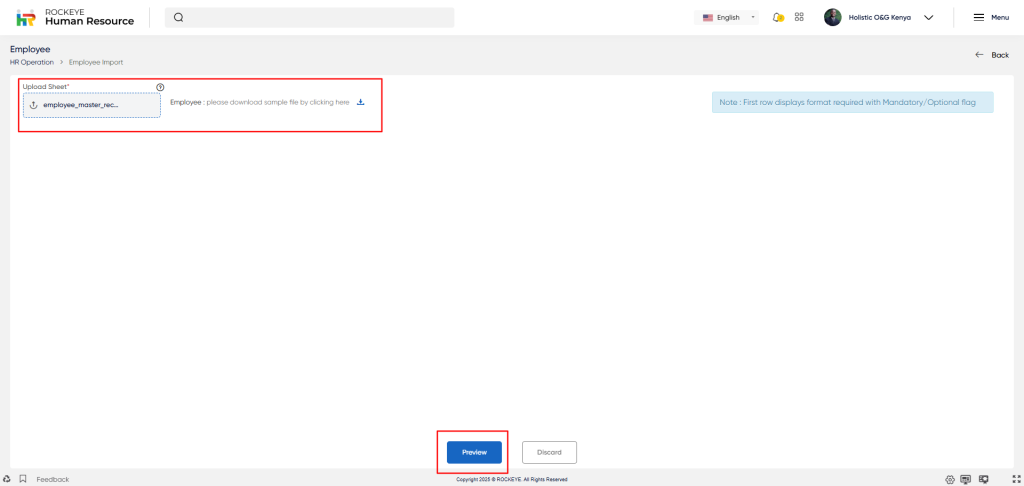
- Once the user clicks on Import, they are prompted to upload a data file in .xls or .csv format. A sample file is available for download to help ensure the correct structure and format.
- After uploading, users have the option to export the imported data for cross-verification. The system performs validation checks and displays clear error messages with warnings if any required data is missing or incorrectly formatted.
- Once the data passes all validations, the user can proceed with the final submit, after which the data is directly imported into the system.
- Grid View: Displays employees in a block format with limited information.
- Table View: Presents a column-wise list of employees with action options on the right, such as Edit Profile and Activity Logs to view who added, updated, or approved the record, along with the Approval Status.
- List View: Similar to Table View, but includes an additional option under Action to Allow/Remove Employee Access to ESS (Employee Self Service).
- Change Sorting: Users can sort the listed employee data based on fields like Name, Employee Code, Gender, Mobile Number, WhatsApp Number, Attendance Code, etc.
- More: (Available in Table or List View)
- Attendance: Allows users to sync employee data with the attendance system (if integrated) or export employee data for the selected pay period.
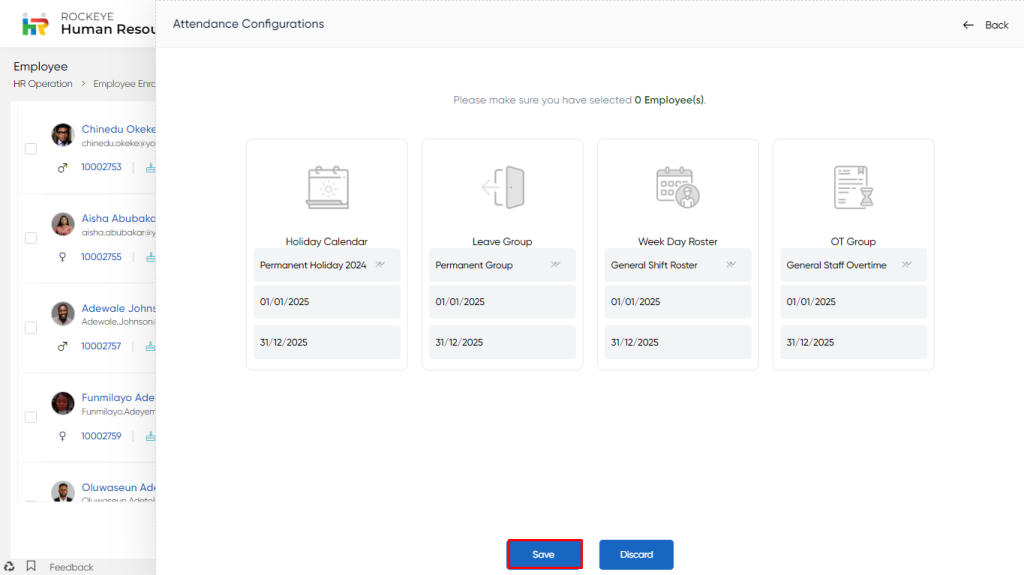
- Common Configuration: Enables users to apply common configurations to new employee records in bulk.
- Upon clicking this option, users can assign settings such as Holiday Calendar, Leave Group, Week Days, Roster, and Overtime Group to multiple selected employees at once, instead of updating each individually.
- Sync Employee Data: Enables syncing of selected employee records with the attendance system.
- On clicking “Sync Employee Data,” a confirmation pop-up appears:
“Are you sure you want to sync?”
- On clicking “Sync Employee Data,” a confirmation pop-up appears:
- Generate Profile Data: Generates employee profile data.
- The user must select at least one record; otherwise, the message appears: “Please select at least one record.”
- Upon clicking the "Generate Profile Data" button, a pop-up message appears: “Change Request Initiated.”
- Export Employee Report: Exports the selected employee report in .xls format.
- The user must select at least one record; otherwise, the message appears: “Please select at least one record.”
- The user must select at least one record; otherwise, the message appears: “Please select at least one record.”
- Transaction Search: Allows custom filtering of employee data using fields not available on the listing page and advanced search operators such as
- Not equal to
- Does not contain
- Begins with
- Ends with
- Contains etc.
- Export Data: Users can export
- Selected records
- Current page records
- All records
- Exports can include either the listed columns or all available columns to a spreadsheet or another format for further analysis.
- Hide/Show Columns: Allows users to customize the columns displayed on the listing page.
- Users can check/uncheck columns based on preference.
- If all columns are unchecked, the system will show an error message: “Please check at least one column.”
- The user can view following action in this section
- Ok. :-On clicking the “Ok” button, the user can submit the checked option, and based on the selection, the column will display to the user in the list.
- Cancel: On clicking this button the user can cancel the check column.
- Show All Listing Columns: This option allows the user to clear all Filter and display all records on the listing page.
- Advanced Search: This option allows user to filter data with single or Multiple criteria in Column Name with options like
- equal
- Not Equal
- Begins
- Does Not Begin with
- Ends With
- Does Not End with
- Contains
- Does Not Contain
- The user will also able to view the three icon for the individual employees
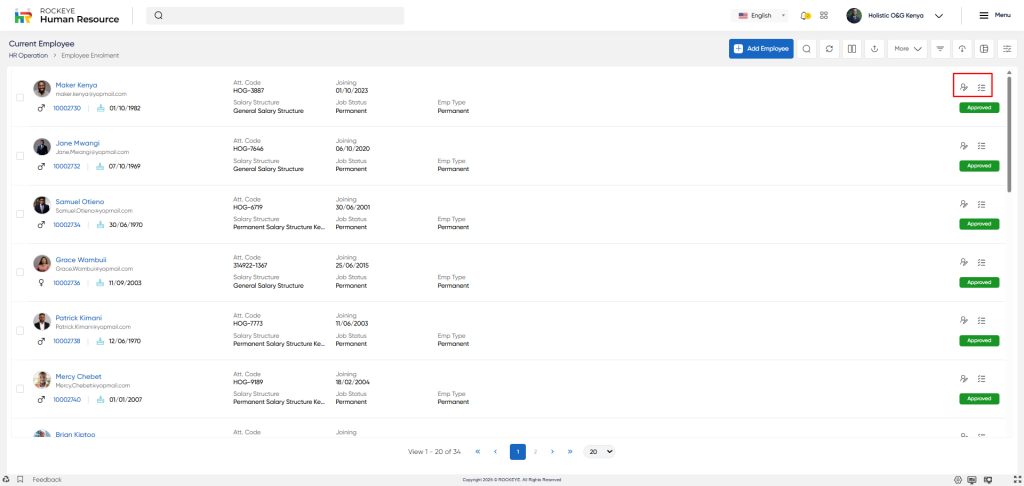
- Edit Profile Icon: On clicking the edit profile icon, the user will be able to edit the profile of the selected employee.
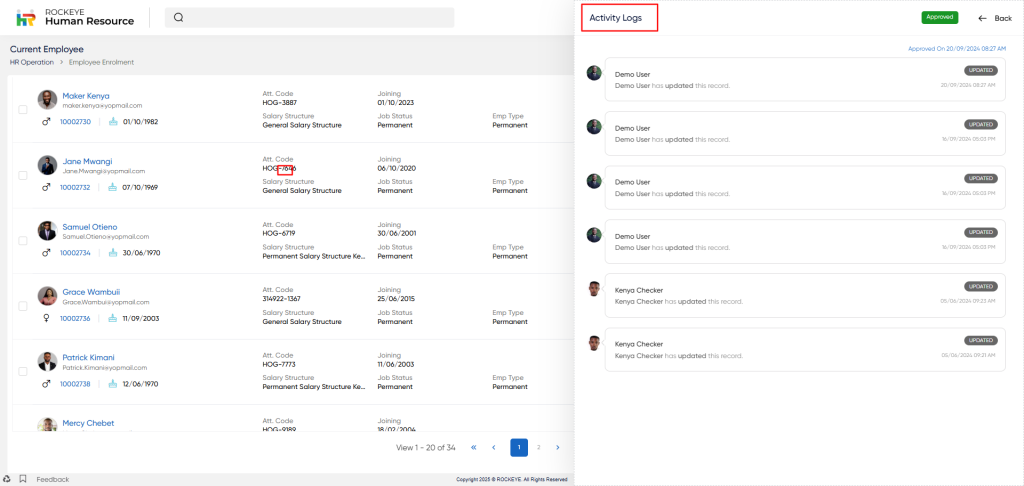
- Activity Log: In the Activity Log option, the user can view the transaction history of All Employee, such as
- Status (pending , pending for approval, approved).
- Time and Date of Transaction
- Execution time
Recording & Updates:
The user can add a new employee record by clicking the “Add New” button and filling in the required fields. To update an existing record, the user can click the “Edit” button, make the necessary changes, and save the updated information.
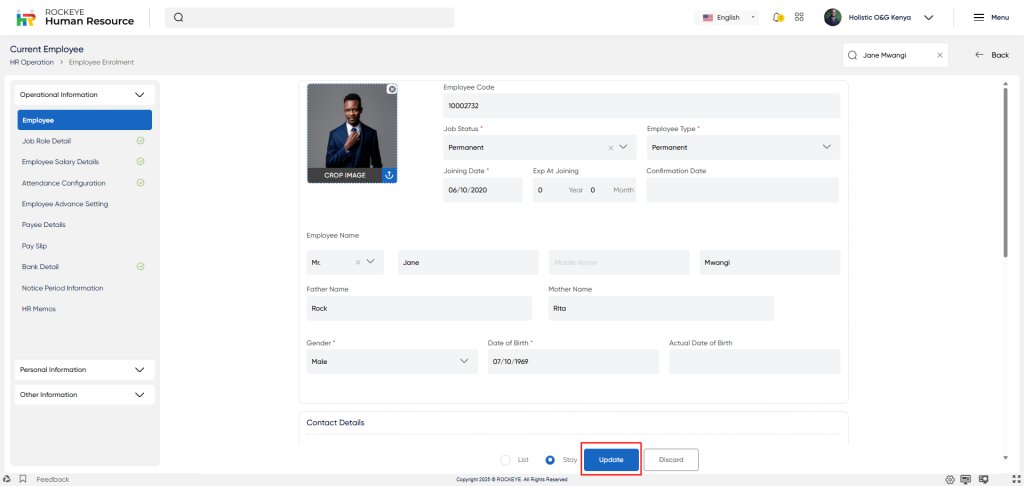
Below are the fields that are typically included in the add employee form:
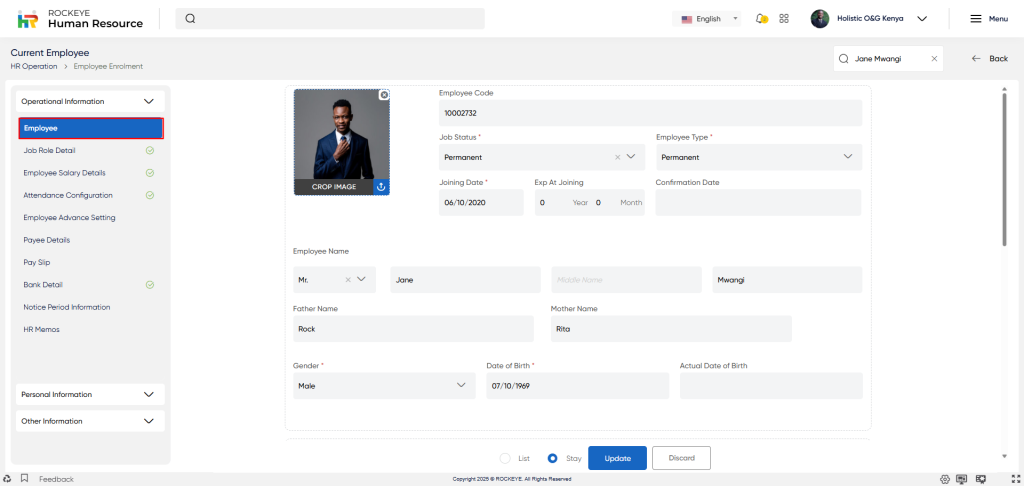
- Photograph: This field allows the employee to upload a photograph for identification purposes.
- Employee Code: This is a unique identifier that is automatically generated by the HR system for the newly hired employee.
- Employee Type: This field describes the employee type. The user has to choose employe type from a dropdown menu, such as Permanent, Intern, casual, etc.
- Job Status*: This field describes the job status of the employee. The user has to choose a status from a drop-down menu, such as full-time, part-time, temporary, or contract.
- Joining Date *: This is the date on which the employee officially starts working for the organization. The user has to enter the date from the calendar.
- Exp At Joining: This field indicates the number of years of experience the employee had at the time of joining the organization.
- Confirmation Date: This field indicates the date of confirmation if the employee is in a probationary period.
- Employee Name: These fields capture the employee’s full name, including their first, middle, and last names.
- Father Name: This field captures the name of the employee’s father.
- Mother Name: This field captures the name of the employee’s mother.
- Gender*: This field captures the employee’s gender. The user has to choose from a drop-down menu, which can be male, female, or other.
- Date of Birth* :This field captures the employee’s date of birth.
- Actual Date of Birth: This field captures the employee’s actual date of birth as verified by official documents.
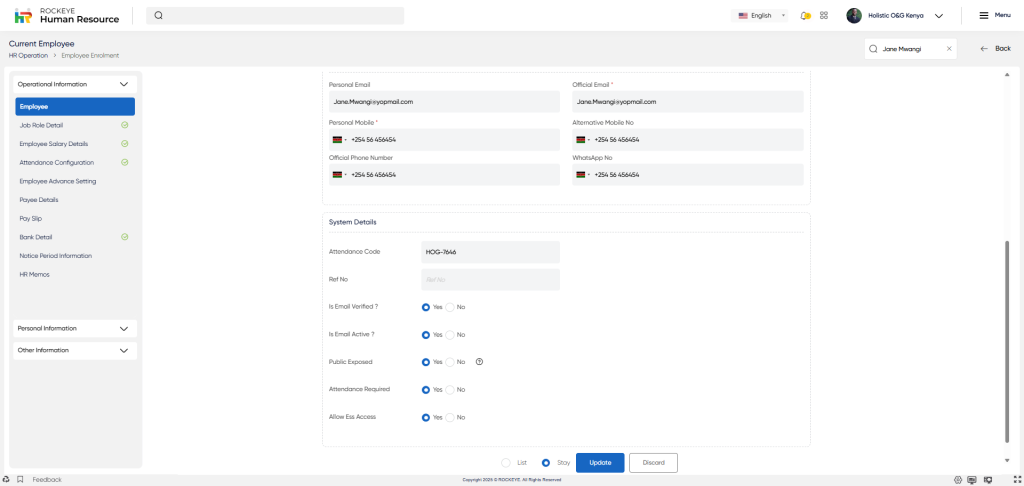
- Personal Email: This field captures the employee’s personal email address.
- Official Email: This field captures the employee’s official email address assigned by the organization.
- Personal Mobile *: This field captures the employee’s personal mobile phone number.
- Official Phone Number: This field captures the employee’s official phone number assigned by the organization.
- WhatsApp No.: This field captures the employee’s WhatsApp number.
- Alternative Mobile No.: This field captures an alternative mobile phone number for the employee.
Classification Details
- Department: This field identifies the department in which the employee works, such as marketing, finance, or human resources.
- Sub-Department: This field further categorizes the department into sub-departments, such as sales, customer service, or payroll.
- Designation: This field identifies the employee’s job title, such as manager, accountant, or analyst.
- Work Location*: This field identifies the physical location where the employee works, such as the company’s headquarters, a branch office, or a remote location.
- Immediate Superior: This field identifies the employee’s direct supervisor or manager who is responsible for overseeing their work.
- Line Manager: This field identifies the employee’s manager, who is responsible for making decisions regarding their work assignments and career development.
- Head of Department: This field identifies the top-level manager who is responsible for overseeing the entire department in which the employee works.
System Details
- Link Employee: This field allows the employee to link the reference employee from the drop down list
- Attendance Code: This field captures an auto-generated attendance code that is assigned to the employee in the attendance system.
- Ref No: This field captures any reference number associated with the employee, such as a reference from a previous employer.
- Confirmation Date: This field captures the date on which the employee’s employment is confirmed by the organization.
- Exit Date: This field captures the date on which the employee leaves the organization.
- Is Email Verified: This field indicates whether the employee’s email address has been verified by the organization.
- Is Email Active: This field indicates whether the employee’s email address is active and currently in use.
- Public Exposed: This field indicates whether the employee's profile or information should be publicly visible or not.
- Attendance Required: This field allows whether attendance is required for the employee or not.
- Allow ESS Access: This field indicates whether the employee is entitled to any consecutive absent days.
The user can perform the following actions in this section along with the radio button:
- Next: Allows the user to navigate the next page upon submission of the record
- List: Allows the user to navigate the employee list upon submission of the record
- Stay: Allows the user to navigate the stay on the same record upon submission of the record
- Submit: This option allows the user to submit the employee record. If the system has an approval flow, HR will submit the information, and it will be sent to the respective approval authority for approval.
- Discard: This option allows the user to discard the transaction, which will remove all changes done (if any) in the module.
In the HR operation section, the user can edit the employee profile by clicking on the edit profile icon, which is located in the All Employees section in Employee Enrollment. The user can add/update the following fields, such as employee designation, department, salary details, Attendance related information, etc.
Job Role Details:
Below are the fields that are typically included in the classification form. The user can edit/update the classification record of the selected employee.
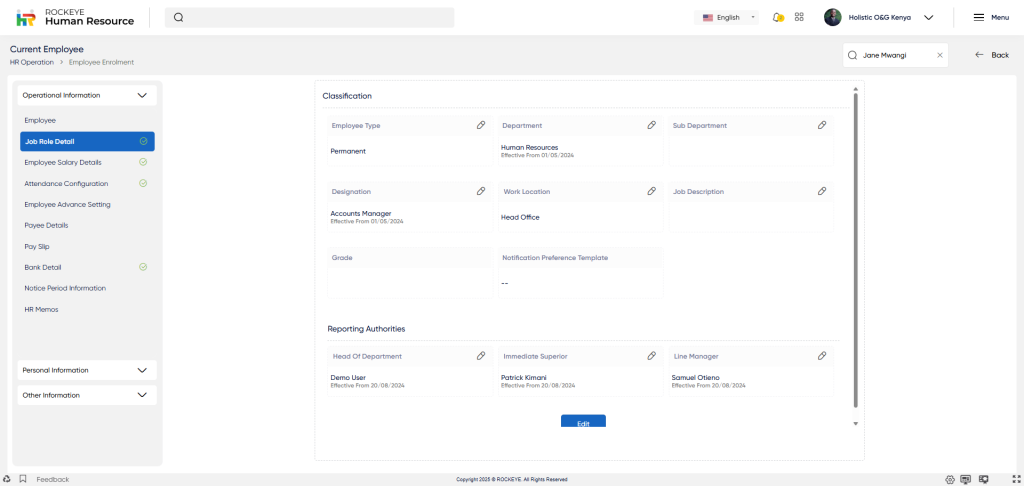
- Employee Type: This field categorizes employees based on their employment status, such as full-time, part-time, temporary, or contract.
- Department: This field identifies the department in which the employee works, such as marketing, finance, or human resources.
- Work Location*: This field identifies the physical location where the employee works, such as the company’s headquarters, a branch office, or a remote location.
- Sub-Department: This field further categorizes the department into sub-departments, such as sales, customer service, or payroll.
- Designation: This field identifies the employee’s job title, such as manager, accountant, or analyst.
- Employee Grade: This field categorizes employees based on their level of experience and skill set. Grades can range from entry-level to senior-level.
- Immediate Superior: This field identifies the employee’s direct supervisor or manager who is responsible for overseeing their work.
- Line Manager: This field identifies the employee’s manager, who is responsible for making decisions regarding their work assignments and career development.
- Head of Department: This field identifies the top-level manager who is responsible for overseeing the entire department in which the employee works.
Key Notes of Classification:
- Once classification details are added, they need to be approved, like department & employee type (if there is any approval flow defined). Later, those fields can be revised using the edit icon highlighted.
Salary Details:
The Employee Salary Details section captures key information related to an employee’s compensation package. Below are the typical fields included in the salary details form:
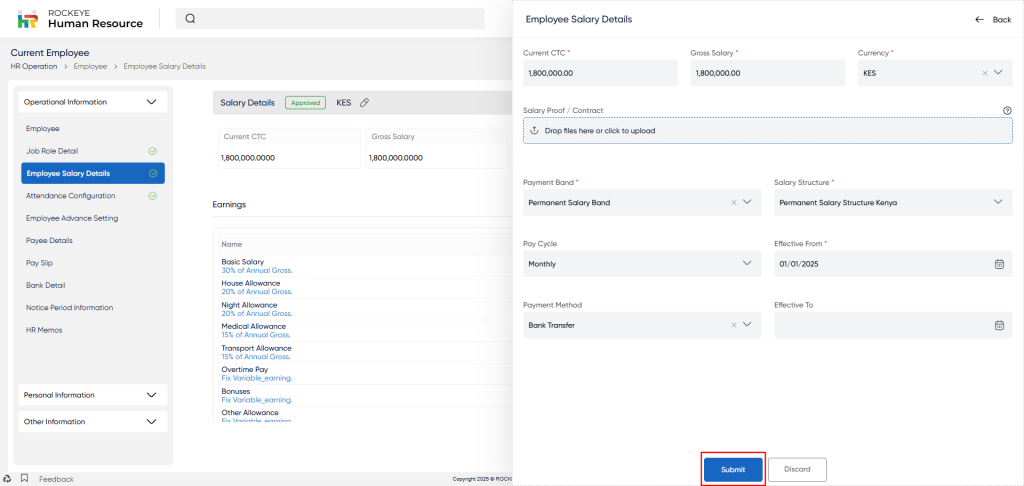
- Current CTC*: This field represents the employee’s current compensation package, including salary, bonuses, and other benefits.
- Gross Salary: This field represents the total amount of money paid to the employee before any deductions, such as taxes, are made.
- Currency*: This field represents the currency in which the employee’s salary is paid.
- Salary Proof/Contract*: This field represents the document or agreement that outlines the terms and conditions of the employee’s salary, including the payment amount, frequency, and mode.
- Payment Band*: This field represents the salary range that the employee falls under based on their job grade or level.
- Salary Structure*: This field represents the breakdown of the employee’s salary, including the basic salary, allowances, and benefits.
- Pay Cycle: This field represents the frequency at which the employee is paid, such as weekly, biweekly, or monthly.
- Effective From*: This field represents the date from which the employee’s new salary structure or payment terms will come into effect.
- Payment Method : This field represents the method used to pay the employee’s salary, such as direct deposit, check, or cash.
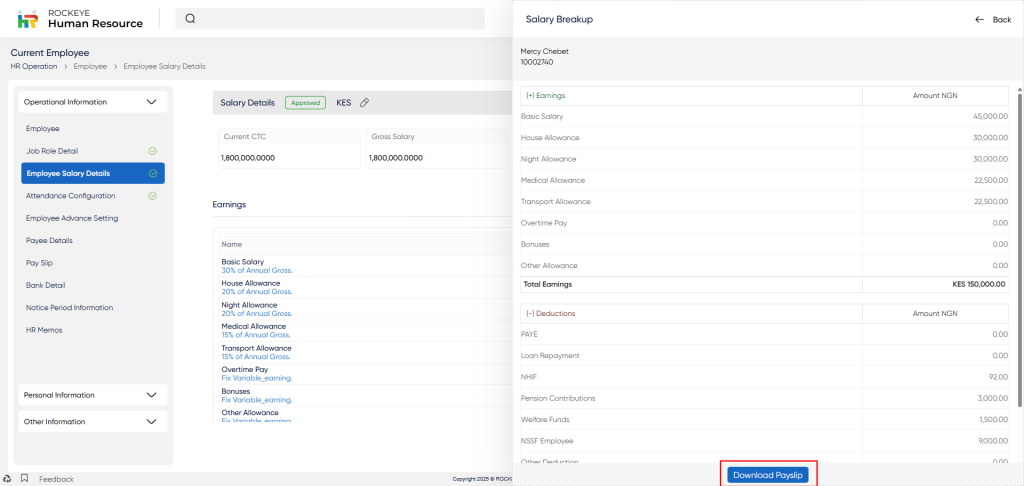
Post Submission Actions
Upon submission, users can view a detailed salary bifurcation, showing a breakdown of components as per the selected salary structure.
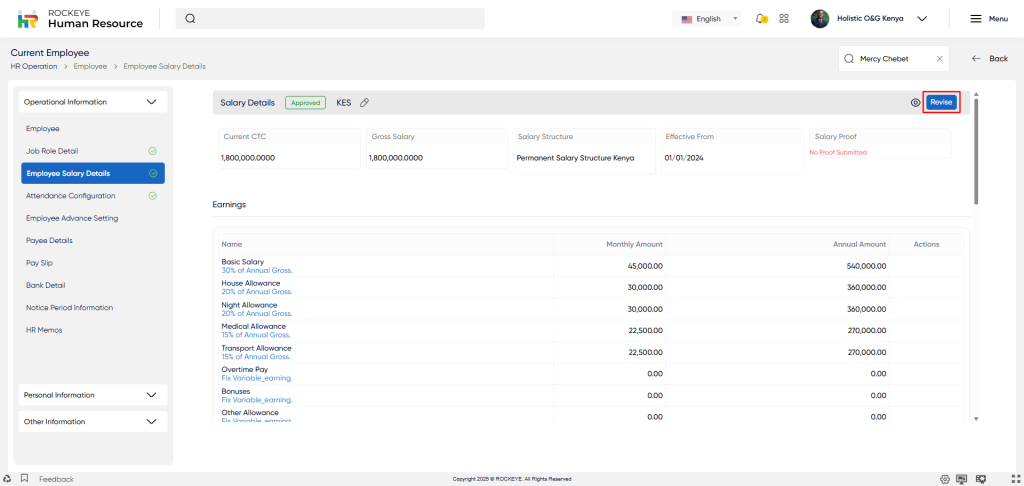
By clicking the “View” icon, users can review the salary breakup in detail.
To modify an employee’s salary, users can click the “Revise Salary” button.
Taxation Information:
- Payee Agency: Enter the name of the tax agency to which the tax amount is to be submitted.
- WHT Group: Enter the applicable withholding tax (WHT) group that should be applied for the specific taxation scenario.
Key Notes of Salary Details:
- If salary has not been processed using the approved salary details, HR can edit the salary structure and amounts via the edit icon next to the Currency field. Any changes made will follow the approval workflow as configured.
- Once salary is processed, HR cannot edit existing salary details. To make changes, they must use the “Revise” option available at the top right of the salary view.
- If the “Allow Employee-wise Edit” option is enabled in the salary structure, HR can customize individual salary components by clicking the edit icon next to each component in the breakup view.
Attendance Configuration:
Attendance configuration refers to the setup and management of an organization’s attendance system. The following points are typically included in an attendance configuration form:
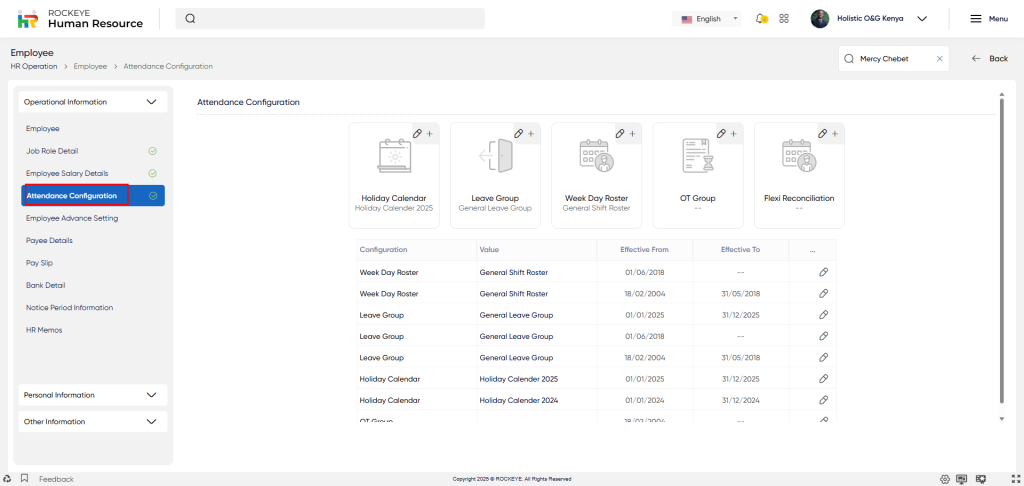
- Holiday Calendar:
- This field identifies the holiday observed by the organization, which can vary depending on the country, state, or region.
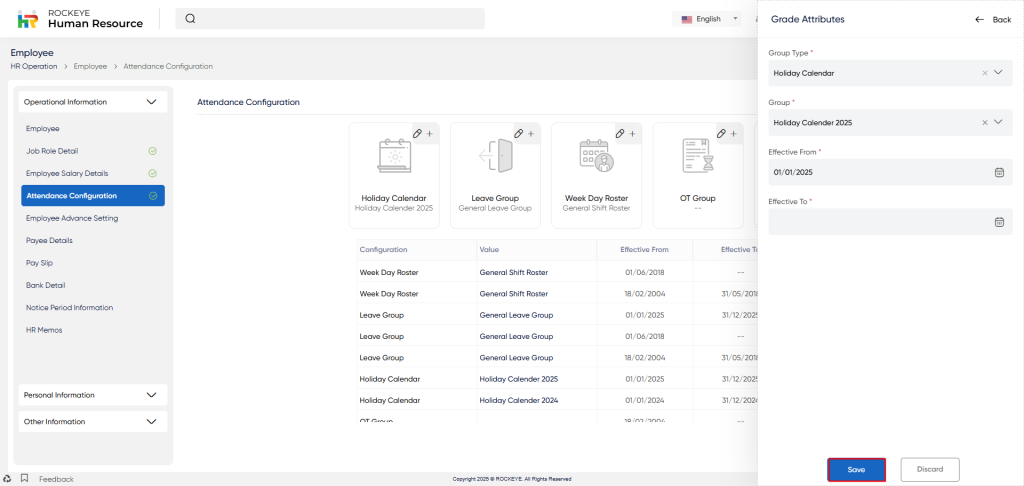
- In this field, the user will be able to add or edit the holiday calendar configuration in the employee profile.
- When the user clicks on the edit or add icon in the attendance calendar section, they will be able to enter the details in the mandatory field, such as
- Group type*: This field specifies the group type. Holiday calendar by default, and the user can not change the group type.
- Group*: User have to choose the group from the drop down menu such as permanent employee group , contract employee , C&I permanent Employee
- Effective From*: "Effective from is a field that specifies the date from which the holiday calendar applies.
- Effective To*: Effective to is a field that specifies the date up to which the holiday calendar ends.
- The user can perform the following action in this section:
- Update/Save :- This field allows the user to save/update the above entered field
- Discard :- This field allows the user to discard the above entered field
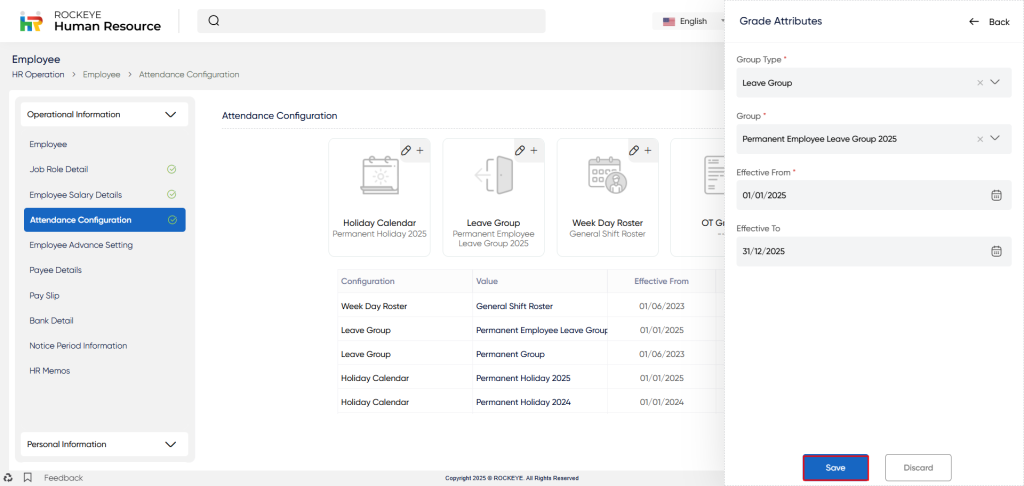
- Leave Group:
- This field identifies the various types of leave that employees are eligible for, such as sick leave, vacation leave, or maternity leave.
- In this field, the user will be able to add or edit the leave group configuration in the employee profile.
- When the user clicks on the edit or add icon in the Leave group section, they will be able to enter the details in the mandatory field, such as
- Group type*: This field specifies the group type as Holiday calendar by default, and the user can not change the group type.
- Group*: User have to choose the group from the drop down menu, such as permanent employee group , contract employee , C&I permanent Employee
- Effective From*: Effective from is a field that specifies the date from which the leave group applies.
- Effective To*:- Effective to is a field that specifies the date up to which the leave group ends
- The user can perform the following action in this section:
- Update/Save :- This field allows the user to save/update the above entered field
- Discard: This field allows the user to discard the above-entered field.
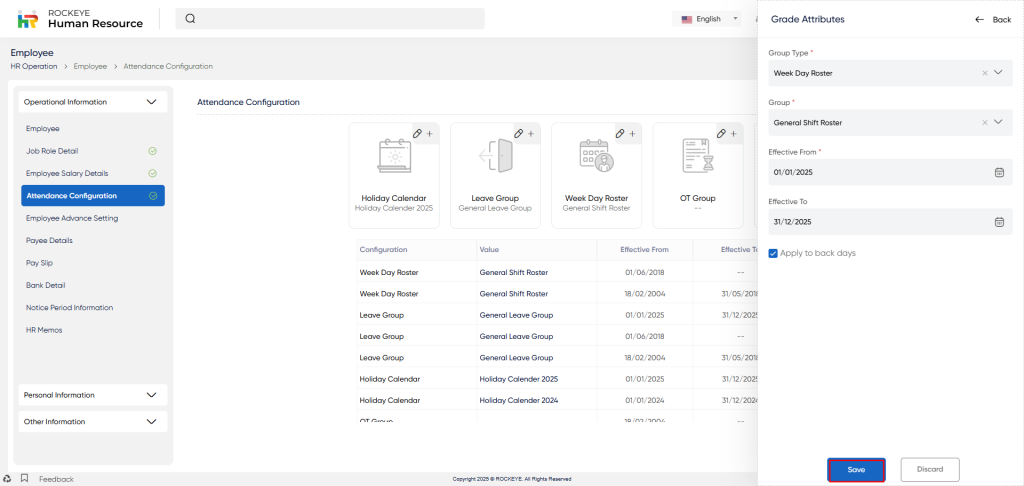
- Weekday Roster:
- This field identifies the workdays and off days for each employee based on their work schedule. The attendance system can be configured to automatically mark attendance based on the employee’s roster.
- In this field, the user will be able to add or edit the Week Day Roster configuration in the employee profile.
- When the user clicks on the edit or add icon in the Week Day Roster section, they will be able to enter the details in the mandatory field, such as
- Group type *:- This field specifies the group type. Holiday calendar by default displayed; the user can not change the group type.
- Group*: User have to choose the group from the drop down menu, such as permanent employee group , contract employee , C&I permanent Employee
- Effective From *:- Effective from is a field that specifies the date from which the Week Day Roster applies.
- Effective To * :- Effective to is a field that specifies the date up to which the Week Day Roster ends
- The user can perform the following action in this section:
- Update/Save :- This field allows the user to save/update the above entered field
- Discard: This field allows the user to discard the above-entered field.
- Overtime Group:
- This field identifies the overtime policy of the organization, such as the rate of pay for overtime work and the maximum number of overtime hours per day/week/month.
- In this field, the user will be able to add or edit the overtime group configuration in the employee profile.
- When the user clicks on the edit or add icon in the Overtime group section, they will be able to enter the details in the mandatory field, such as
- Group type * :- This field specifies the group type. Holiday calendar by default, and the user can not change the group type.
- Group*: User have to choose the group from the drop down menu, such as permanent employee group , contract employee , C&I permanent Employee
- Effective From * :- Effective from is a field that specifies the date from which the overtime group applies.
- Effective To*: - Effective to is a field that specifies the date up to which the overtime group ends

- The user can perform the following action in this section:
- Update/Save :- This field allows the user to save/update the above entered field
- Discard: This field allows the user to discard the above-entered field.
Key Notes of Attendance Configuration:
- If Weekday Roster is not configured with employee, generating a timesheet will not be possible
- If Leave Group is not assigned, Employee Leave Balance can not be added and Employee might not be able to apply for leave if leave balance is not allowed to go in negative
- Attendance configuration can be done for individual employees as well as multiple employees by selecting multiple employees in Table View under the Current Employee Listing Page. In the Other Action option, select Common Configuration, where you can assign the required attendance configuration with start and end dates.
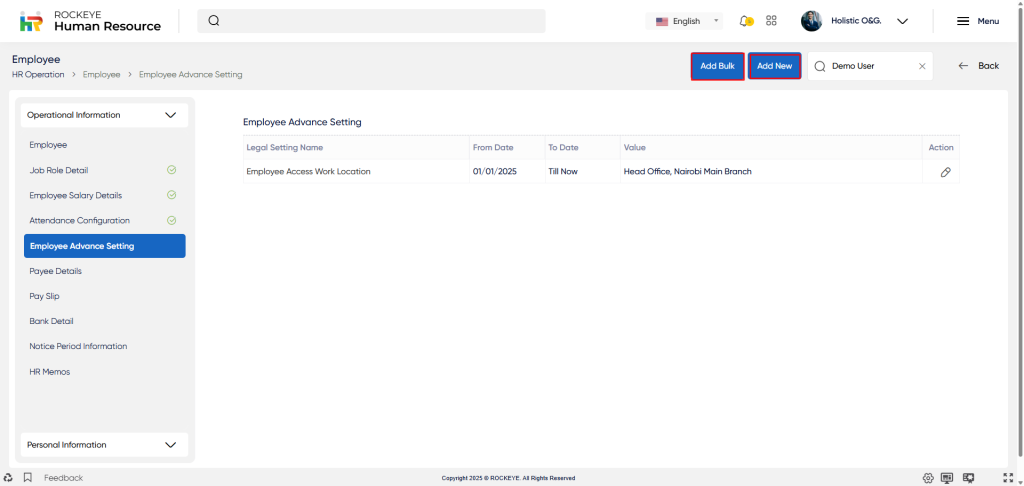
Employee Advance Setting:
Employee advance setting refers to the configuration of an employee’s eligibility for certain financial benefits or deductions, which may be provided by the employer. Below are the fields typically included in an employee advance setting form:
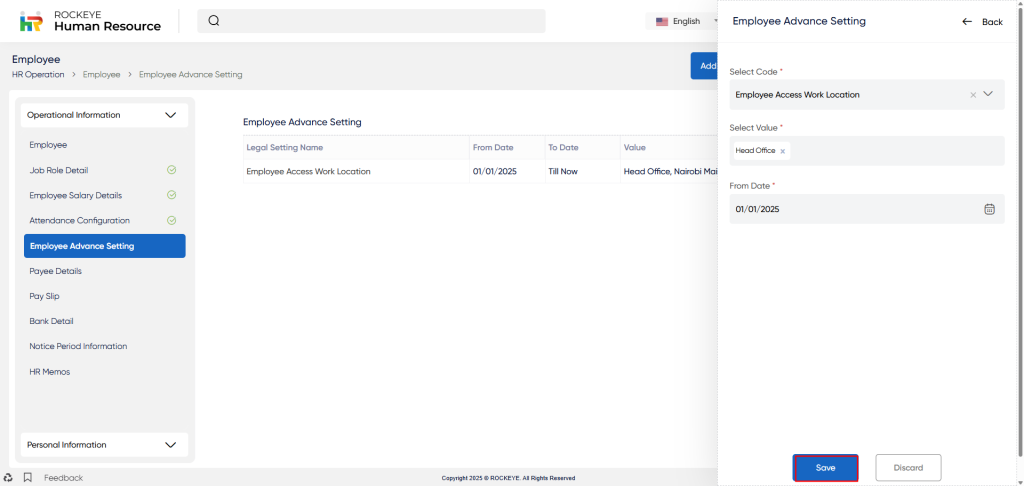
The user can add a new advanced setting by clicking the “Add New” button and entering the following mandatory field:
- Select code*:- This field allows the user to choose the advanced setting code from the drop-down menu, such as attendance alert exclusion , attendance auto-present, disable biometric present, and employee access work location.
- Select Value *: The user has to select the yes or no option in this field .
- From Date * :- From date is a field that specifies the date from which the advanced setting applies.
Key Notes of Employee Advance Setting:
- Advanced settings can be added for an individual Employee or even Bulk details can be configured together using Add Bulk
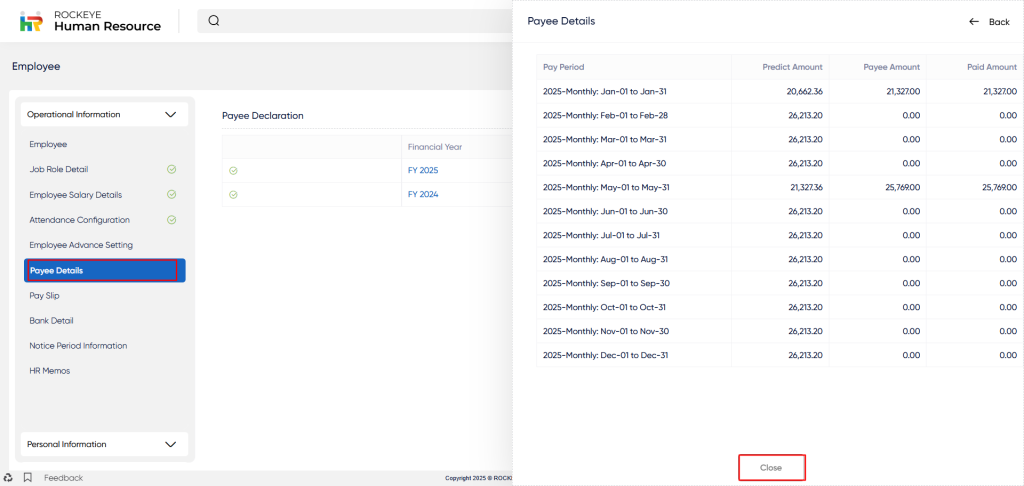
Payee Tax Details:
Payee tax details refer to the tax-related information of an employee that is necessary for payroll processing and compliance with tax regulations.
If the payee is flagged as applicable in the salary structure assigned to the employee, the payee amount is auto-calculated based on employee payroll.
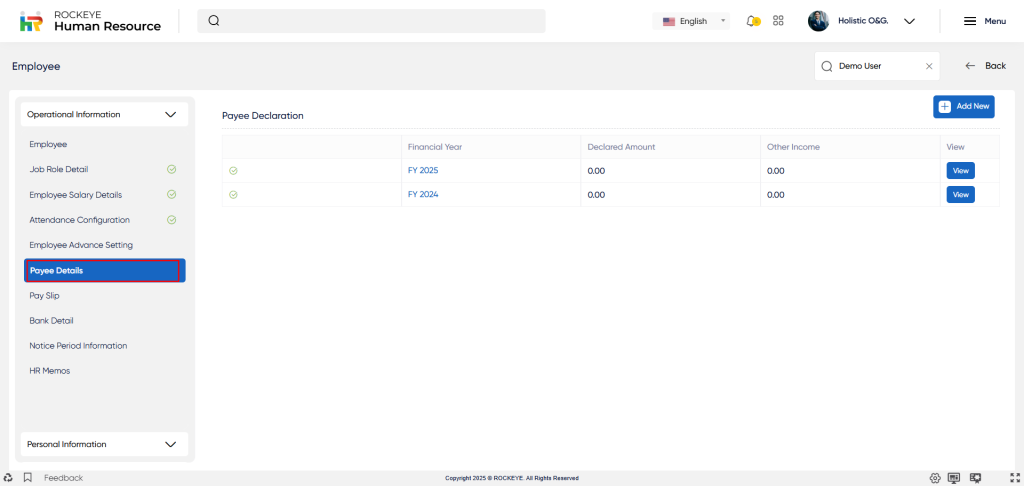
Once the user clicks on the “View” button, they will be able to see the complete taxation details for the selected financial year.
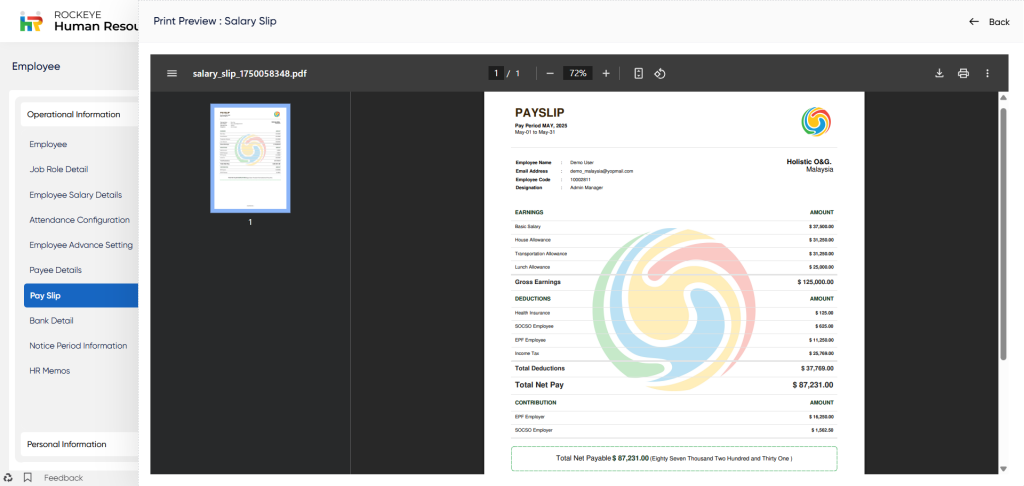
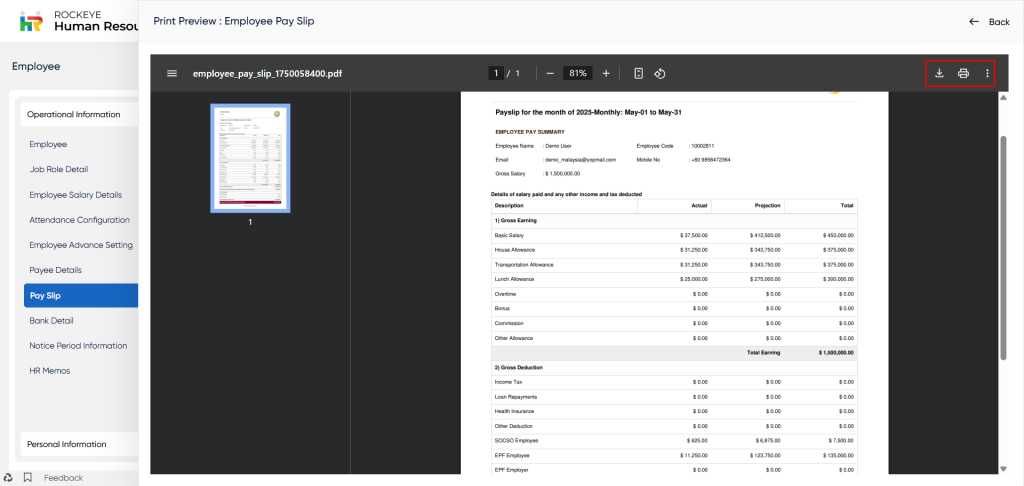
Pay Slip & Payee Sheet:
A pay slip, also known as a pay stub or salary slip, is a document that provides detailed information about an employee’s earnings, deductions, and net pay for a specific pay period. It is typically provided to employees along with their salary payment details
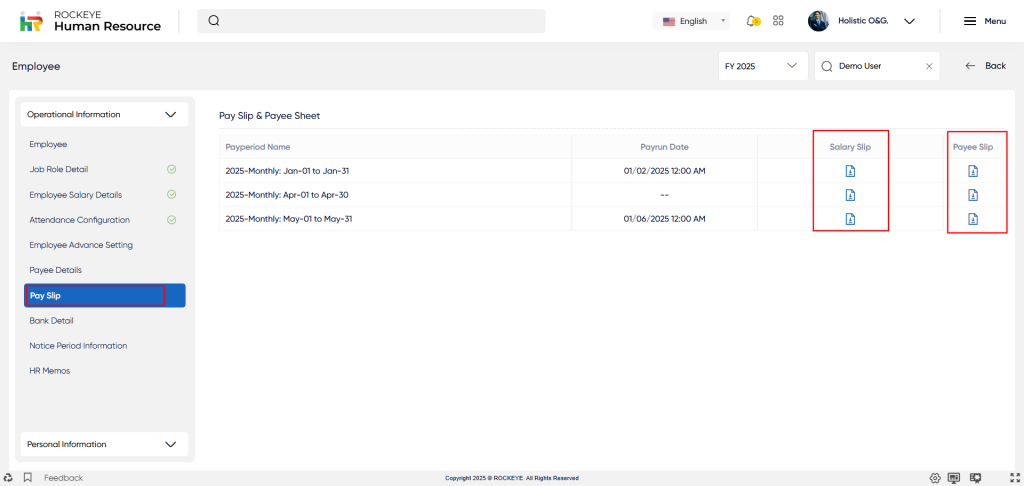
- User can download the salary slip once click on the salary slip icon of selected pay period
- User can download the payee slip once click on the payee slip icon of selected pay period
Bank Detail:
Employee bank details refer to the bank account information of an employee, which is necessary for processing salary payments and other financial transactions.
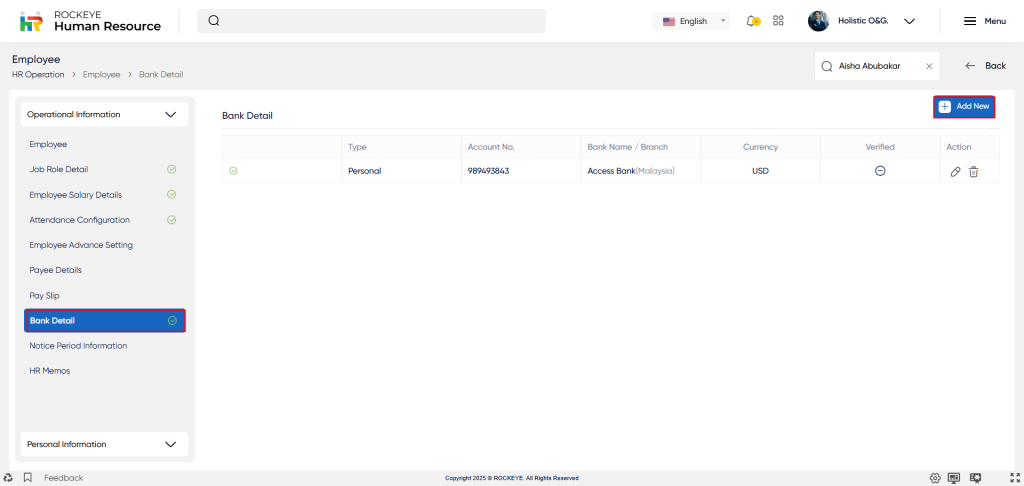
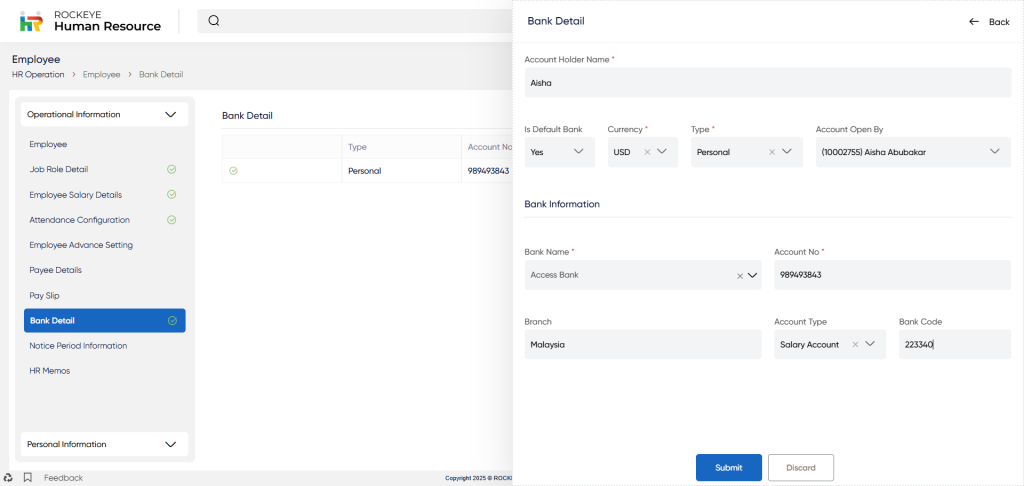
Below are the fields typically included in an employee bank details form:
- Type*: This field refers to the type of bank account, such as a personal account or an official account.
- Account Open By: This field specifies the name of the person who opened the bank account.
- Bank Name: This field specifies the name of the bank where the account is held.
- Bank Code: This field refers to the unique code assigned to the bank by the regulatory authority.
- Branch*: This field specifies the branch of the bank where the account is held.
- Account Type: This field specifies the type of account, such as Salary or savings account.
- Account Number*: This field refers to the account number assigned by the bank.
- Account Holder Name*: This field specifies the name of the account holder as it appears on the bank records.
- Remark: This field provides additional information or remarks related to the bank account.
Key Notes of Bank Details:
- If Bank API is linked for direct payment, Employee Bank details needs to be Verified from the Verify option provided under Report > Employee Bank Account > Verify against respective Employee
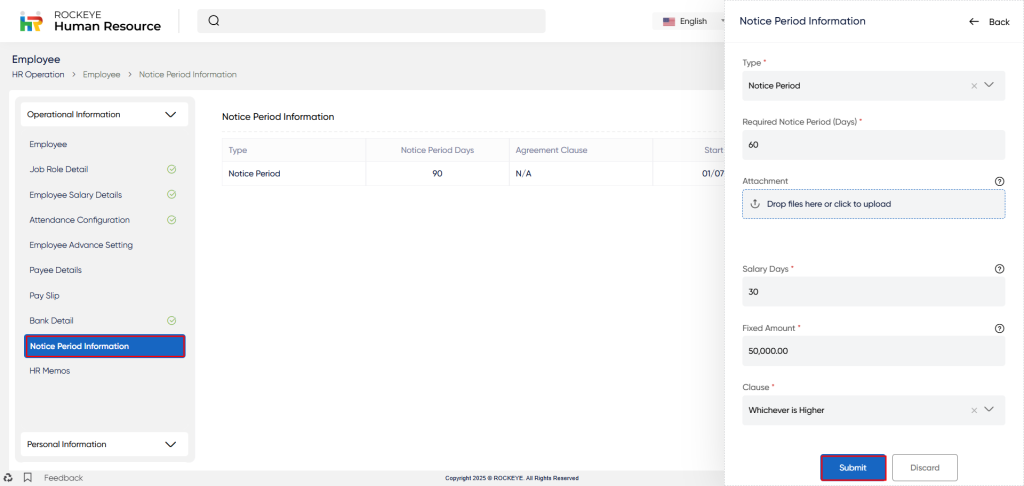
Notice Period Information
This section captures the details when an employee is serving their notice period. The related information is recorded and displayed in the Notice Period Information tab.
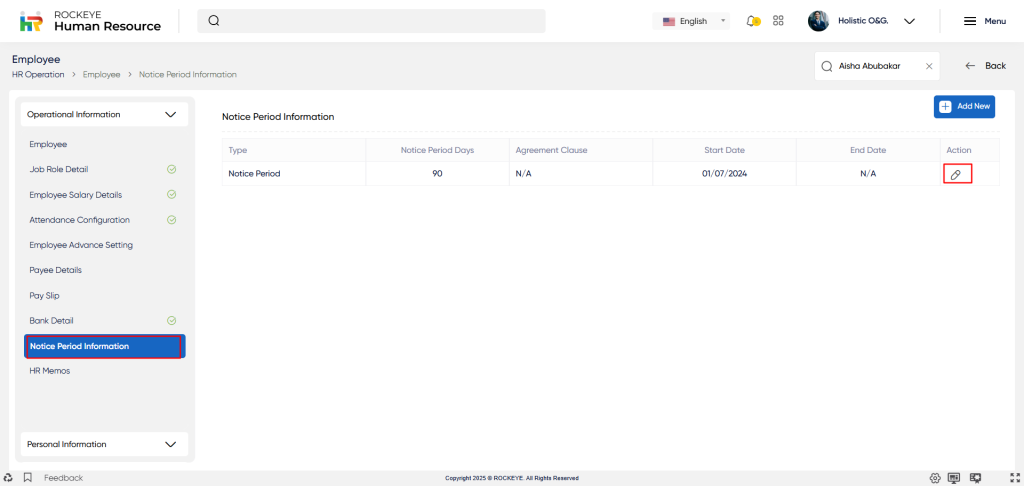
- Type*: Indicates the type of notice period record.
- Required Notice Period (Days)*: Number of days the employee is required to serve during their notice period.
- Attachment: Upload any supporting document related to the notice period, such as an acknowledgment letter.
- Salary Days*: Number of salary days to be considered during the notice period.
- Fixed Amount*: A pre-defined monetary amount associated with the notice period, if applicable.
- Clause*: Clause defining how the notice period compensation is calculated.
- Start Date*: The effective start date of the notice period.
- Status*: Current status of the notice period entry.
HR Memo
An HRMS memo is used to formally communicate important updates, actions, or observations related to an employee’s HR record—such as attendance issues, policy violations, compliance requirements, or general instructions. It serves as a documented reference and may include attachments for supporting evidence.
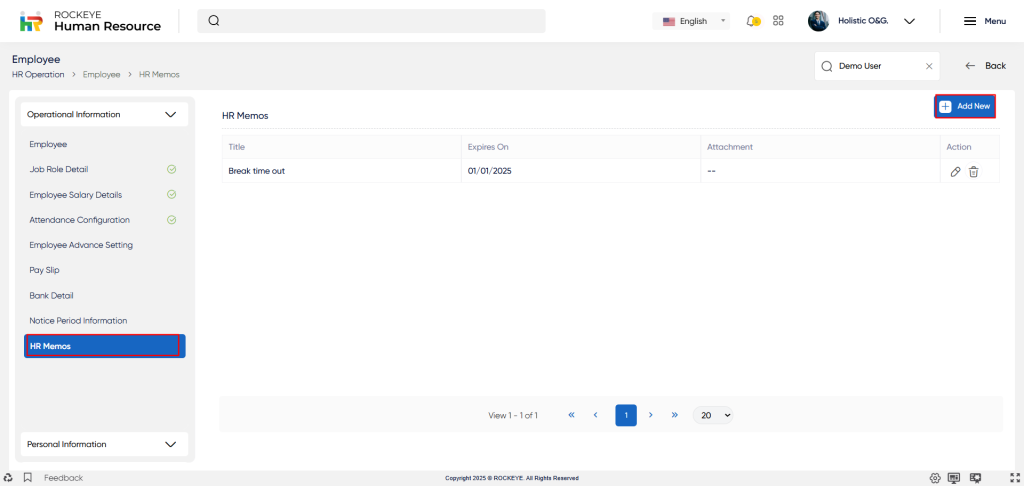
Below are field which user need to enter for the HR memo
- Title*: A brief and clear subject line summarizing the purpose of the memo.
- Expire On: The date after which the memo is no longer active or applicable.
- Attachment: Optional file upload to support the memo (e.g., scanned letters, reports).
Personal Information:
Personal information: This section is designed to capture essential background details of an employee. It supports HR in managing demographic profiles, statutory reporting, benefits eligibility, and diversity tracking.

Below are the fields typically included in an employee’s personal information form:
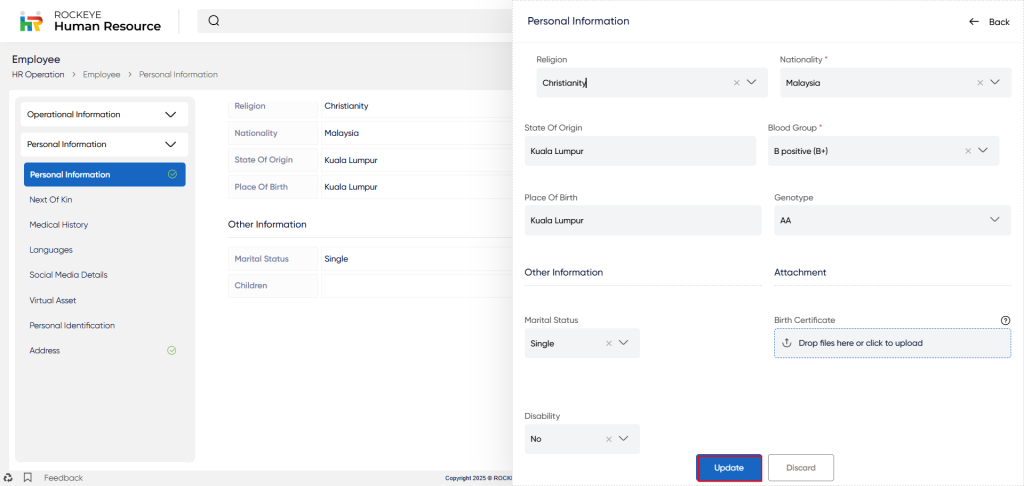
- Religion: Specifies the employee’s religious belief or affiliation. Useful for diversity reports and optional policy considerations.
- Nationality: Indicates the country of which the employee is a legal citizen. Important for legal documentation, visa processing, and compliance.
- State of Origin: Refers to the native state or province of the employee, often required for regional compliance or reporting in certain countries.
- Place of Birth: The specific city or town where the employee was born.
- Marital Status: Reflects the current marital status—e.g., Single, Married, Divorced, Widowed. Helps determine eligibility for certain benefits or allowances.
- Spouse Name: Captures the full name of the employee’s spouse (if applicable), often needed for dependent benefits and official records.
- Marriage Date: The date when the employee was married; helps verify marital status and calculate anniversary-related entitlements.
- Has Children: Indicates whether the employee has children. A checkbox or Yes/No field that may impact family-related benefits.
- Number of Children: The total number of dependent children, if any.
- Child Age Range: Specifies the age brackets (e.g., 0–5, 6–12, etc.) for each child—useful for schooling benefits or allowances.
- Has Disability: States whether the employee has a recognized disability (Yes/No). Supports diversity reporting and accessibility initiatives.
- Disability Type: Details the nature of the employee’s disability, if applicable
- Birth Certificate: Indicates whether a copy of the birth certificate has been submitted for verification purposes.
- Marriage Certificate: Confirms whether a marriage certificate has been uploaded or submitted (if married), typically for spouse benefit verification.
Personal Identification:
Used to verify an employee’s identity for HR, compliance, and administrative purposes. These documents can include legal and personal IDs.
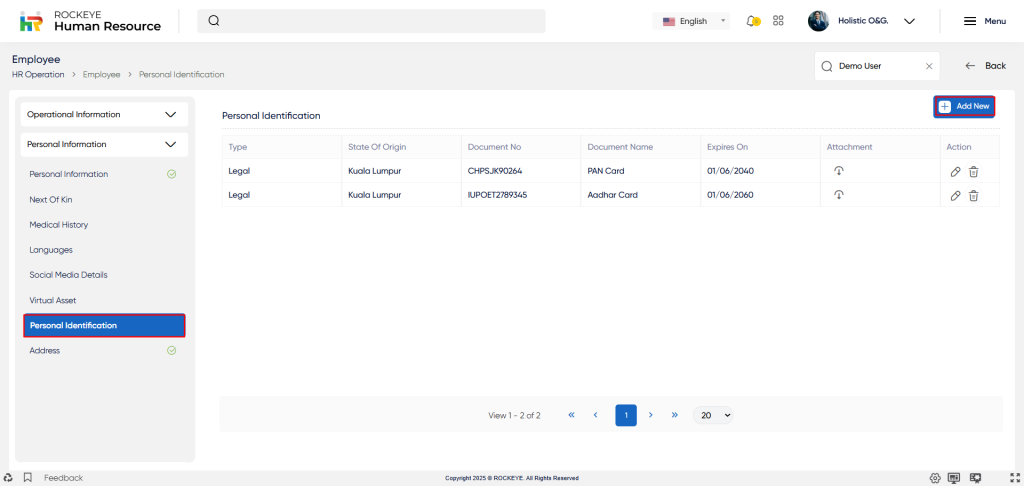
Below are the fields typically included in an employee’s personal identification document:
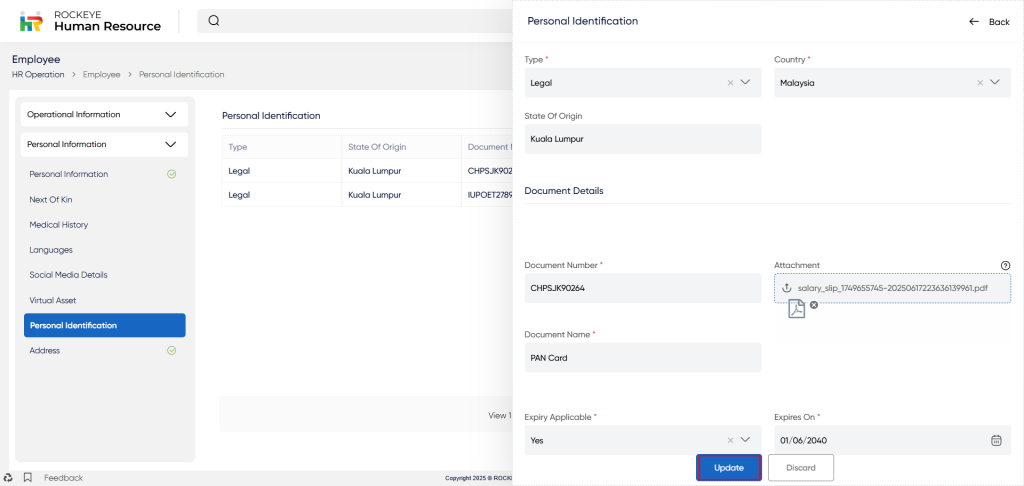
- Type*: This field specifies the type of identification document, such as a passport, driver’s license, or national identity card. It may also specify whether the document is considered legal, personal, or other.
- Country*: This field specifies the country where the identification document was issued.
- State of Origin: This field specifies the state or province where the identification document was issued.
Document Details
- Document Number*: This field specifies the unique identification number associated with the document.
- Document Name: This field specifies the name of the identification document.
- Attachment: This field specifies whether an electronic copy of the identification document has been attached to the employee’s record.
- Expiry Applicable*: This field specifies whether the identification document has an expiration date.
- Expires On*: If the identification document has an expiration date, this field specifies the date on which the document expires
Corresponding Address:
Employee corresponding address typically includes both permanent and temporary addresses
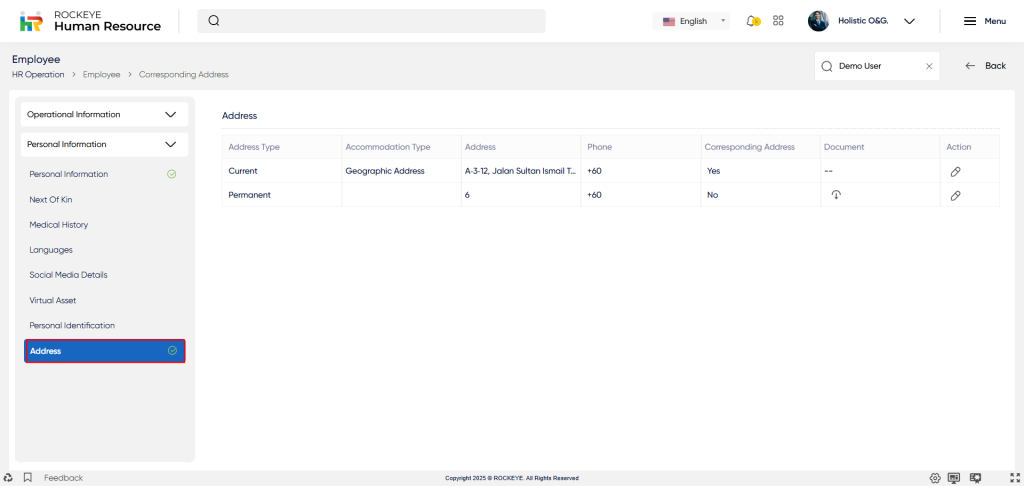
Below are the fields typically included in an employee’s corresponding address:
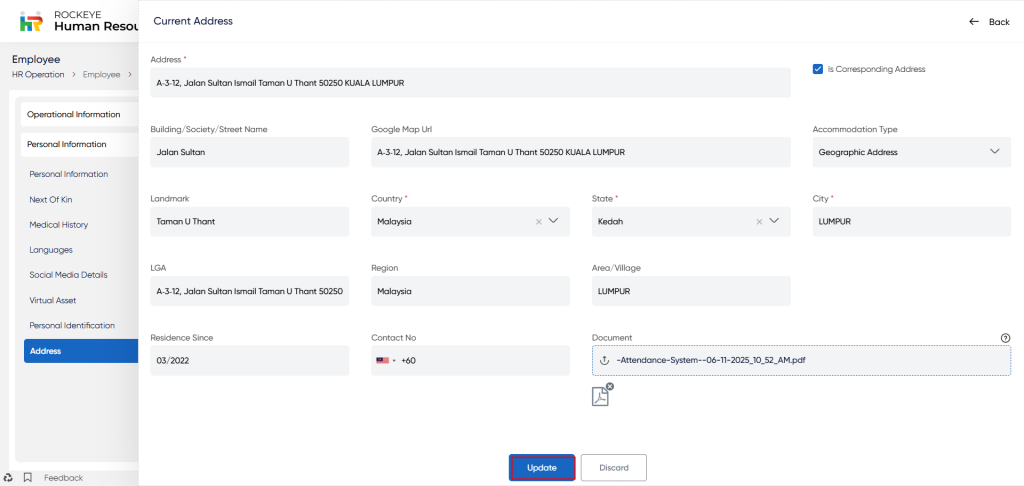
- Address*: Street address of the employee’s current residence.
- Landmark*: Nearby location to help identify the address.
- Country*: Country of residence.
- State*: State or province of residence.
- City*: City of residence.
- LGA: Local Government Area of residence.
- Region: Region or neighborhood of residence.
- Contact No.: Phone number linked to the permanent address.
- Document: Supporting document (e.g., utility bill, rental agreement).
- Address Type*: Nature of residence (e.g., rented, family-owned, self-owned).
- Corresponding Address: Alternate address used for communication.
Key Notes of Corresponding Address:
- If the Permanent and corresponding addresses are same, Both Options of ‘Is Permanent Address’ and ‘Is Corresponding Address’ can be checked
Next of kin: Captures emergency contact and beneficiary details of the employee’s next of kin, useful for HR, benefits, and insurance documentation.
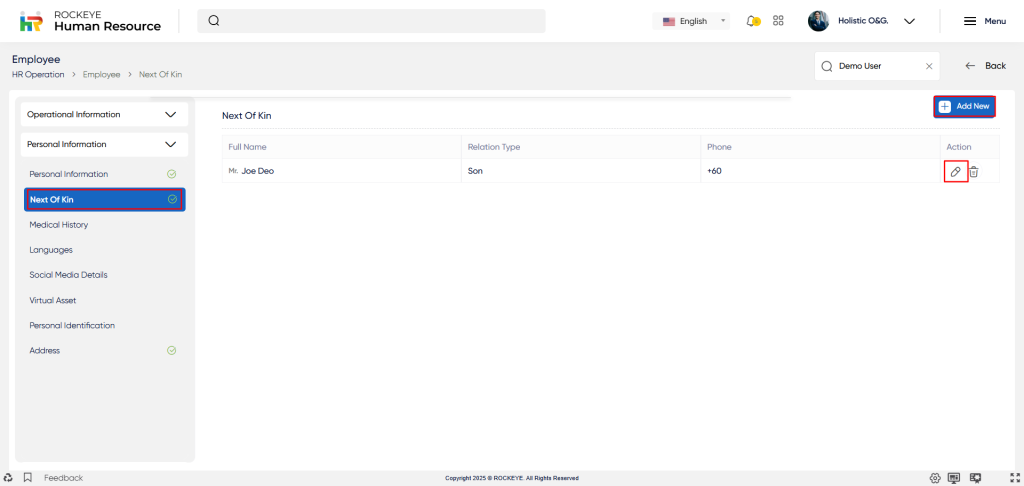
Below are the fields typically included in an employee’s corresponding address:
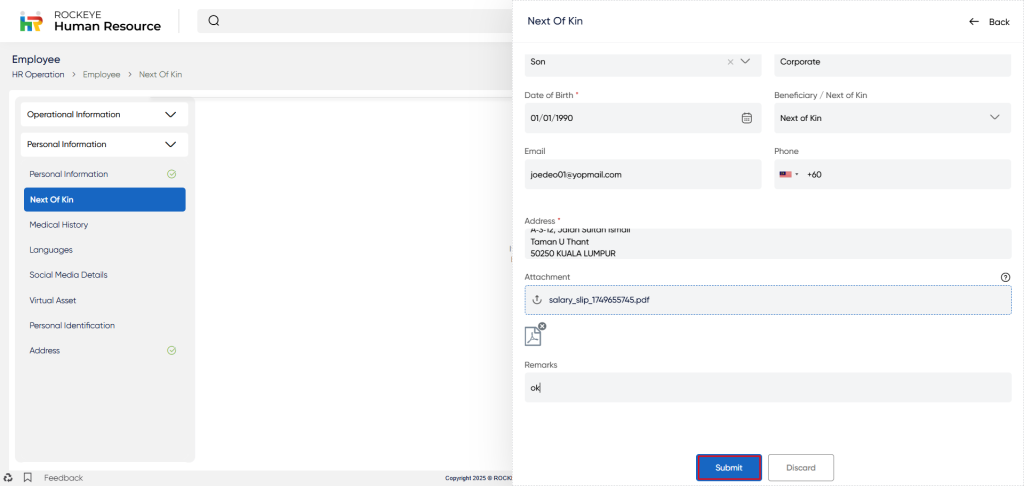
- Prefix*: Title used for addressing (e.g., Mr., Mrs., Ms.).
- Full Name*: Full legal name of the next of kin.
- Nominee Percentage: Share (%) of benefits allocated to this person.
- Relation Type*: Relationship to the employee (e.g., spouse, parent).
- Occupation: Current job or profession of the next of kin.
- Date of Birth: Birth date of the next of kin.
- Email: Contact email for the next of kin.
- Phone: Contact number.
- Address*: Full residential address.
- Attachment: Upload of supporting documents (e.g., ID, proof of address).
- Remarks: Additional notes or comments.
Key Notes of Next of Kin:
- Multiple next of kin records can be added for an employee. However, the total nominee percentage across all entries must not exceed 100%.
- If the combined percentage exceeds 100%, the system will prompt the HR to either
- Set the Nominee Percentage of a previous entry to zero, or
- Adjust the percentages so that the total allocation remains within 100% before adding a new Next of Kin record.
Academic Information:
Academic information is to collect educational details of an employee, including the highest degree or diploma they’ve earned and their major.
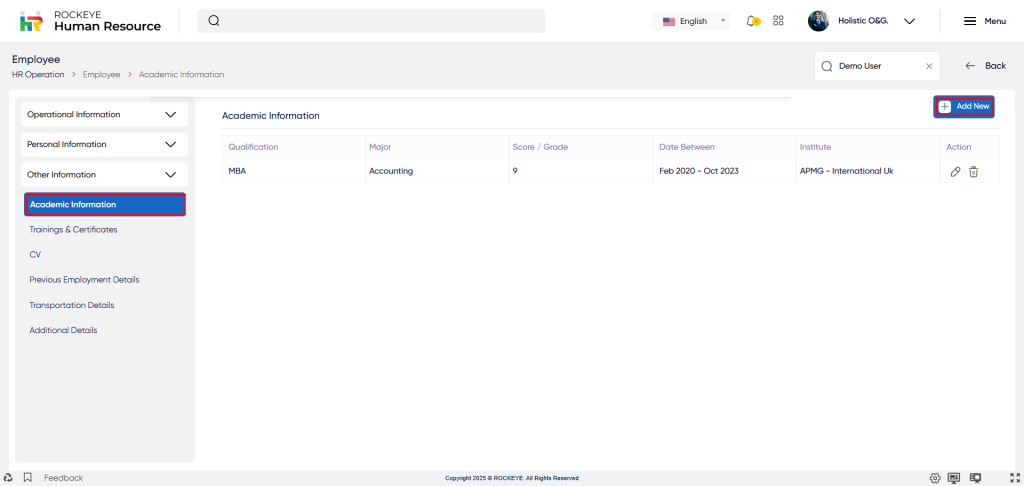
Academic information typically includes the following details:
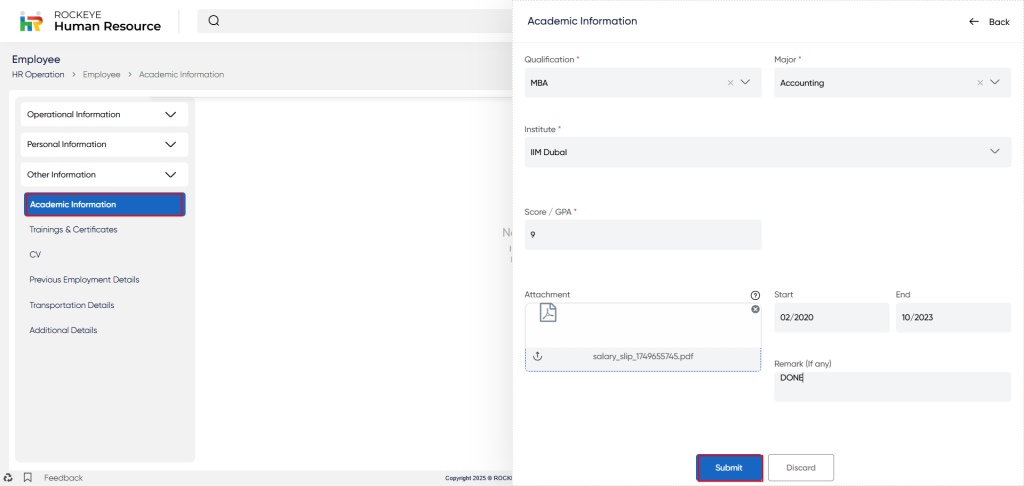
- Qualification*: Academic degree attained (e.g., Bachelor’s, Master’s).
- Major*: Field of study or specialization.
- Institute*: Name of the educational institution.
- Score/GPA*: Grade or GPA achieved.
- Attachment: Related document (e.g., certificate, transcript).
- Start: Month and year studies began.
- End: Month and year studies were completed.
- Remark (If any): Additional notes (e.g., awards, honors).
Training & Certificates:
Training and certificates are a record of an employee’s professional development and skill acquisition. This information is important for both the employee and the employer as it helps in assessing the employee’s competencies and identifying areas where they need further training.
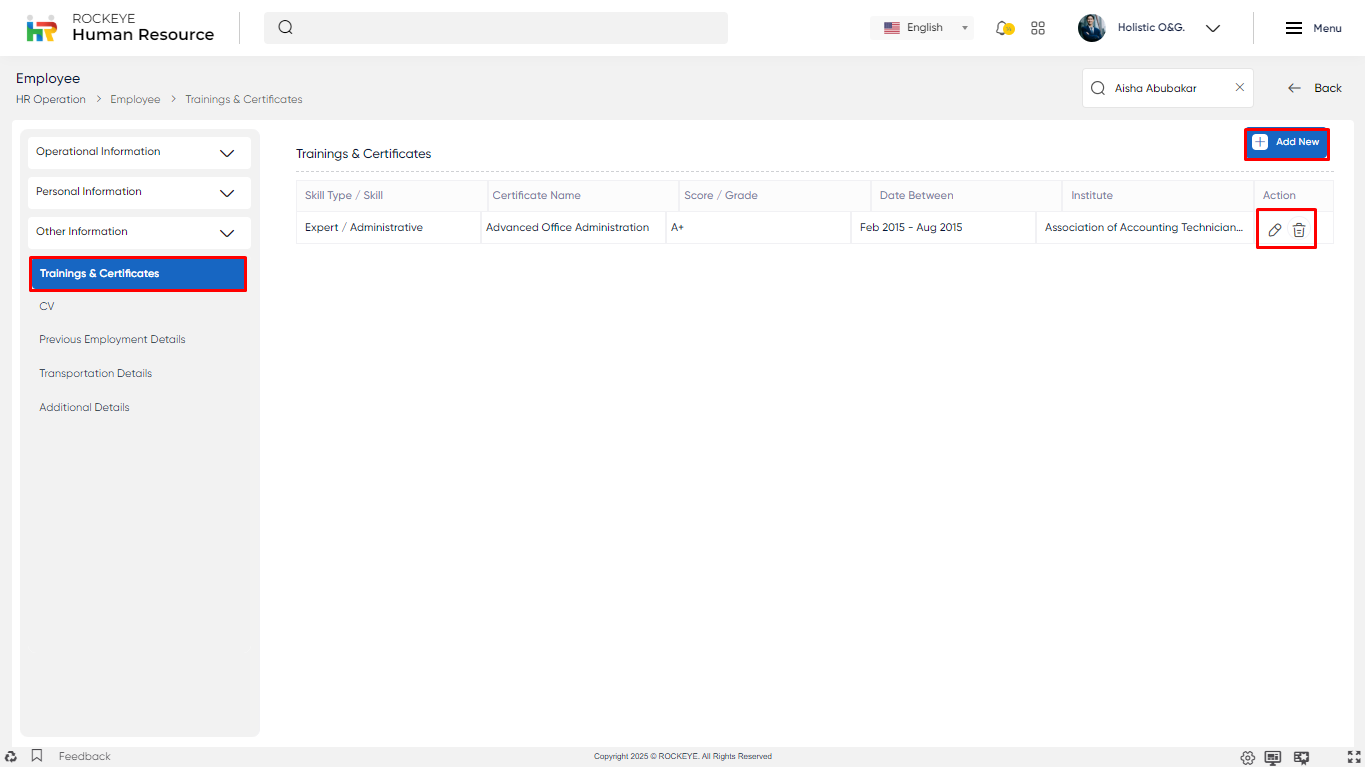
Below are some of the fields that could be included in a record of an employee’s training and certificates:

- Skill Type*: Indicates the proficiency level (e.g., Beginner, Intermediate, Expert).
- Skill*: Specifies the particular skill or area of expertise.
- Certified*: States whether the employee holds a valid certification for the skill.
- Certificate Name*: Name or title of the certification obtained.
- Institute: Organization or institute that issued the certification.
- From: Start date of the certification or training.
- To: Completion or expiry date of the certification.
- Score / Grade: Marks, grade, or rating achieved in the certification.
- Document: Attachment field to upload a copy of the certification.
- Remark: Additional comments or notes regarding the skill or certification.
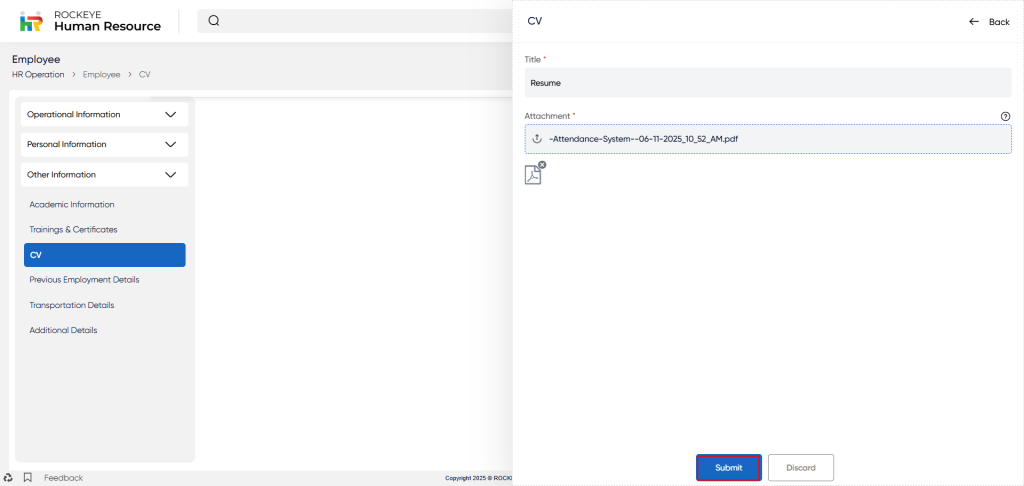
CV:
A CV (curriculum vitae) is a document that summarizes a person’s academic and professional achievements and experiences. It typically includes details such as education, work experience, skills, publications, and other relevant information.
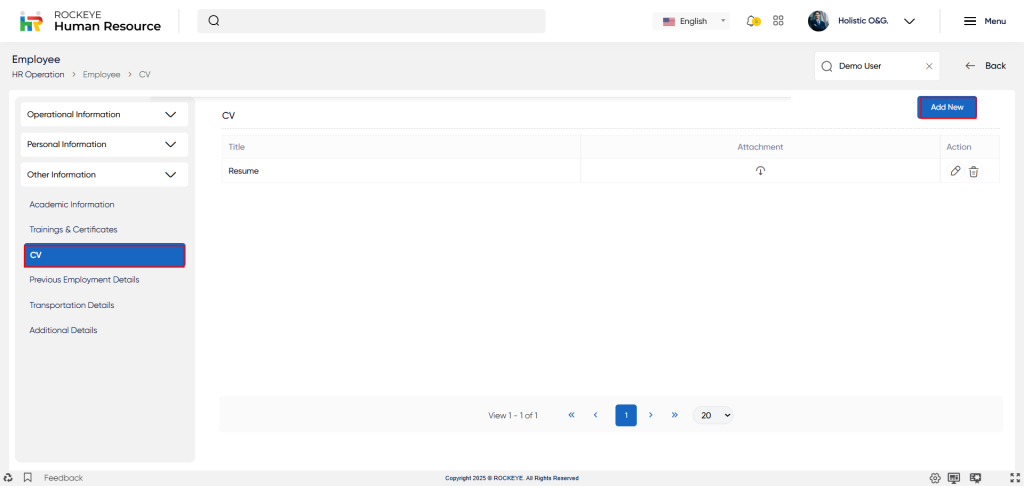
- Title*: Name of the CV, typically the applicant’s name or a descriptive document title.
- Attachment*: Upload field for the CV file or related document.
Medical History:
Medical tests refer to a series of tests that are conducted to assess an individual’s overall health and detect any underlying medical conditions. Some common medical tests include blood tests, X-rays, MRIs, ECGs, etc.
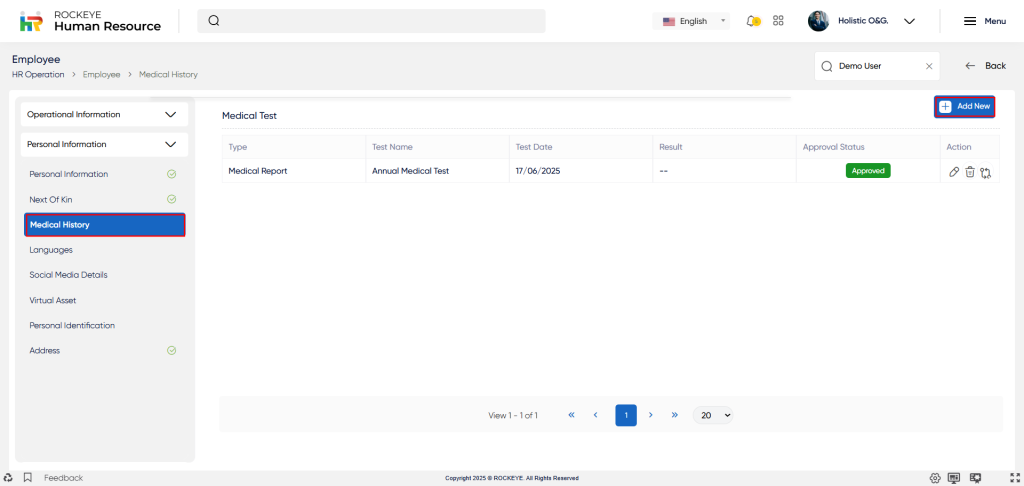
Below are some of the fields that could be included in a record of an employee’s Medical History
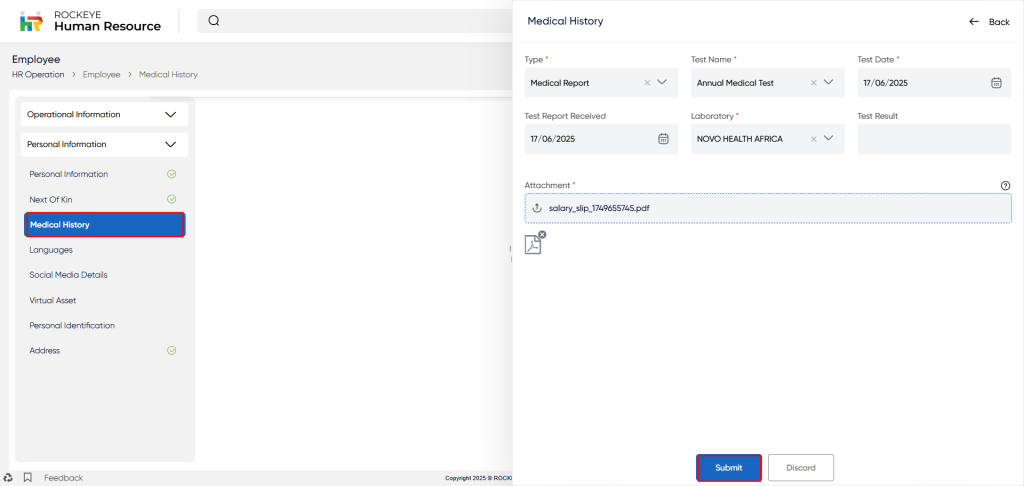
- Type*: Category of medical test.
- Test Name*: Specific test conducted (e.g., CBC, lipid profile, chest X-ray).
- Test Date*: Date the test was performed.
- Test Report Received: Status of report receipt (Yes/No).
- Laboratory: Name of the lab where the test was done.
- Test Result: Outcome or values from the test.
- Attachment: Related files like reports or images.
Languages:
The language section typically captures the employee’s proficiency in different languages.
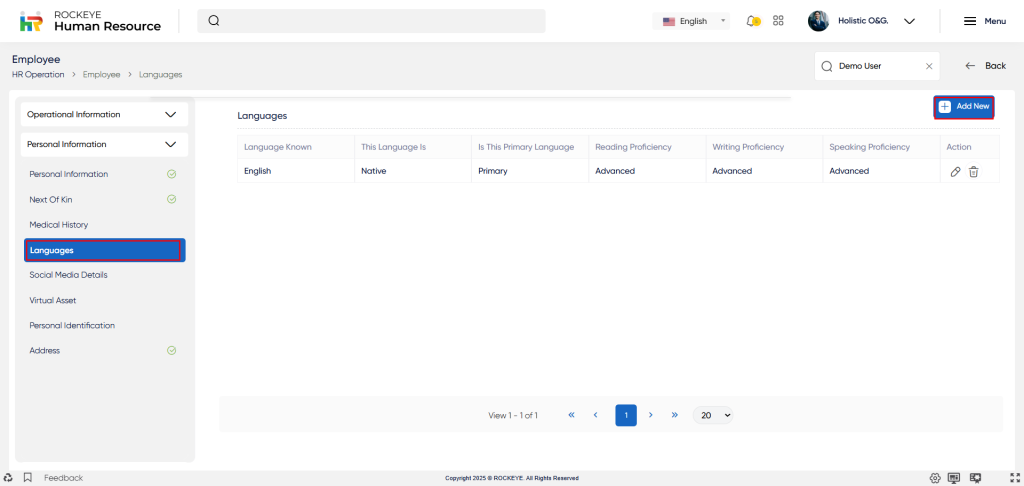
Below are the common fields used to describe the employee’s language skills:
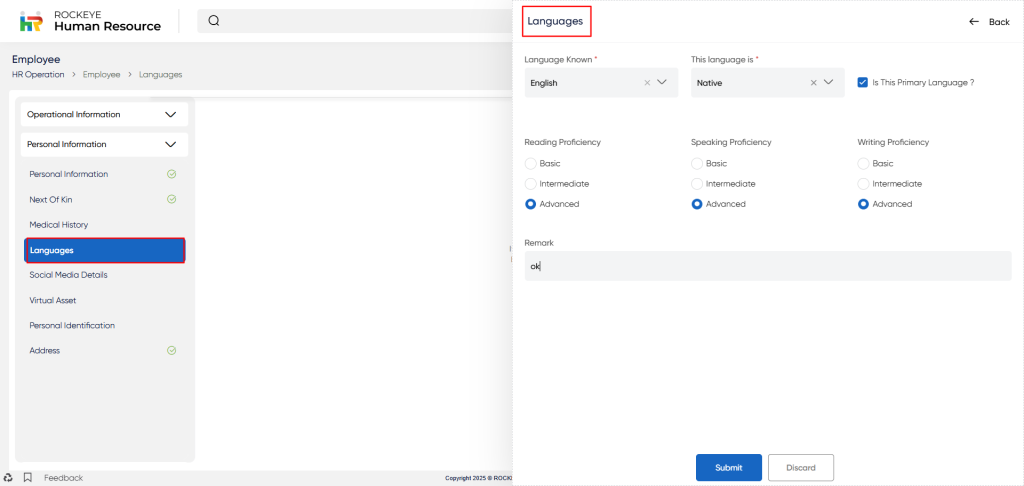
- Language Known*: Language(s) the employee is familiar with.
- This Language Is*: Type of language (native, foreign, tribal).
- Is This Primary Language: Marks if it’s the employee’s main language.
- Reading Proficiency: Reading skill level (basic, intermediate, advanced).
- Speaking Proficiency: Speaking skill level (basic, intermediate, advanced).
- Writing Proficiency: Writing skill level (basic, intermediate, advanced).
- Remark: Additional notes about language skills.
Key Notes of Languages:
- Multiple Languages can be added known by an Employee using Add New option
Virtual Asset:
Virtual access refers to the digital tools and communication channels provided by the employer to the employee for work-related communication and tasks.
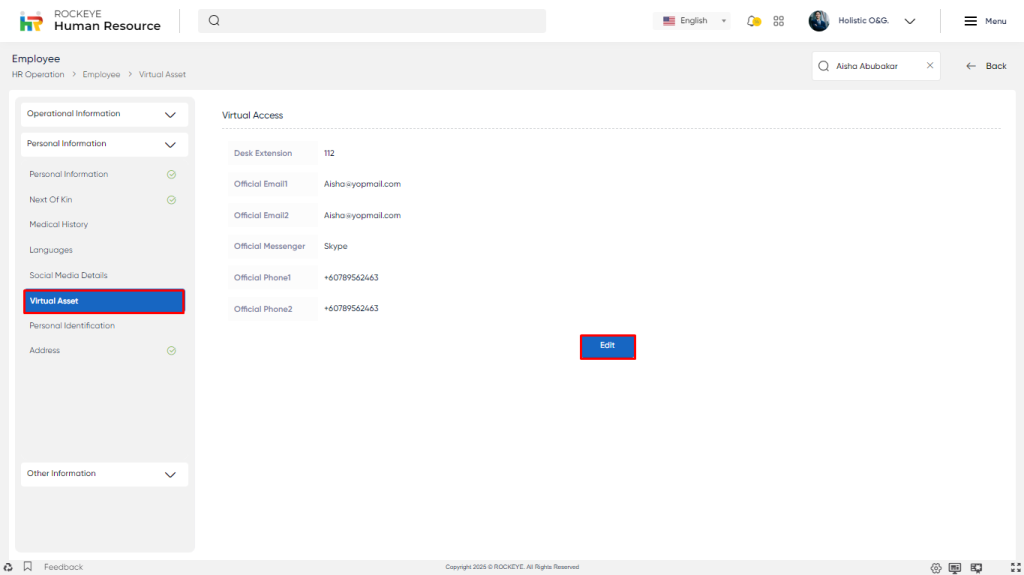
The following are the details associated with Virtual Access:
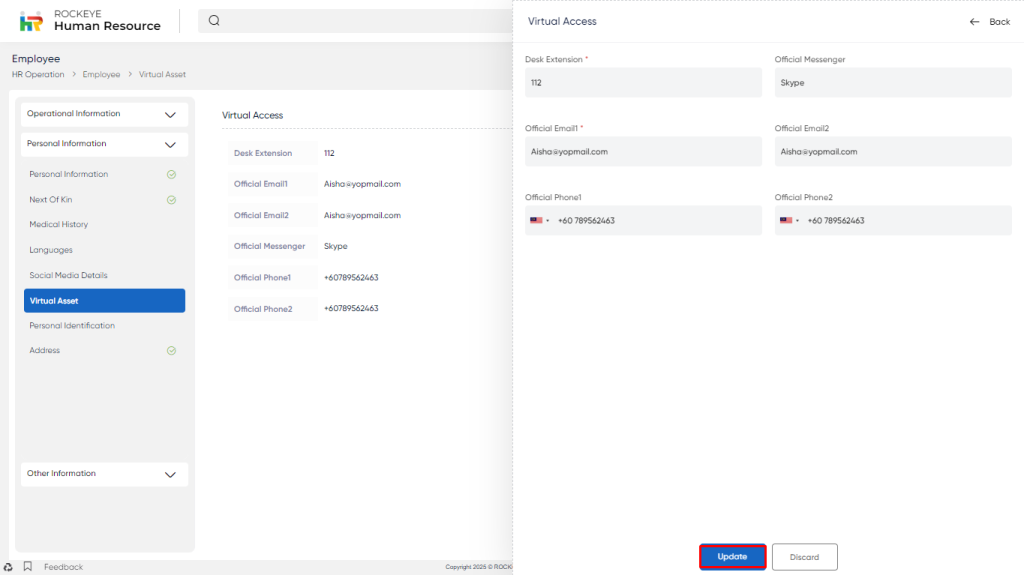
- Desk Extension*: Employee’s internal extension number (e.g., 112).
- Official Messenger: Platform used for official messaging (e.g., Skype).
- Official Email 1*: Primary official email address.
- Official Email 2: Alternate official email address.
- Official Phone 1: Primary official contact number.
- Official Phone 2: Alternate official contact number.
Previous Employment Details
This section captures key details of the employee’s previous employment, including the employer’s name, duration of service, last drawn salary, and designation held. It also includes information about the reporting senior and the reason for leaving, helping to provide a clear snapshot of the employee’s professional background.
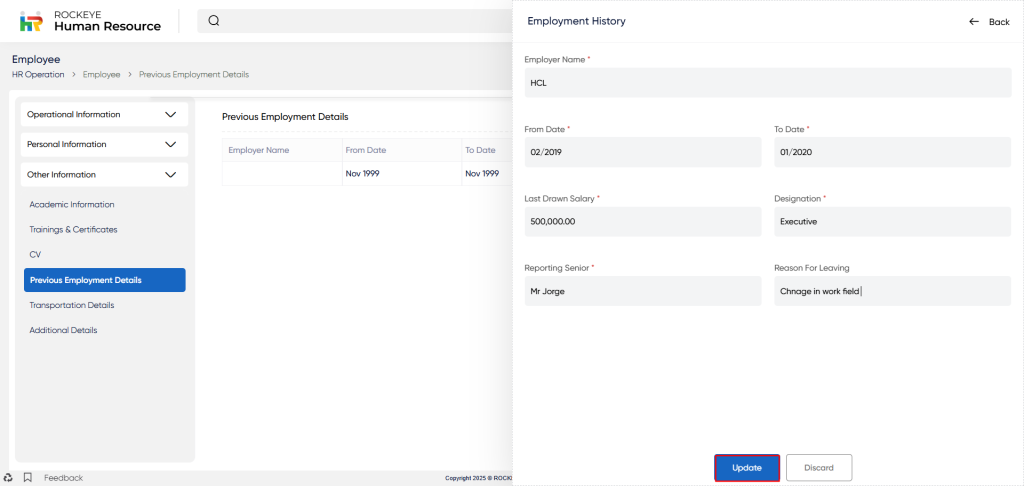
- Employer Name*: Name of the previous organization.
- From Date*: Start date of employment.
- To Date*: End date of employment.
- Last Drawn Salary*: Final salary received (e.g., 0.00).
- Designation*: Job title held.
- Reporting Senior*: Name of the immediate supervisor.
- Reason for Leaving: Explanation for leaving the organization.
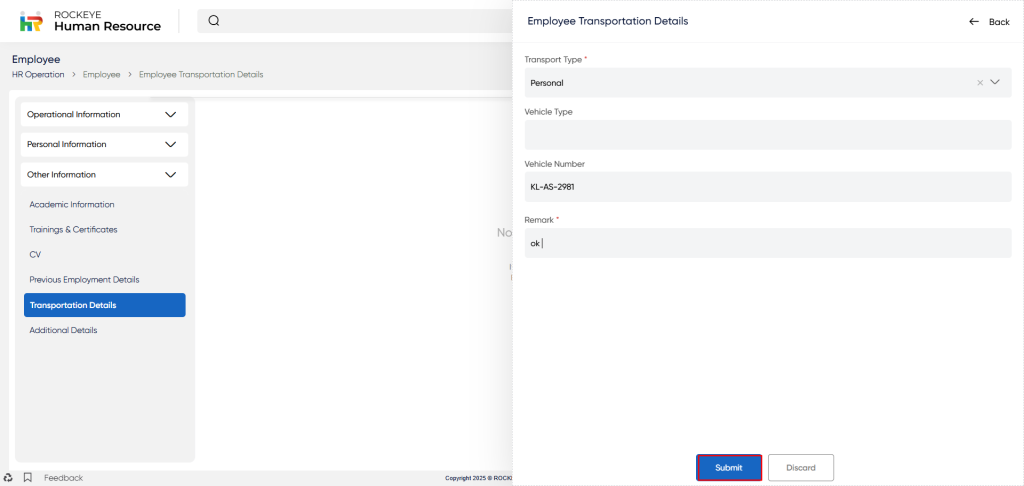
Transportation Details:
This section records the employee’s mode of transport, specifying whether it's personal or company-provided, along with details like vehicle type, registration number, and any relevant remarks.
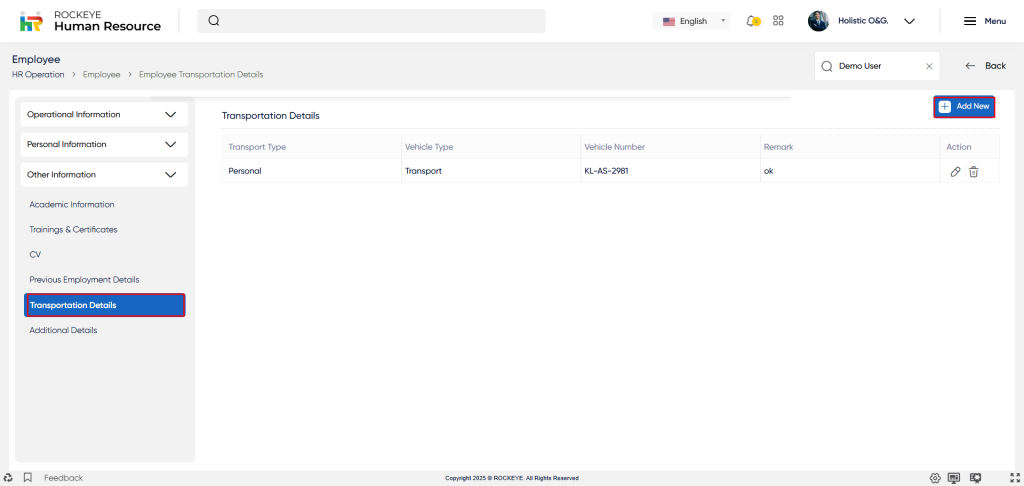
- Transport Type*: Indicates if transport is personal or company-provided.
- Vehicle Type: Type of vehicle used (e.g., Car, Bike).
- Vehicle Number: Registration number of the vehicle.
- Remark*: Additional notes related to the vehicle.
Additional Details:
This section captures emergency contact details, including the primary and secondary contact persons, their phone numbers, and relationship to the employee, ensuring quick communication in case of emergencies.
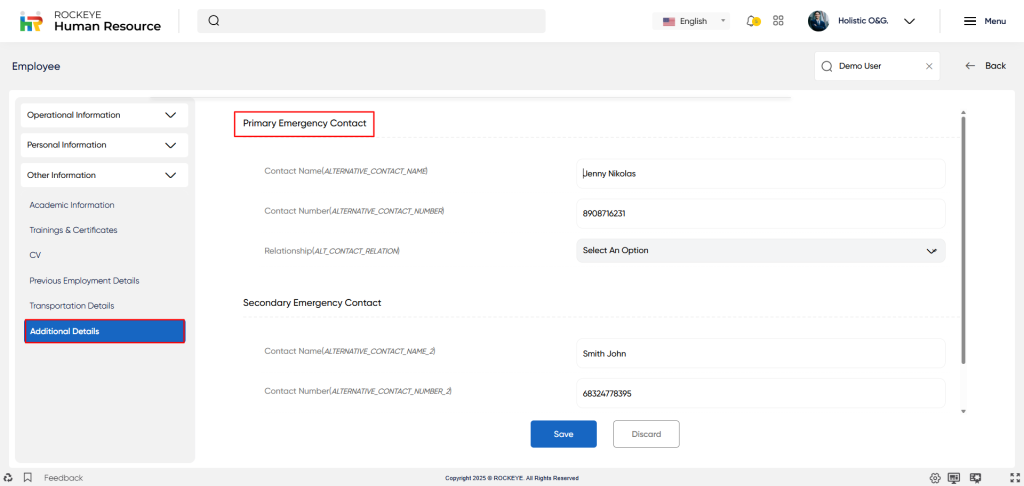
- Primary Emergency Contact:
- Contact Name: Name of the main person to contact in case of an emergency.
- Contact Number: Phone number of the primary emergency contact.
- Relationship: Relationship of the contact to the employee (e.g., spouse, parent).
- Secondary Emergency Contact:
- Contact Name: Name of the backup person to contact if the primary is unreachable.
- Contact Number: Phone number of the secondary emergency contact.
- Relationship: Relationship of the secondary contact to the employee.
Key Notes:
- Attendance Code gets generated only if some important details like Date of Joining, Department, Employee Type is updated in system
- Job Status as Notice Period or Exit Job status is not to be updated manually from Employee Registration Module
- If the user clicks on the Add New button, then the user will not be able to go and update the different sections visible on the left screen.