Introduction/Purpose
The trip feature in the Smart Tracking system is designed to facilitate and streamline the process of setting up and managing all the trips created in the system. Users can view past trips, create new trips and update the details for upcoming trips.
The purpose of the trips feature is to organize and mange the various operations related to the trips.
Dependencies
- System Performance: System should respond properly to save the trips details in DB.
- Location Data: Users must have added the locations into the system to create a trip.
- Routes: Users must have added routes into the system. To create trips, users select routes from the added routes in the DB.
- Vehicle: Users must have added vehicles into the system. To create trips, users select vehicles from the added vehicles in the DB.
- Driver: Users must have added drivers into the system. To create trips, users assign drivers from the added drivers in the DB.
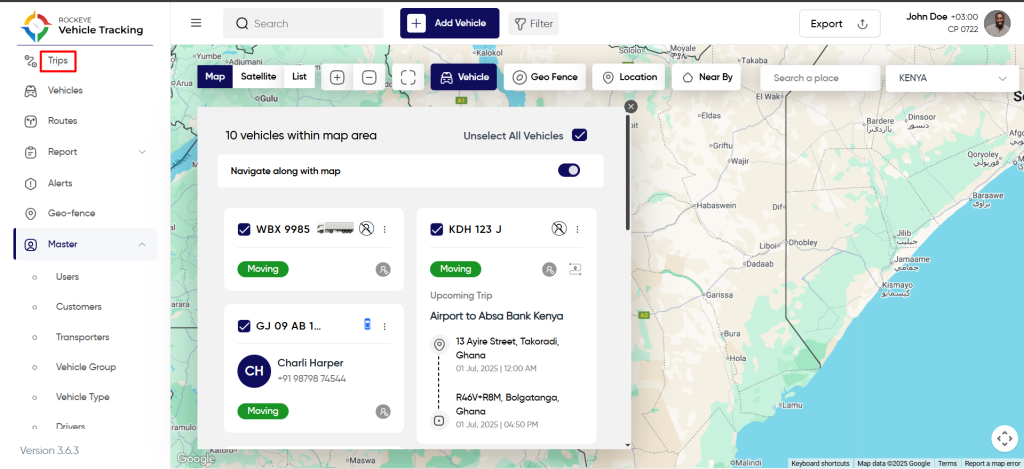
How To Navigate
Side Menu >> Trips
The navigation to access the trips typically involves the following steps:
Click on the Trips icon: On clicking Trips from the side navigation menu, the user is redirected to trips listing.
Trips Listing
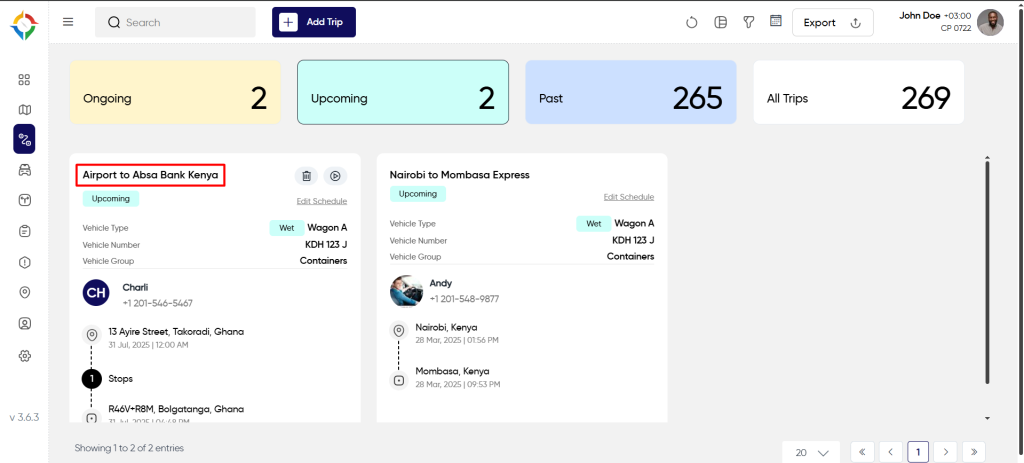
Admin will be able to view trips details in the trips listing page. Admin will be able to view the following sections in the trip listing page.
Ongoing Trips
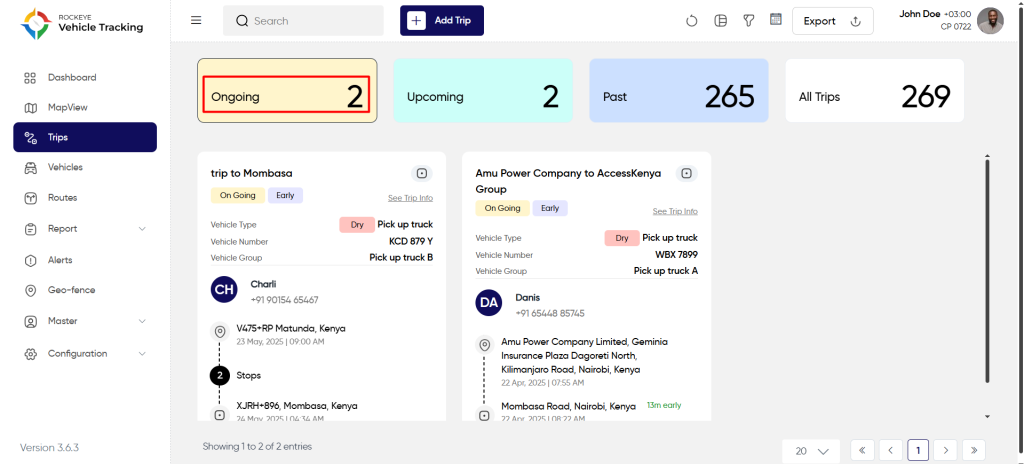
Here, the user will be able to view the following information from the ongoing trip section as below :
- Trip Name
- Trip Status
- Alert status
- Vehicle Details
- Driver details
- locations
Upcoming Trips :
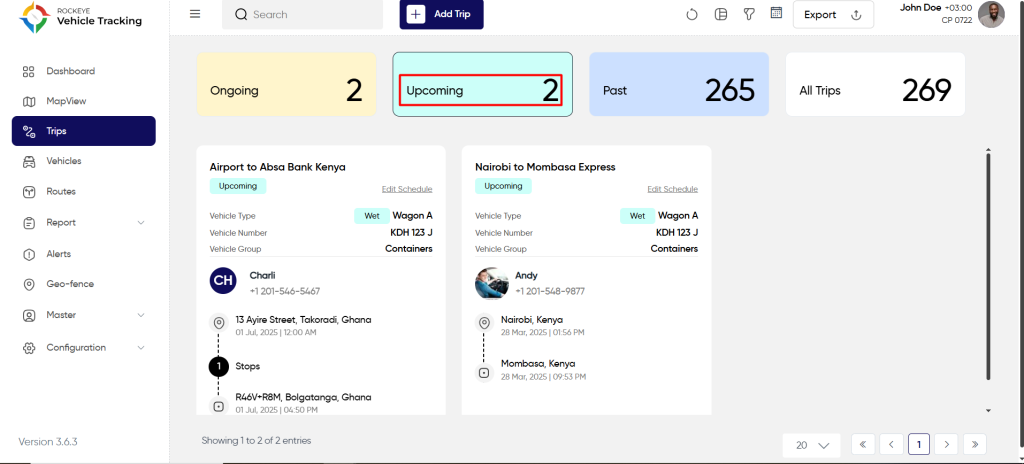
Here, the user will be able to view the following informations from the upcoming trips section as below :
- Trip Name
- Trip Status
- Alert status
- Vehicle Details
- Driver details
- locations
Past Trips :
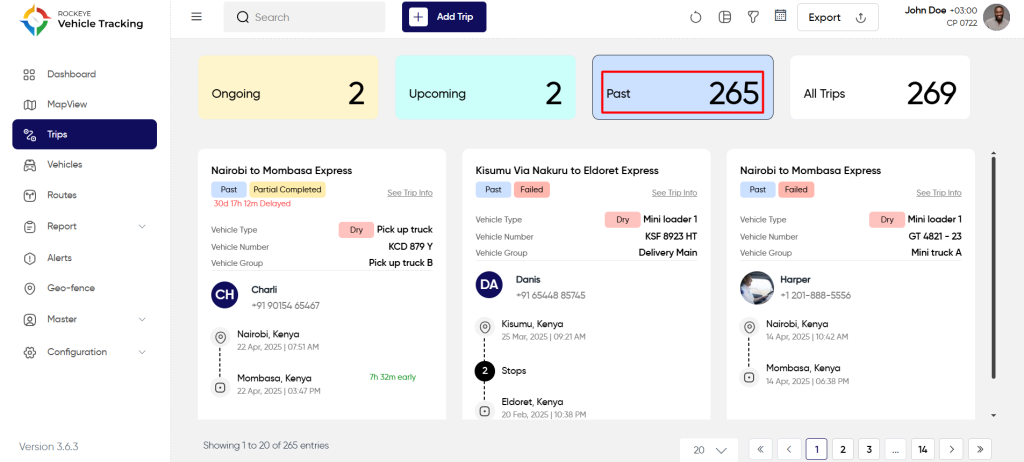
Here, the user will be able to view the following information from the past trips section as below :
- Trip Name
- Trip Status
- Trip completion status
- Trip timeline (delay or not)
- Vehicle Type
- Vehicle Number
- Vehicle Group
- Cargo Type
- Driver details
- locations
All Trips :
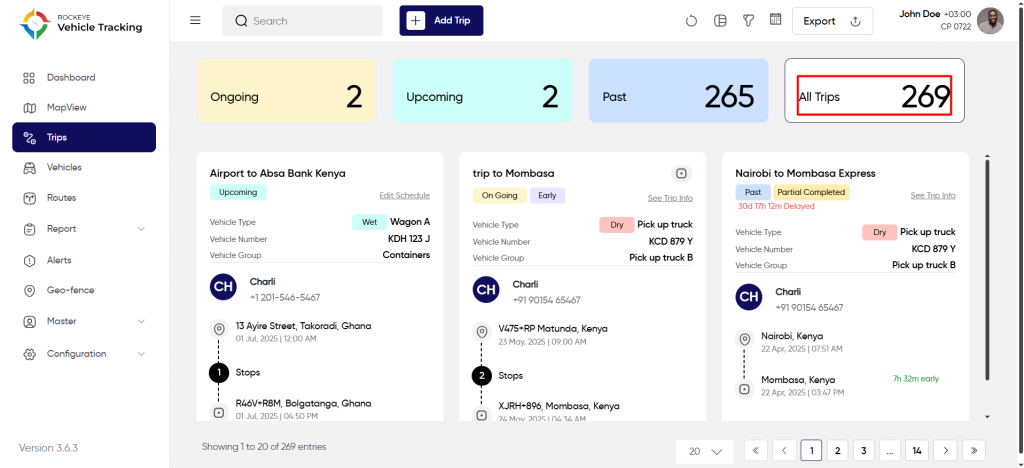
Here, the user will be able to view the following information from the All section as below :
- Trip Name
- Trip Status
- Trip completion status
- Trip timeline (delay or not)
- Vehicle Type
- Vehicle Number
- Vehicle Group
- Cargo Type
- Driver details
- locations
- User will be able to view the allrelated trips from this section.
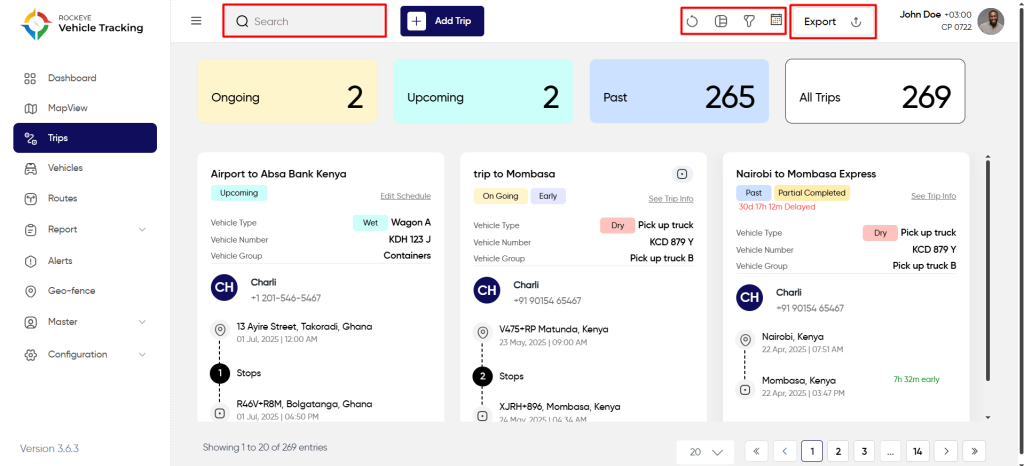
Users will be able to perform the various operations:
- Refresh
- Switch View
- Filter
- Calender Filter
- Export
- Search
Create Trips
Users will be able to schedule the vehicle trip using the create trips feature. Once the trip is created, users can track the vehicle on the route and get the respective alert notifications.
To create trip, Follow the below steps:
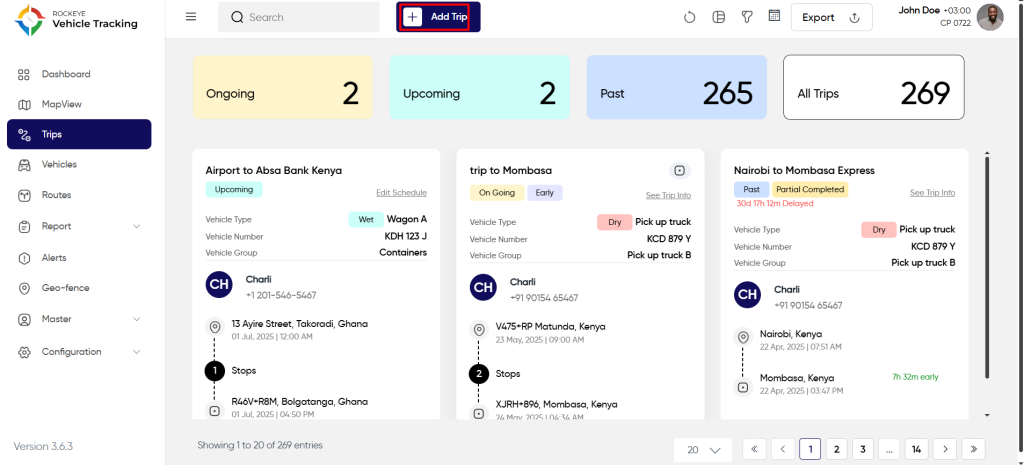
Step 1: Redirect to the trip list screen. To know how to reach the trip list, follow the referred section Trips List.
Step 2: Click on the “Add Trip” button.
Step 3: Enter trip details as shown in below steps.
Step 3.1: Enter “Trip Name” and select “Start Time” as shown below.
Step 3.2: Select previously added route from the “Route” drop list and view the route on the map. Users can even search and add locations manually into the origin, stoppages and destination fields.
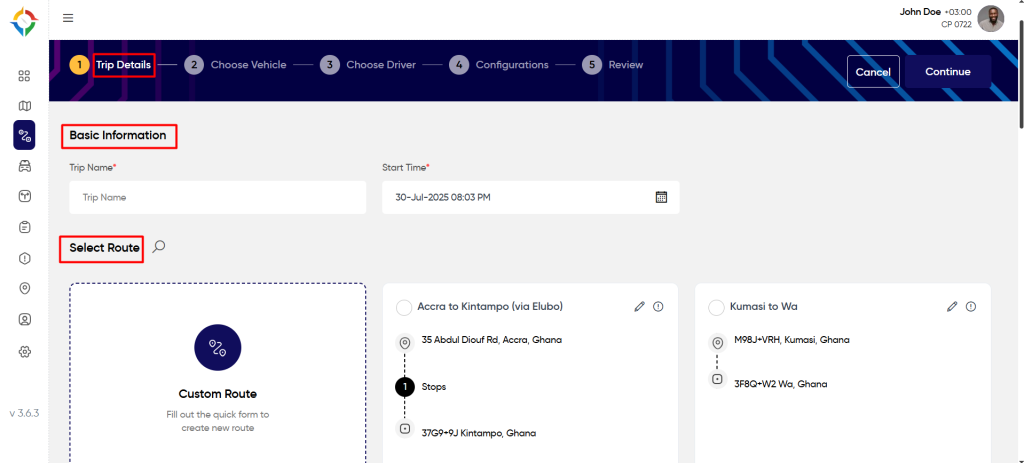
Step 3.3: Once the trip details are filled, click on the “Continue” button to choose the vehicle for the trip.
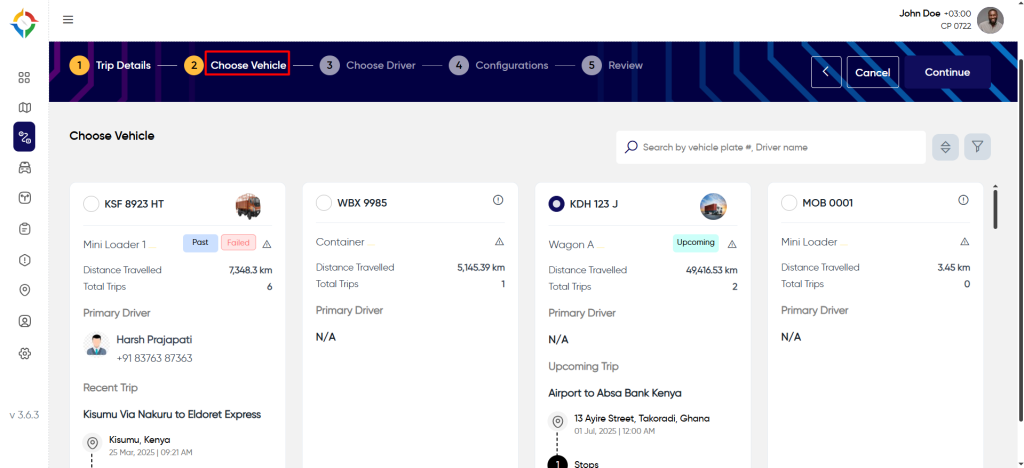
Step 4: Choose the most appropriate vehicle for the trip by searching / filtering the vehicles as shown in below steps
Step 4.1: Search for the vehicle and select the most suitable vehicle by clicking on the vehicle tile as shown below
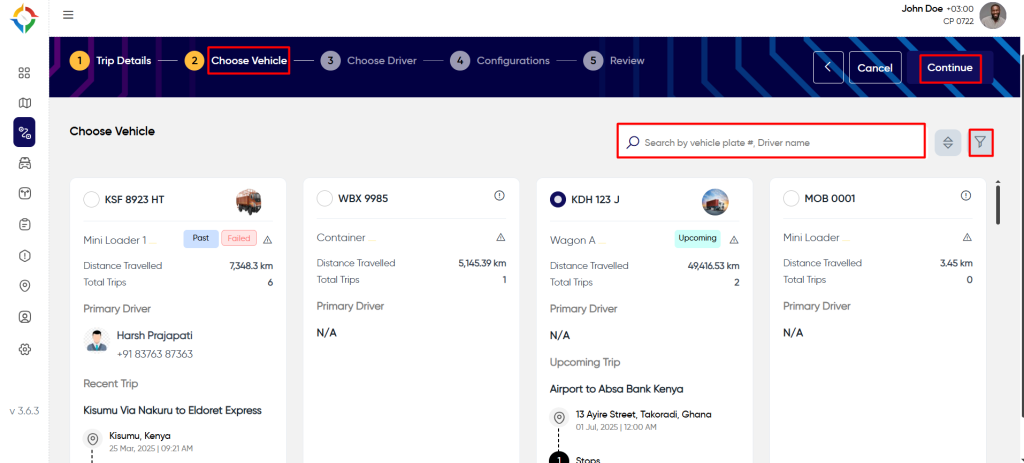
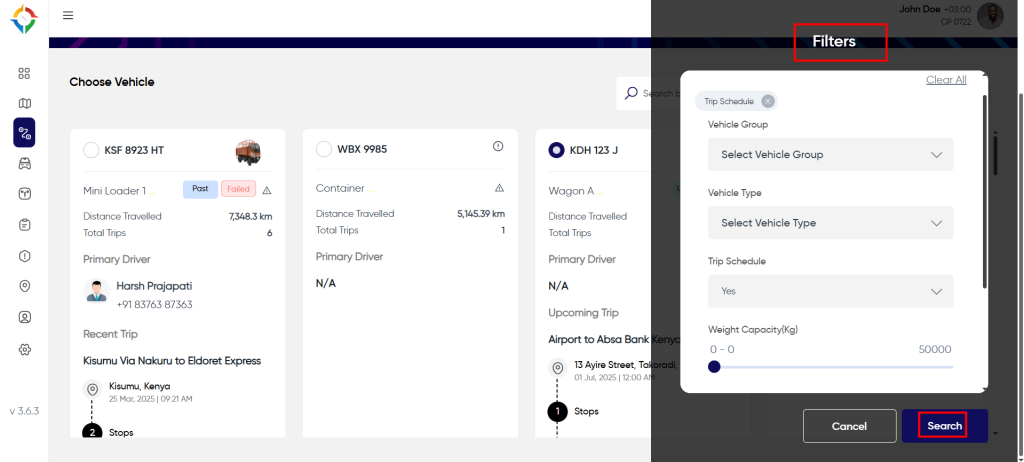
Step 4.2: Users can even filter the vehicle by clicking on the filter button. Select the preferable filter and click on the “Search” button as shown below.
Step 4.3: Once the vehicle is selected, click on the “Continue” button to save the vehicle for the trip and redirect to the “Choose Driver” step.
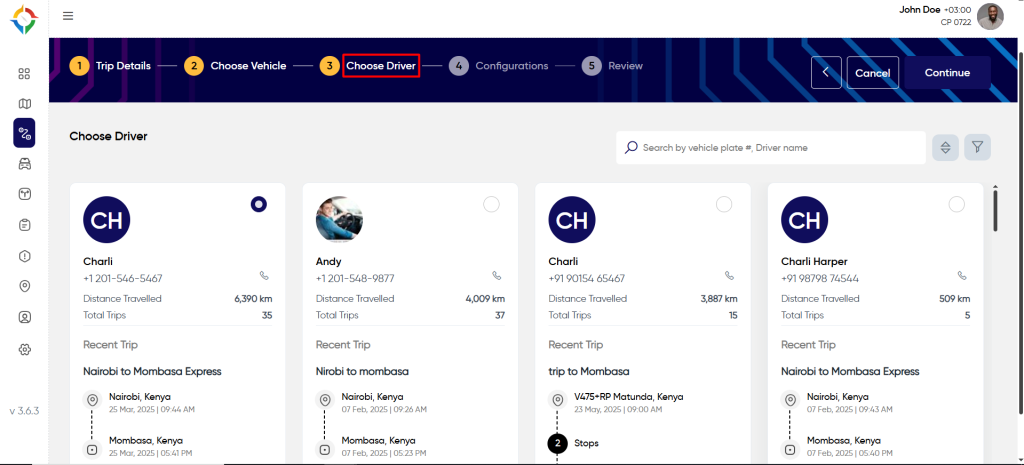
Step 5: Choose driver step will be optional. The primary driver which is by default assigned with the vehicle will be assigned the trip if no other driver is selected. If one driver is selected, then the trip will get assigned to the selected driver only.
Choose the most appropriate driver if required for the trip by searching / filtering the drivers as shown in below steps
Step 5.1: Search for the driver and select the most suitable driver by clicking on the driver card as shown below
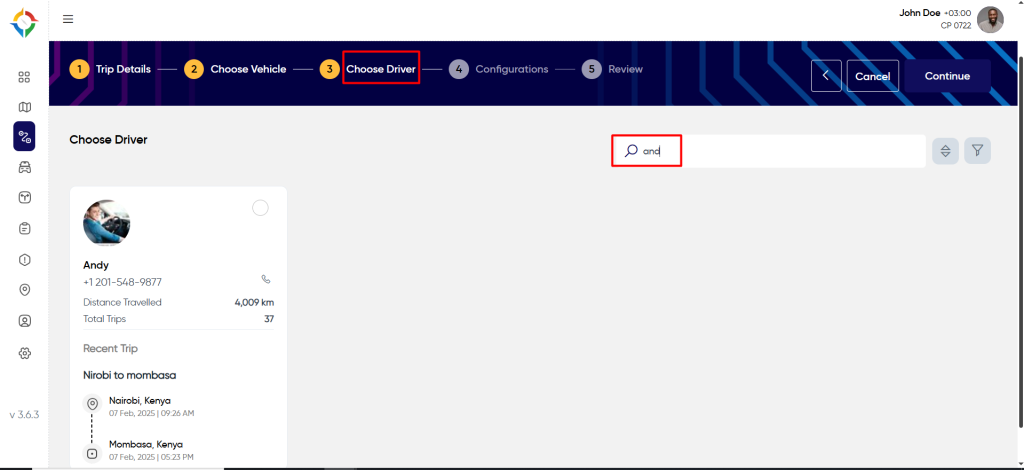
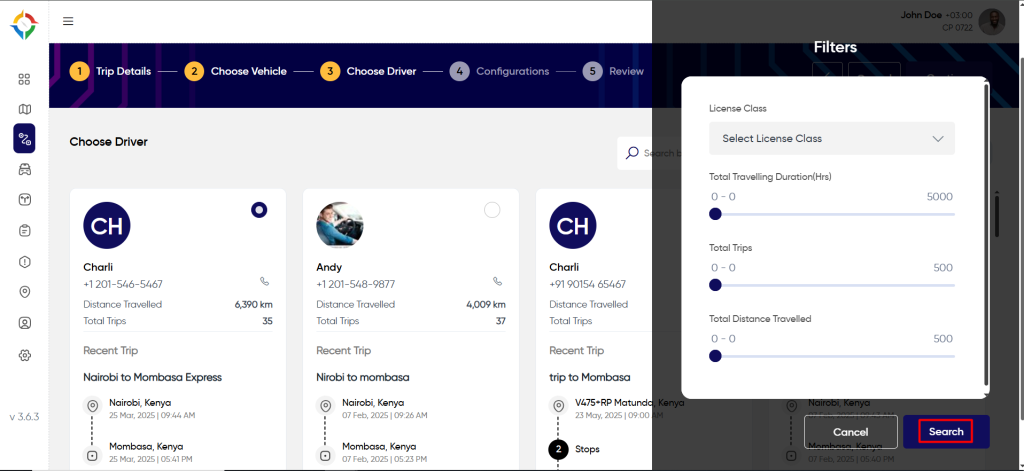
Step 5.2: Users can even filter the drivers by clicking on the filter button. Select the preferable filter and click on the “Show Drivers” button as shown below.
Step 5.3: Once the driver is selected, click on the “Continue” button to save the driver for the trip and redirect to the “Configurations” step.
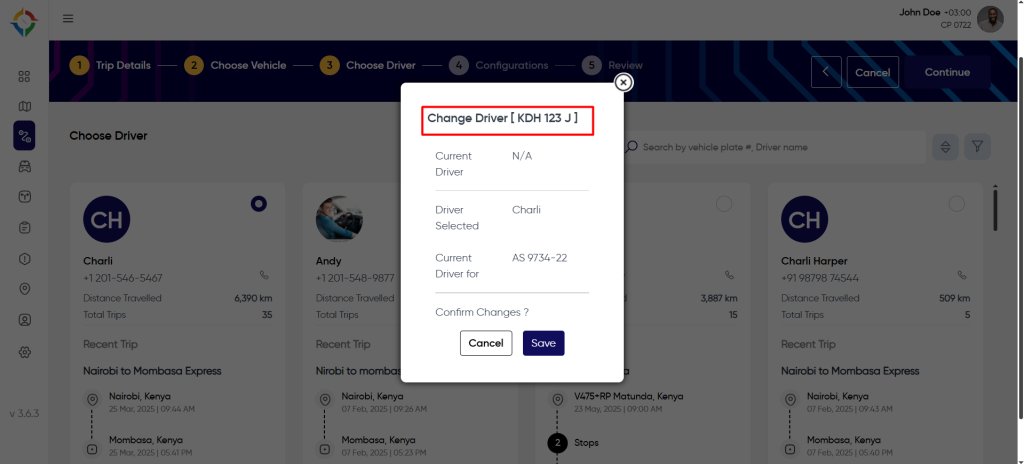
Note:
If the selected driver is not the current driver of the selected vehicle, then users will get a popup to confirm and get the option to save the current driver for the vehicle.
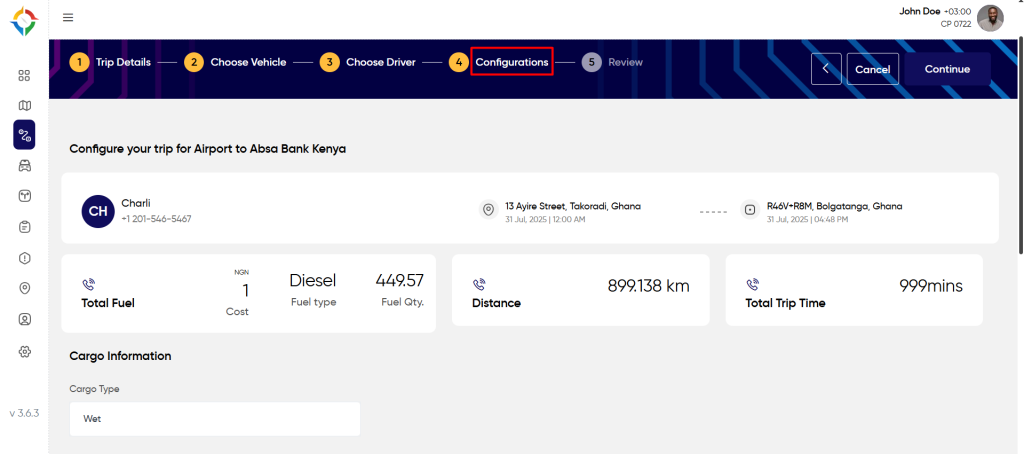
Step 6: You need to enter the required details of configurations to successfully create the trip as shown in below steps.
Step 6.1: Enter the “Auto End Trip” duration after which the trip will automatically end if the trip end time has been reached.
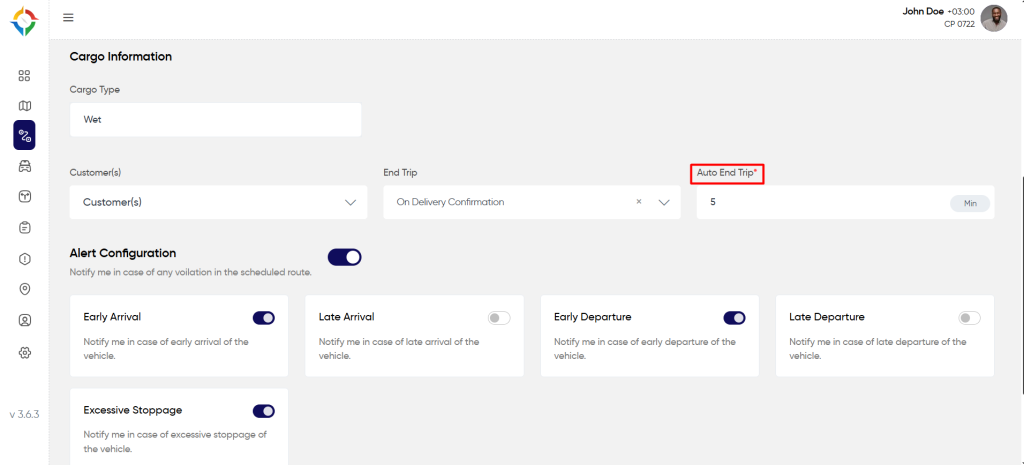
Step 6.2: Select “Alert Settings” if the user wants to receive alerts for the trip. Keep it unselected if you do not want to receive any trip alerts.
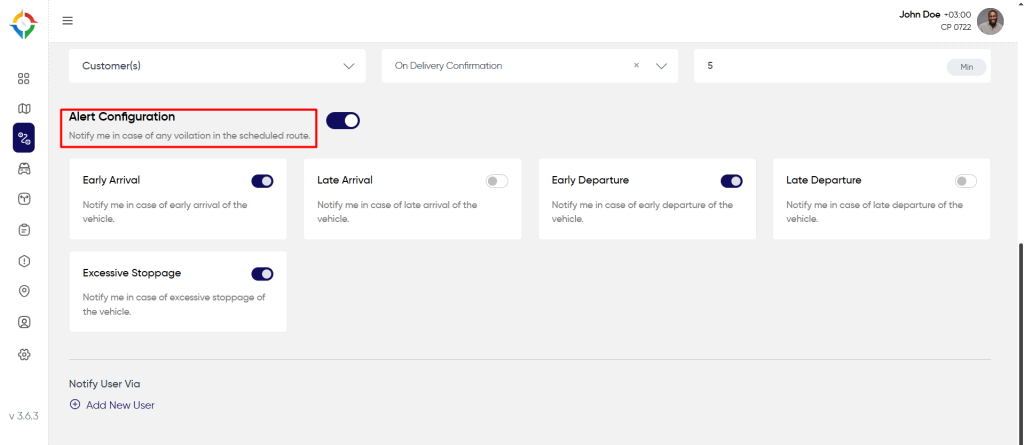
Step 6.3: Select the alerts for locations for which the system will send the notifications to the added users in the alert settings.
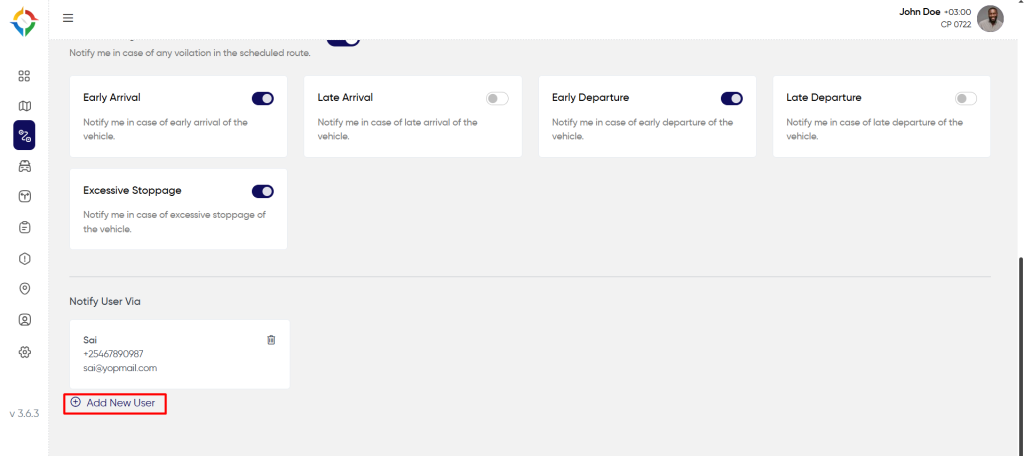
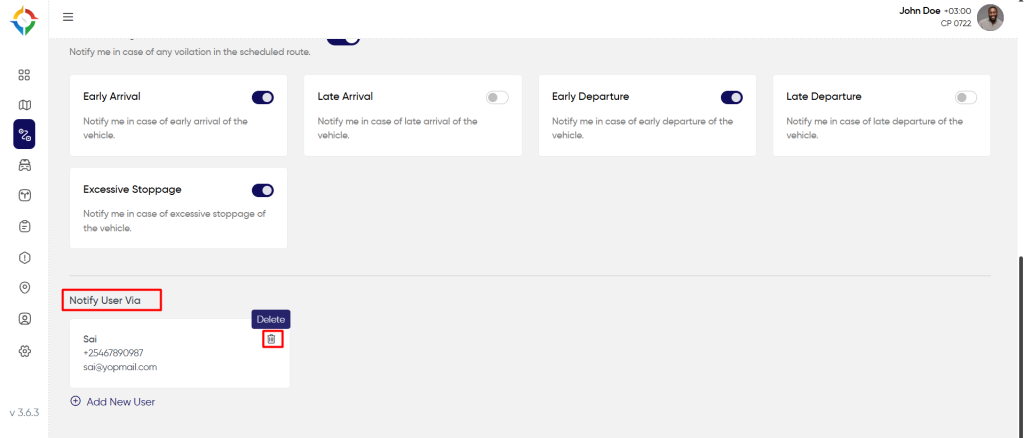
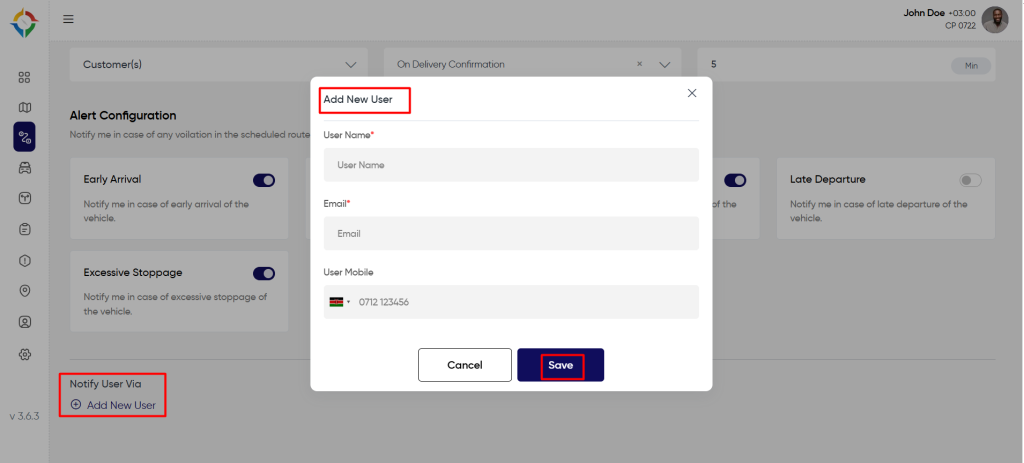
Step 6.4: To add a new user, Click on the “Add New User” button. To delete the user, click on the “Delete User” to delete the user as shown below.
Step 6.5: Enter the “User Name” , “Email” and “Mobile Number” then click the “Save” button to add the new user successfully.
Step 6.5: Once the configuration is selected, click on the “Continue” button to save the configuration for the trip and redirect to the “Review” step.
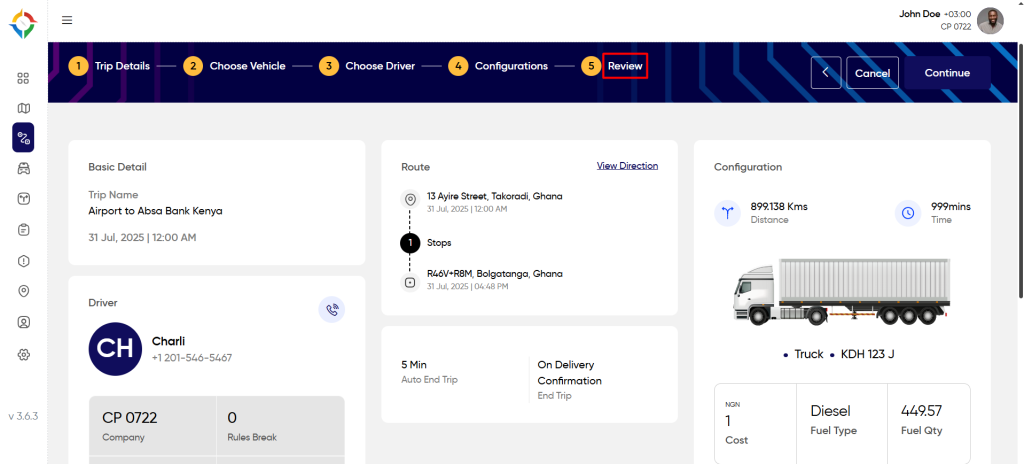
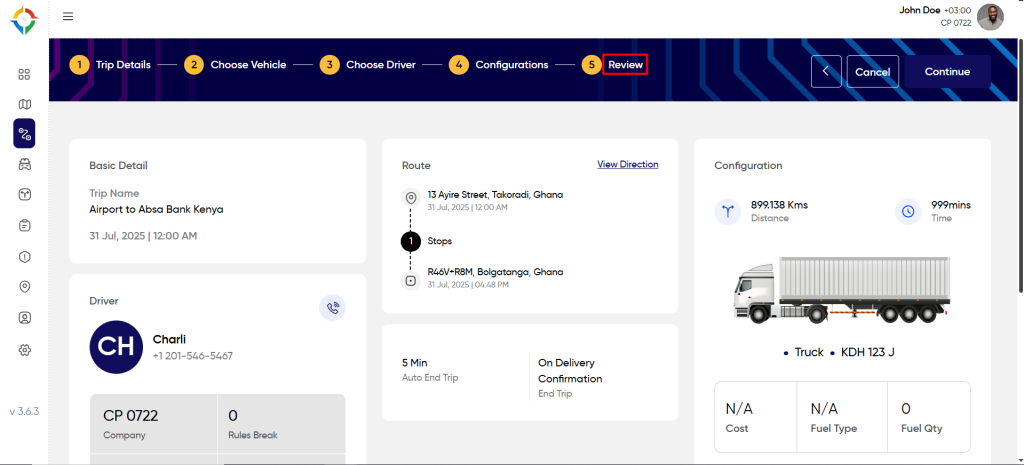
Step 7.1: User can review & check the details. Once the create trip form is filled completely, Click the “Submit” button to successfully create the trip.
Update Trips
Users will be able to update only the upcoming trips in the system any time in the system and only the trips which are having trip start time more than 15 mins than the current time can be deleted.
To update trip, follow the below steps:
Step 1: Open the trip list screen. Referred section Trips list to know how to reach trips list screen.
Step 2: Click on the “Trip Name” to get redirected to the update trip screen as shown below.
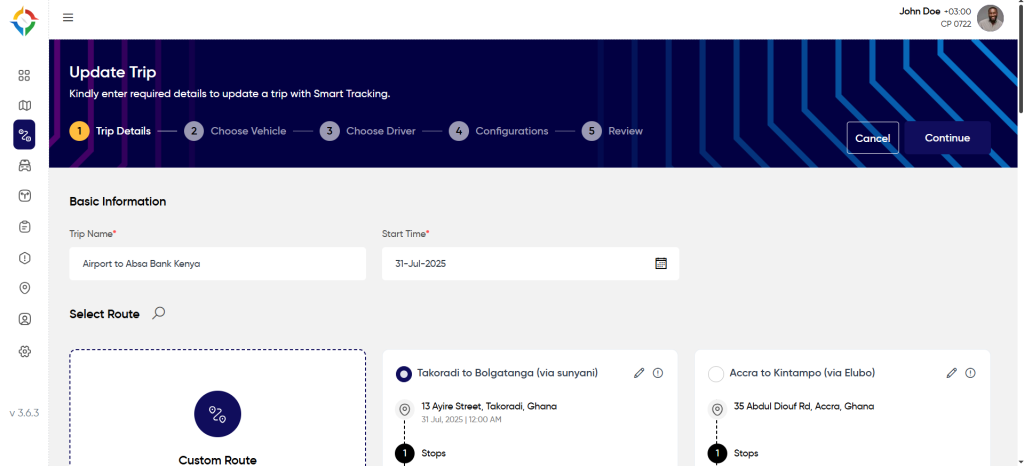
Step 3: Prefilled trip details will open in the update trip and users can update the trip details in the same way as explained in the section Create Trips.
Step 4: Click on the “Submit” button in the “Configurations” step as explained in section Create Trips to update the trip.