Introduction/Purpose:
Mapview provides a birds eye view for all the vehicles added by the user including live tracking via integrated map.
Its purpose is to provide a convenient and user-friendly way for users to oversee the status of their vehicles.
In summary, it provides a user-friendly experience, enabling the users to efficiently access the relevant information related to their vehicles with real time updates.
Dependencies/Assumptions
- System Performance: System should respond properly to retrieve, process and save data accurately.
- Data Availability: The mapview relies on real-time and historical data from tracking devices installed in vehicles. It assumes that these devices are operational and transmitting data as expected.
- Database: The dashboard depends on the accurate data of several databases like, Routes, Trips, Vehicles, Drivers, Locations, Alerts etc.
- Proper Data Management: Proper data retrieval mechanisms are responsible to ensure efficient mapview data.
How To Navigate
Side Menu >> Mapview
The navigation to access the Mapview typically involves the following steps:
Click on the Mapview icon: On clicking on Mapview in the side navigation menu, the user is redirected to Mapview.
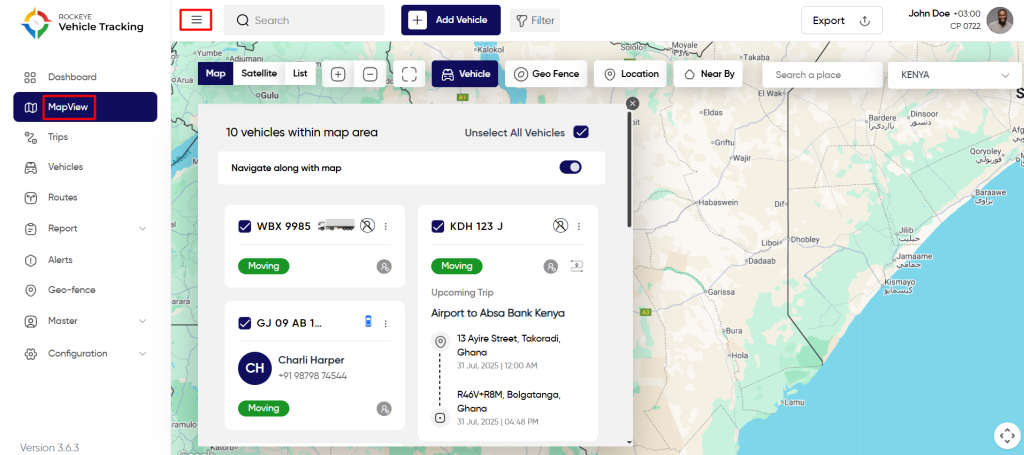
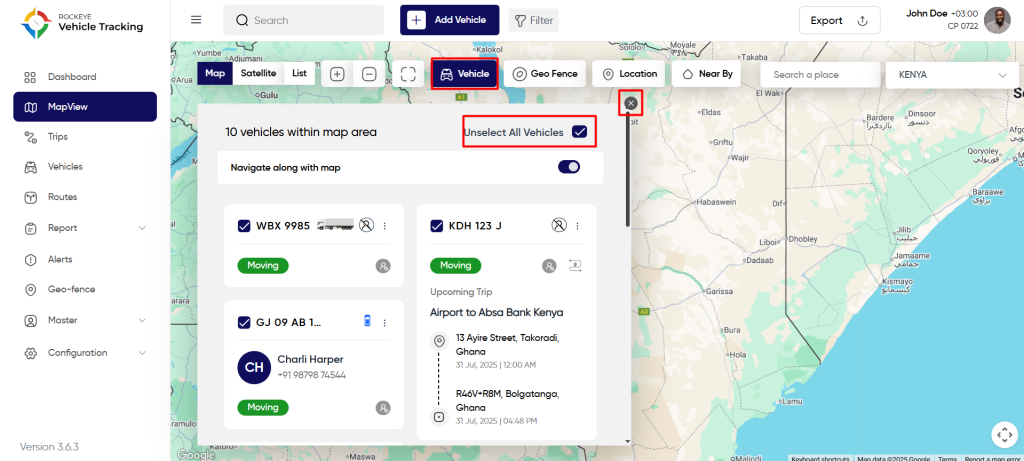
Vehicle Details Window
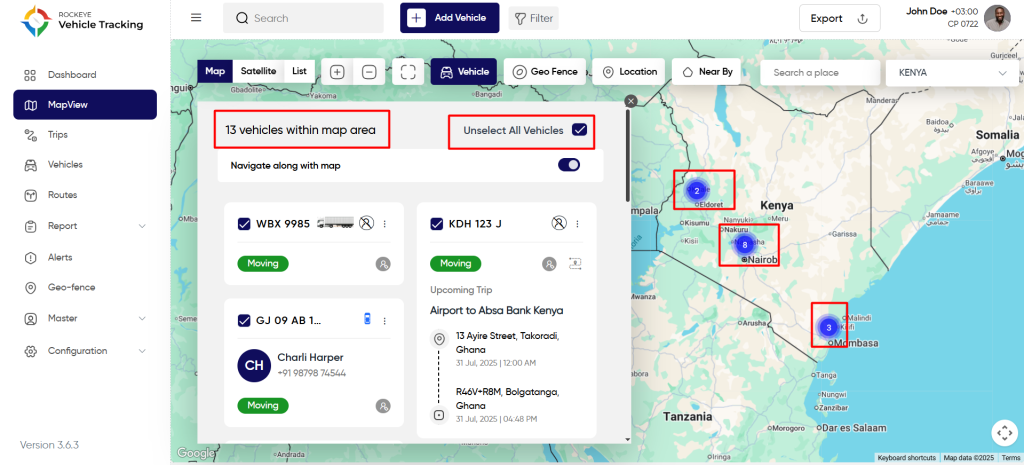
Users will be able to view all the active vehicles available in the system on the mapview.
Case 1: Click on the “Cross” button to hide the vehicle details window.
Case 2: Click on the “Search” field and search for the vehicle plate number or driver name to search for the vehicle in the list.
Case 3: Click on the “Sort by” drop list and select sorting options like “Moving”, “Stopped”, “Idle” or “Recently Tracked” to sort the vehicle list as per the status.
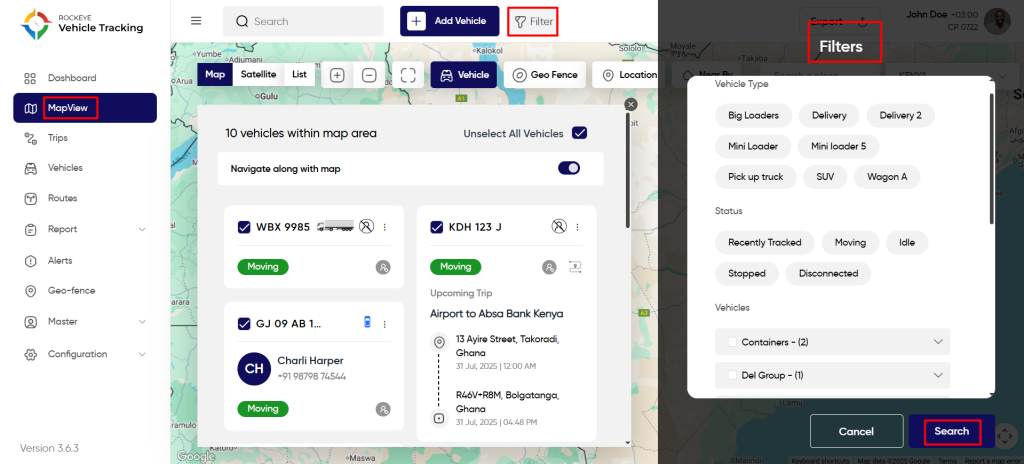
Filter Vehicles
Users will be able to apply filters (such as Vehicle Groups and Vehicle Types) to view the list of vehicles as per requirement.
Step 1: Click on the filter button and filter options will display on the screen.
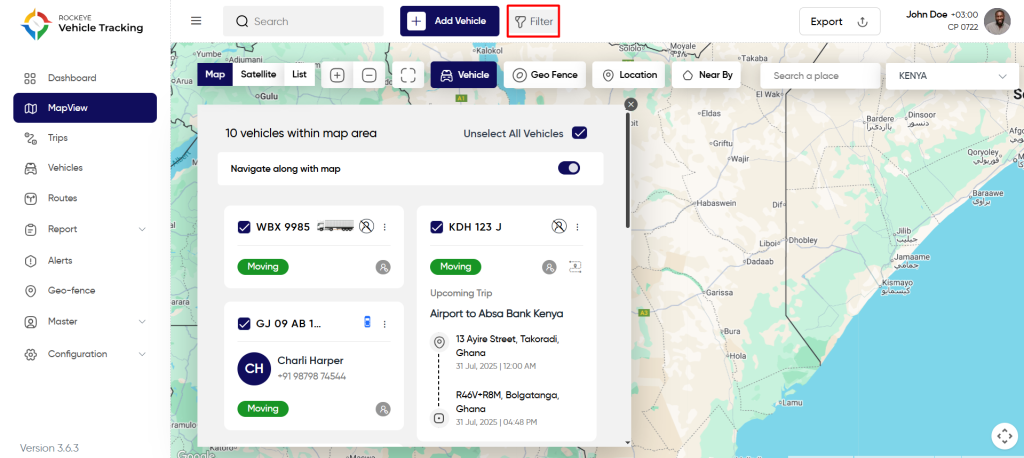
Step 2: Click on the “Vehicle Group” drop list and select the group to filter the vehicles as per their group.
Step 3: Click on the “Vehicle Type” drop list and select type to filter the vehicles as per their type.
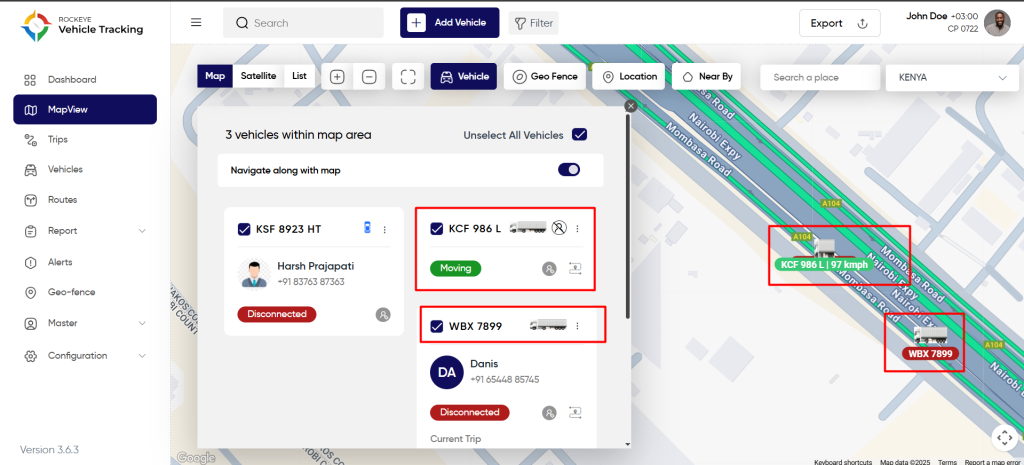
Track Vehicles
Users can track the vehicles by following the below steps
Step 1: Select the checkboxes of the vehicles which the user wants to track.
Step 2: Blue line behind the vehicle will show the route taken by the vehicle (which is moving currently) once the tracking is started.
Step 3: Selected vehicle will show on the map using the truck icon with vehicle plate number displayed over the vehicle.
View Vehicle Detail
Click on the vehicle icon on the map to view the vehicle details in a popup window.

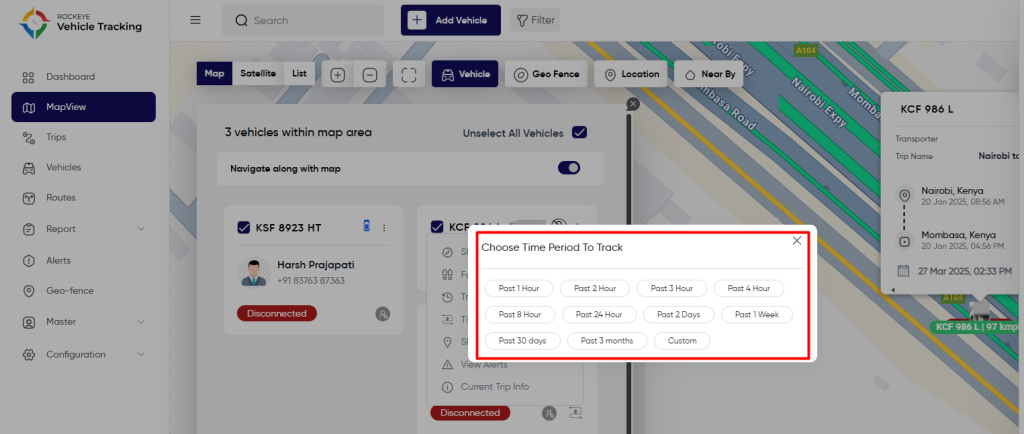
Track History
Users can view the history of the routes traveled by the vehicle. To track history, follow the below steps:
Step 1: Click on the menu button of the vehicle you want to track as shown below
Step 2: Click on the “Track History” option
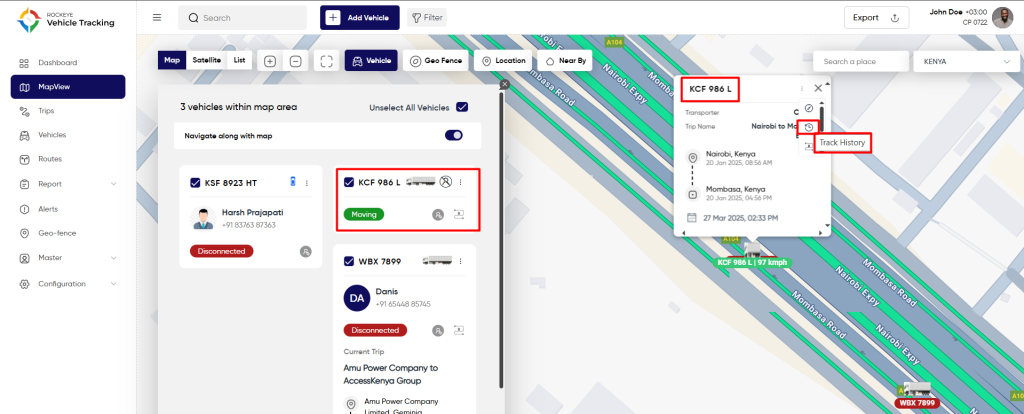

Step 3: A popup window will open to select the time period to track the vehicle. System will show the history as per the time period selected.
Step 4: vehicle detail window will hide and tracking history of vehicle will display over there. Click the back button to view the vehicle details window.
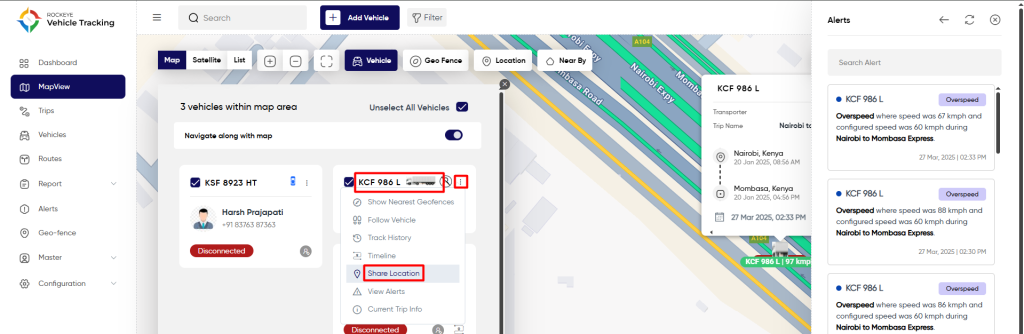
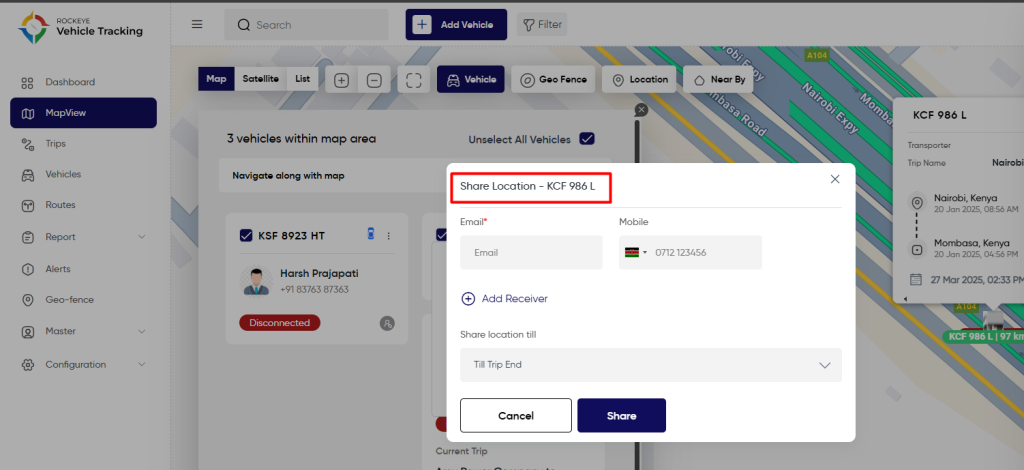
Share Location
With the help of the share location feature, users will be able to share the current location of the vehicle to any other user via email. The receiver can track the vehicle for the set time limit by the admin.
Follow the below steps to share the vehicle location:
Step 1: Click on the menu button of the vehicle you want to share location of, as shown below
Step 2: Select the share location option.
Step 3: Enter receiver email and mobile number.
Step 4: Select time duration for which the vehicle location should be shared with the receiver.
Note: Users can add multiple receivers
Step 5: Click on the “Share” button to successfully send the share link to the receiver.
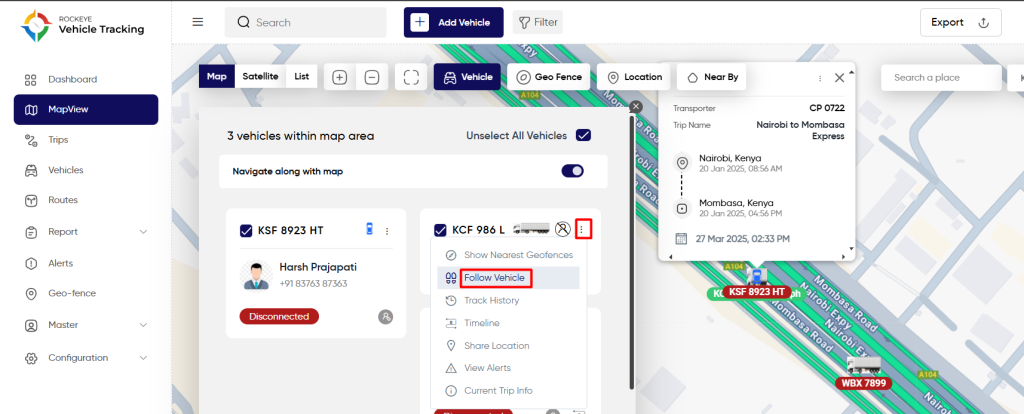
Follow Vehicle
With the help of “follow vehicle” option, users will be able to follow a particular vehicle on the mapview and the followed vehicle will always remain in the center of the mapview.
To follow vehicle, go through the below steps:
Step 1: Click on the menu button of the vehicle you want to follow as shown below
Step 2: Select “Follow Vehicle” option
Vehicle Timeline
Users can view the timeline of the vehicle. To track vehicle timeline, follow the below steps:
Step 1: Click on the menu button of the vehicle you want to track as shown below
Step 2: Click on the “Timeline” option
Step 3: A popup window will open to select the time period. System will show the timeline data as per the time period selected.

Step 4: vehicle detail window will hide and timeline history of vehicle will display over there. Click the back button to view the vehicle details window, as shown below.
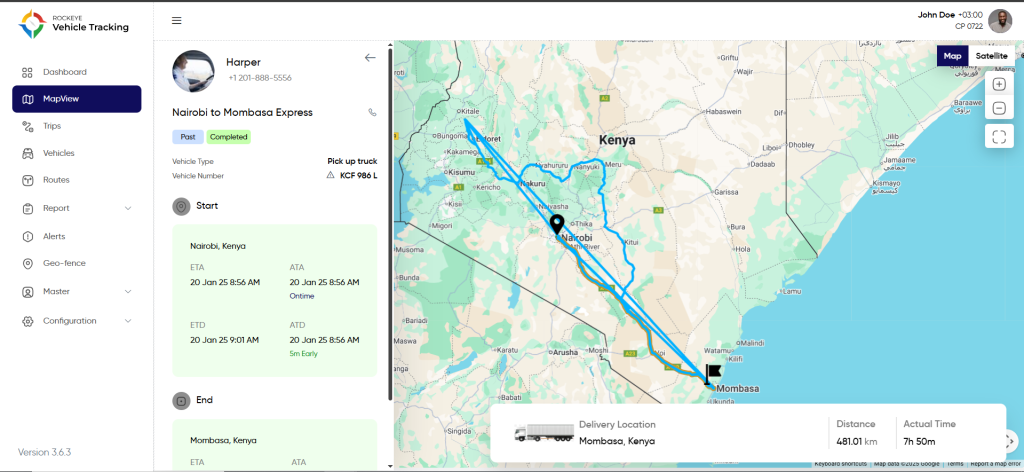
Current Trip Info
This feature allows you to view the current trips of the vehicle and the system will show the route assigned to the vehicle. This feature will display only if the vehicle is having one ongoing trip.
To know how to view current trip info, follow below steps:
Step 1: Create a trip for one vehicle. Referred section Create Trips to know how to create a trip.
Step 2: Open “Mapview” and click on the menu button of the vehicle running on a trip as shown below
Step 3: Select “Current Trip Info” option from the drop down.
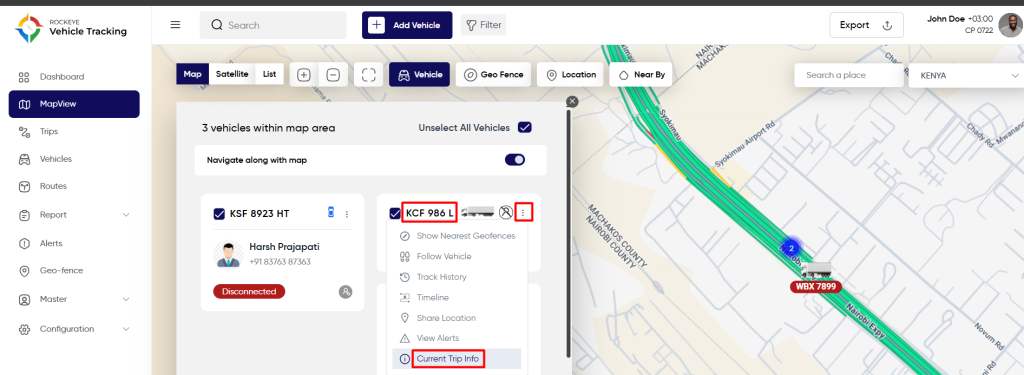
Step 4: View the current trip details
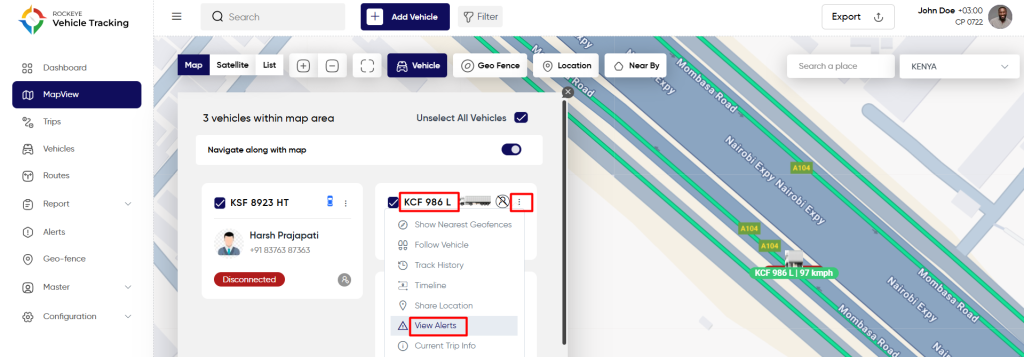
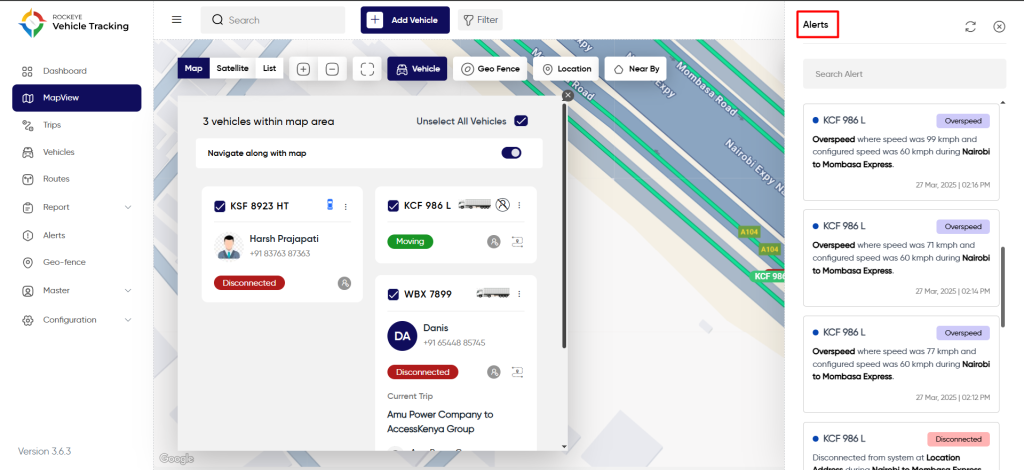
View Alerts
This feature allows you to view the list of alerts violated by the vehicle.
To know how to view alerts, follow below steps:
Step 1: Click on the “View Alerts” button as shown below
Step 2: View alerts of vehicles as shown below.
Vehicle Status Change
As per the speed of the vehicle and stoppages taken by the vehicle, the status of the vehicle will get updated on the map view for particular vehicles. Vehicle can have following 4 status with their colors
- “Moving” showed with green color
- “Idle” showed with orange color
- “Stopped” showed with red color
- “Disconnected” showed red color
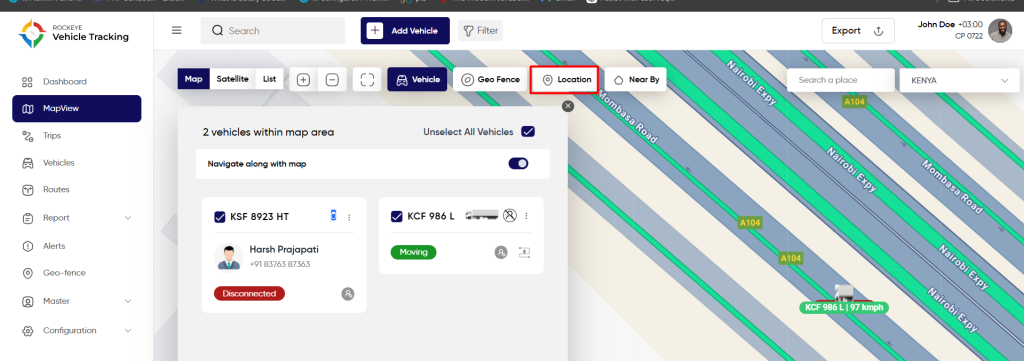
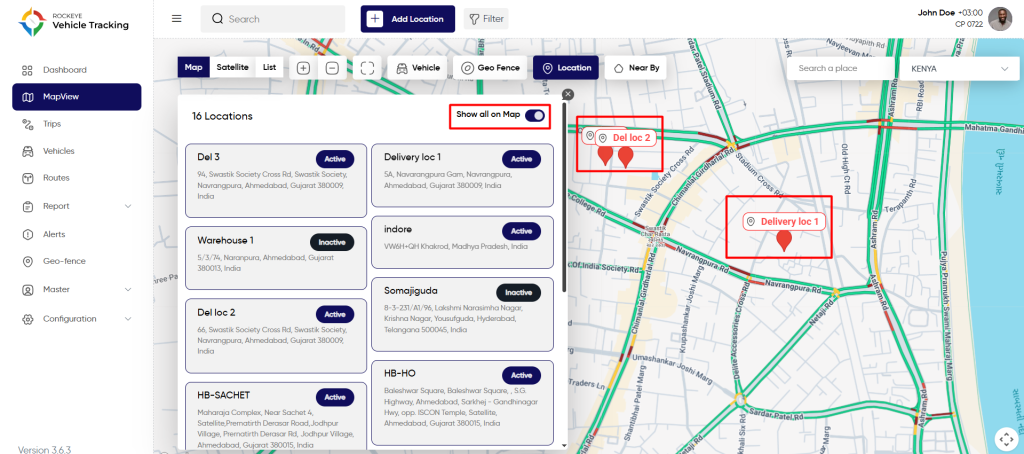
- Show Locations
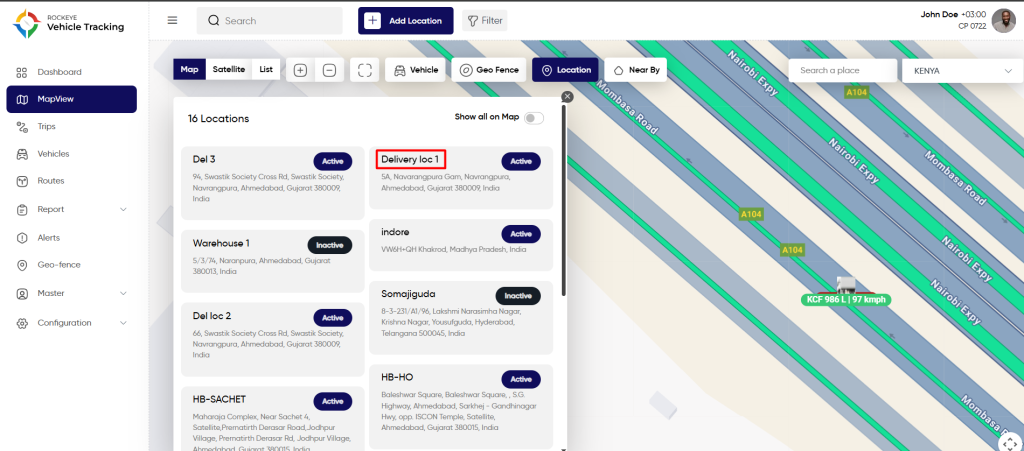
This feature allows the users to view the list of added locations in the system on the mapview itself and pinpoint the added location on the map.
Follow the below steps to view locations and pin location on map
Step 1: Click on the show locations button as shown below
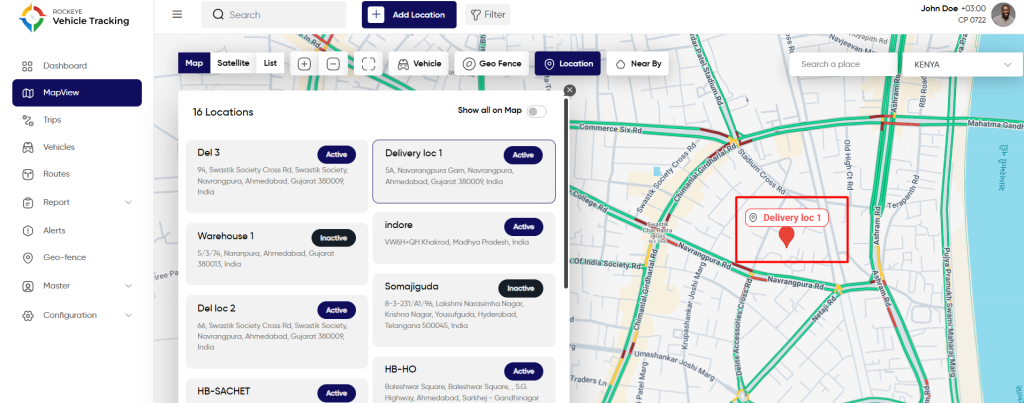
Step 2: Click on a single location as shown below to view that location’s pin on the map.
Step 3: Location pin on map
Step 3: Click on the below switch button to show/hide all the location’s pin on map
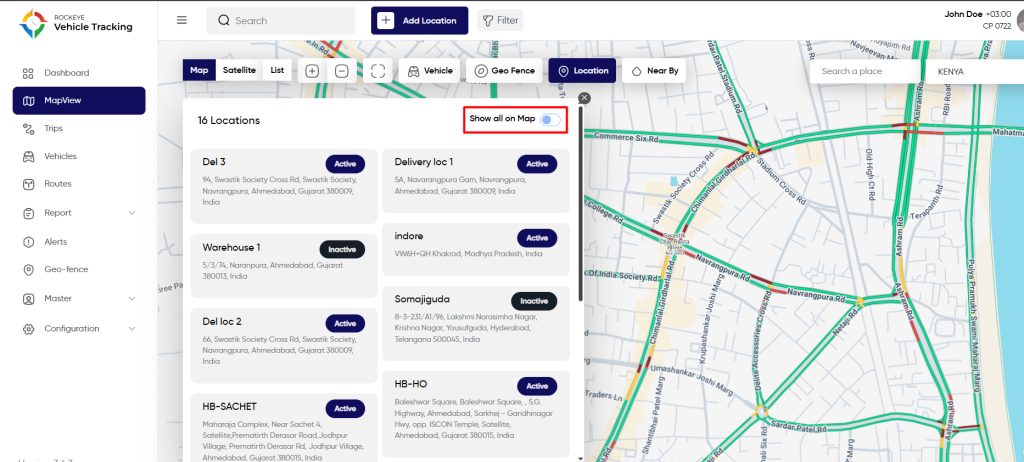
Step 4: Show pin of all the locations on map
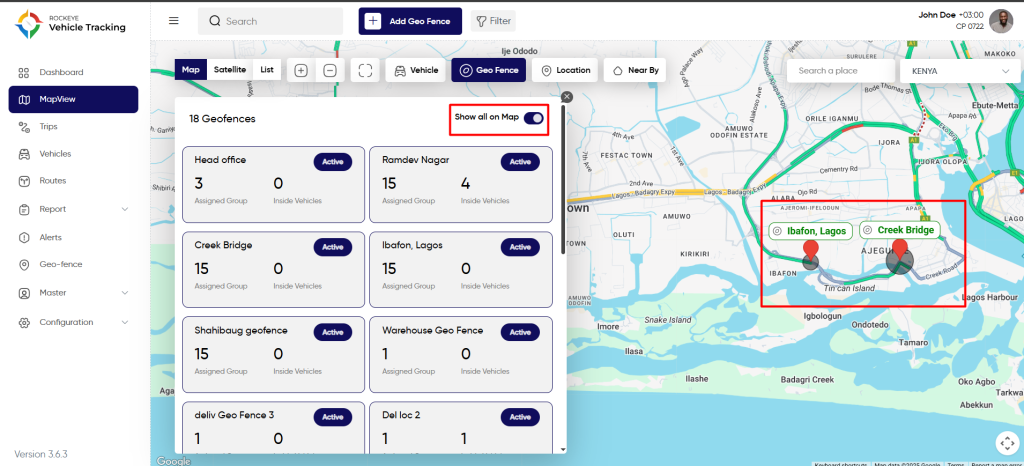
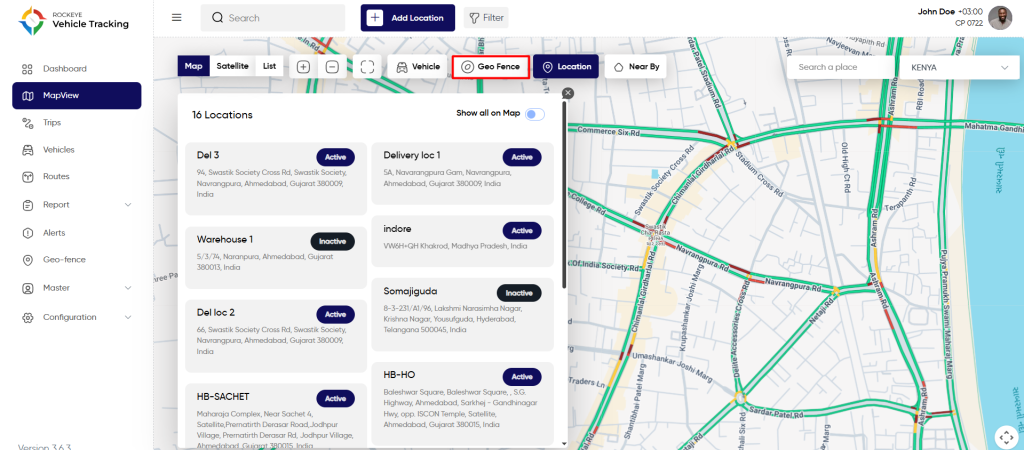
Show Geofences
This feature allows the users to view the list of all the added geofences in the system by the user on the mapview itself and pinpoint the area of added geofences on the map.
Follow the below steps to view geofences and pin geofences on map
Step 1: Click on the show geofences button as shown below
Step 2: Click on a single geofence as shown below to view that geofence’s area on the map

Step 3: Click on the below switch button to show/hide all the geofence’s area on map
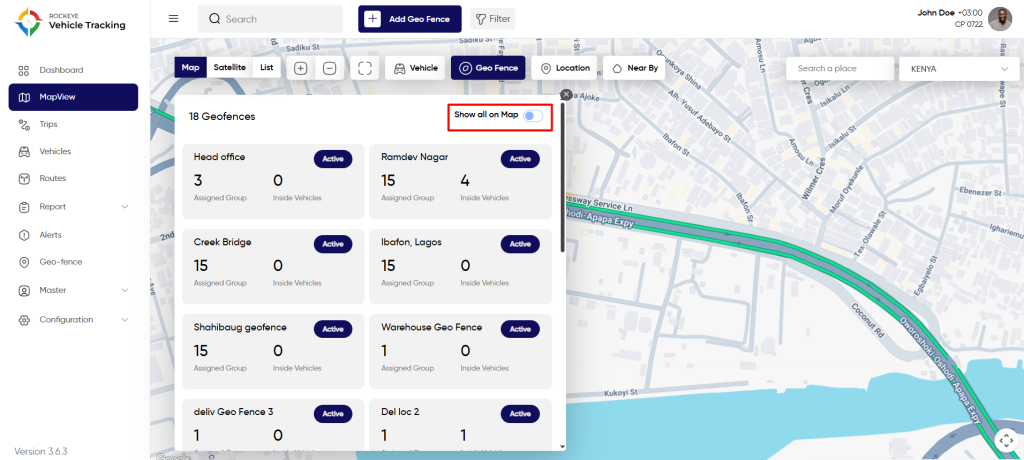
Step 4: Show areas of all the locations on map