Introduction/Purpose
In today’s fast-paced world, efficient management and monitoring of vehicles have become crucial for various industries. To address these needs, modern vehicle tracking systems are being developed with advanced features to enhance operational control, safety, and resource optimization. One such pivotal module is the “Geo-Fences” module, which plays a vital role in establishing virtual boundaries and geographically-restricted areas within the tracking system. By allowing admin to define and monitor geographic zones, this module empowers businesses with location-based insights, real-time alerts, and data-driven decision-making capabilities, ultimately leading to improved efficiency, safety, and service satisfaction.
Dependencies
The Geo-fence module in a Vehicle Tracking system typically relies on several dependencies to function effectively and provide the intended features and benefits.
- System Performance: System should respond properly to retrieve, process and save data accurately.
- Tracking Device: The core functionality of the Geo-Fence module depends on accurate and real-time location data from the hardware installed in the tracking device to track vehicles. The module uses this data to determine when a vehicle enters or exits a defined geographic area.
- Geospatial Data & Mapping: Geospatial data, which includes mapping details like coordinates and boundaries, is used to build geo-fences. For the module to properly construct and manage these virtual boundaries, it must have access to accurate and current mapping data.
- Database: The system needs a database to store and manage the defined geo-fences, along with associated metadata and user settings. The database is also used to store and reuse historical data related to vehicle movements within geo-fenced areas.
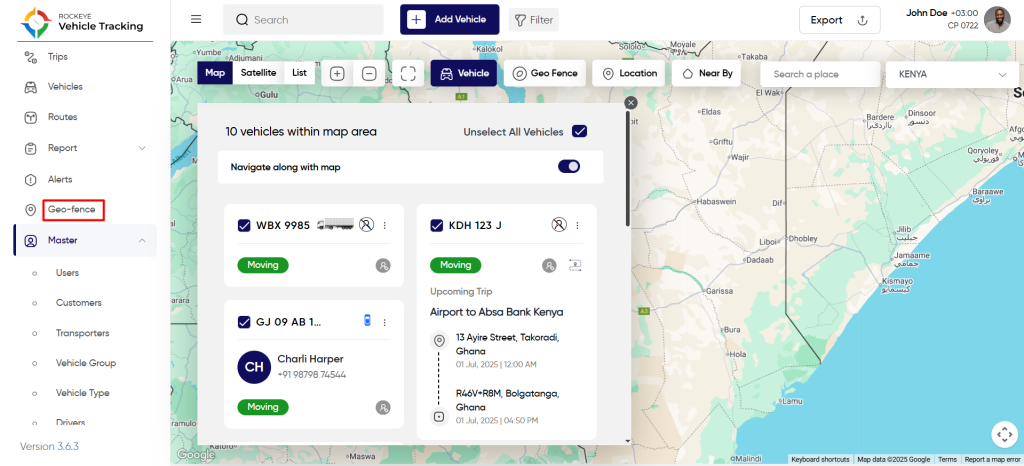
Navigation To Geo-fence
Hamburger Menu >> Geo-fence
Side Menu >> Geo-fence
Users can hover to the left side of the screen to access the navigation menu. Click on the “Geo-fence” from the side menu as shown below.
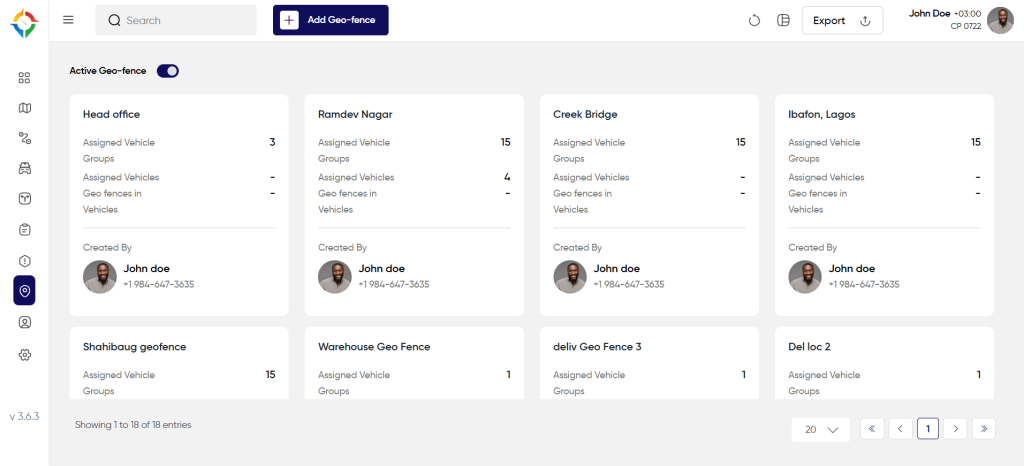
Geo-fence List
To open the geo-fence list follow the steps mentioned in the section “Navigation To Geo-fence”.
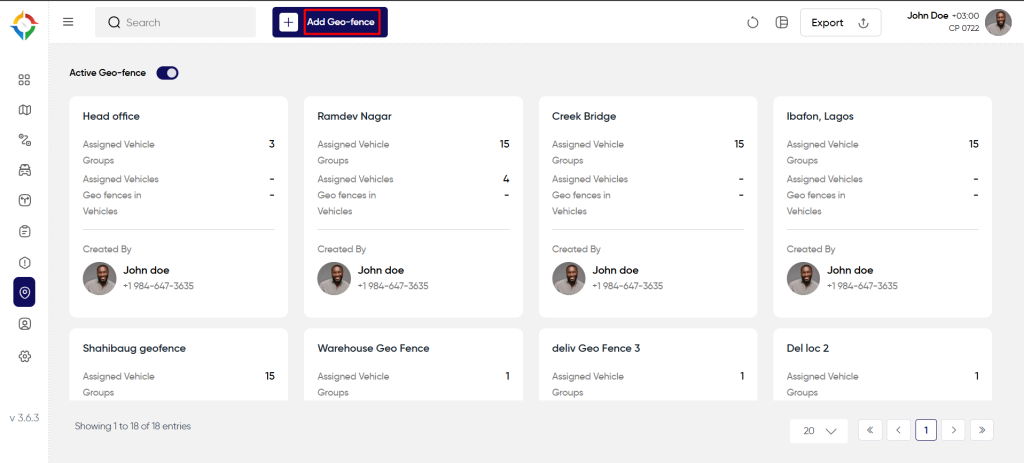
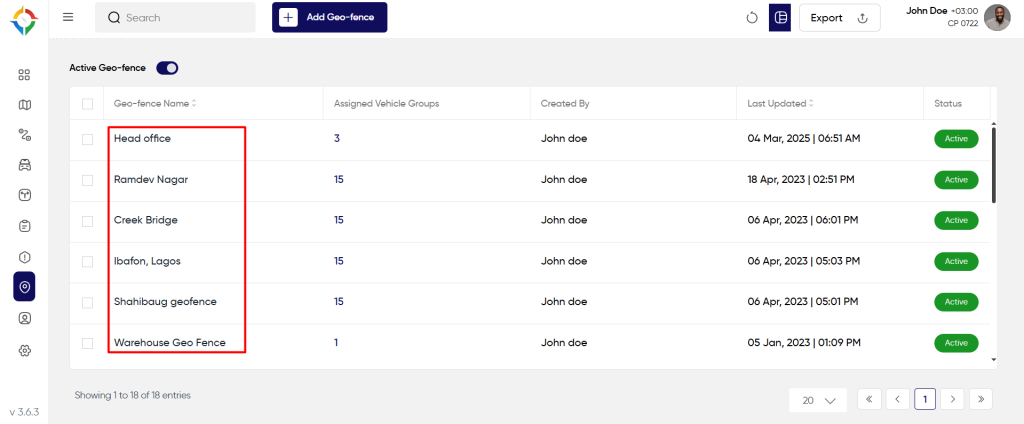
Details Available On The Geo-fence List
Admin will be able to view the following information from the geo-fences
- Geo-fences
- Total number of vehicle groups are assigned under every geo-fences
- Assigned Vehicles
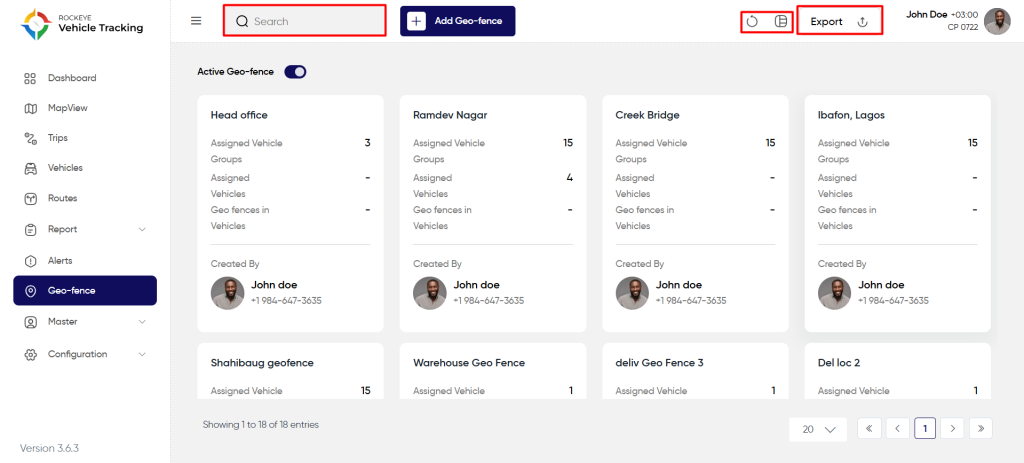
Users will be able to perform the various operations:
- Refresh
- Switch View
- Search
- Export
- Active /Inactive Toggle switch
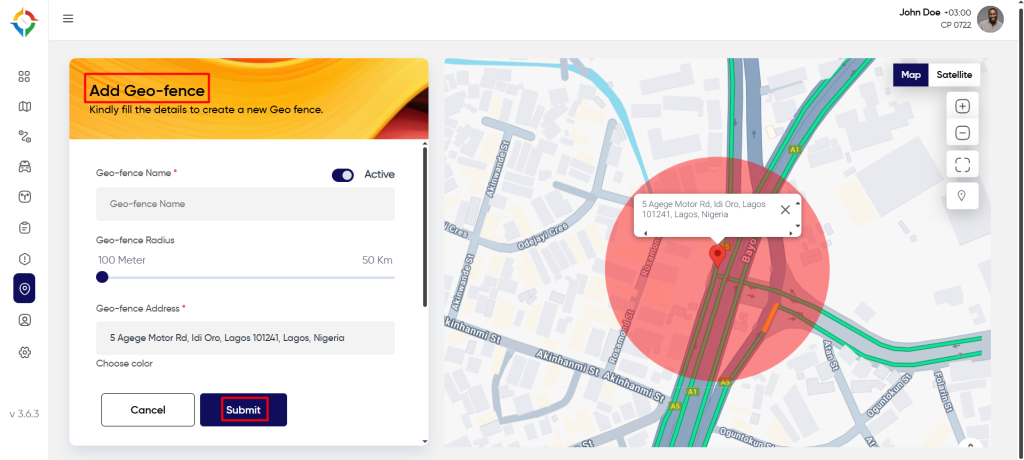
Add Geo-Fences
Click on the “Add Geo-fence” from the geofences list page as shown below.
User will be able to view the following fields in the geo-fence
- Geo-fence Name*
- Geo-fence Radius
- Geo-fence Address*
- Choose Color
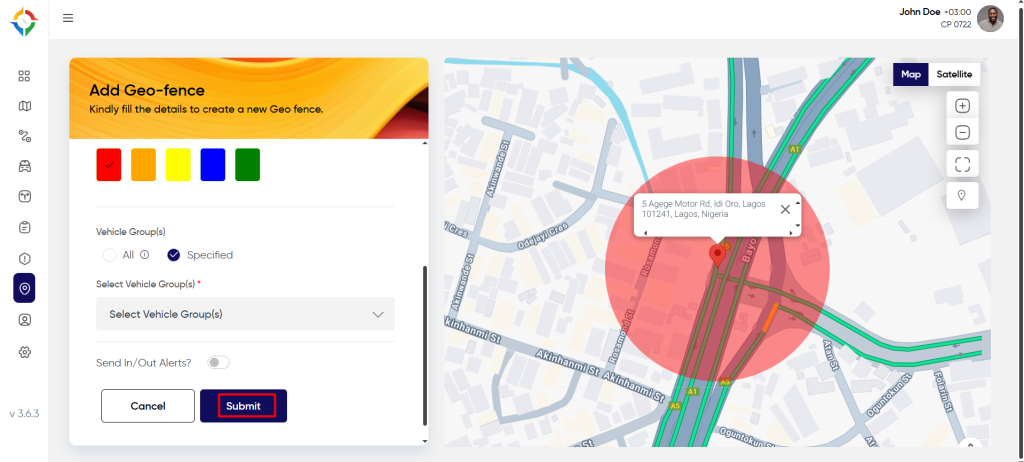
- Select Vehicle Group(s)* (All / Specified)
- Send in/out alerts*
Fill the mandatory fields, enter geo-fence name, address, set geo-fence radius, vehicle group(s) and enable/disable “send in/out alerts”. Once the form is completed, click on the “Submit” button to successfully add the geo-fence.
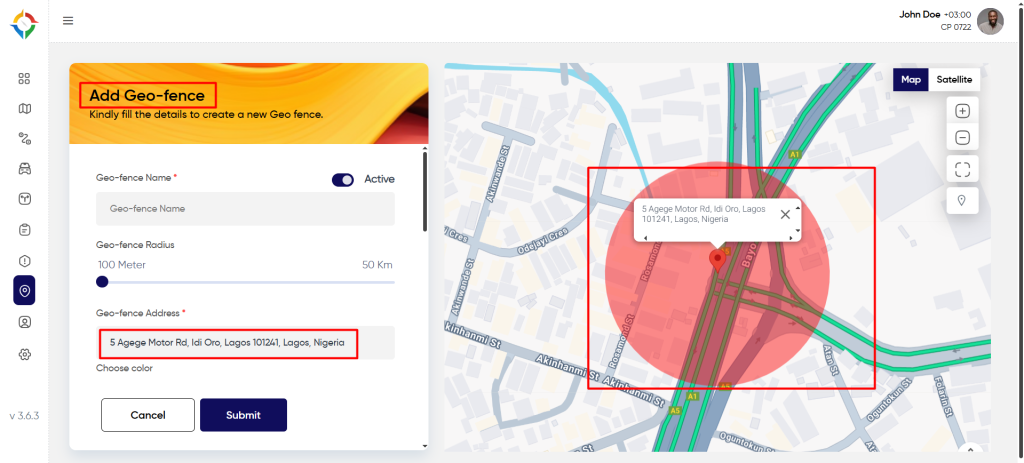
Note:
- Users can select a location address by dropping the map-icon on the map, as shown below.
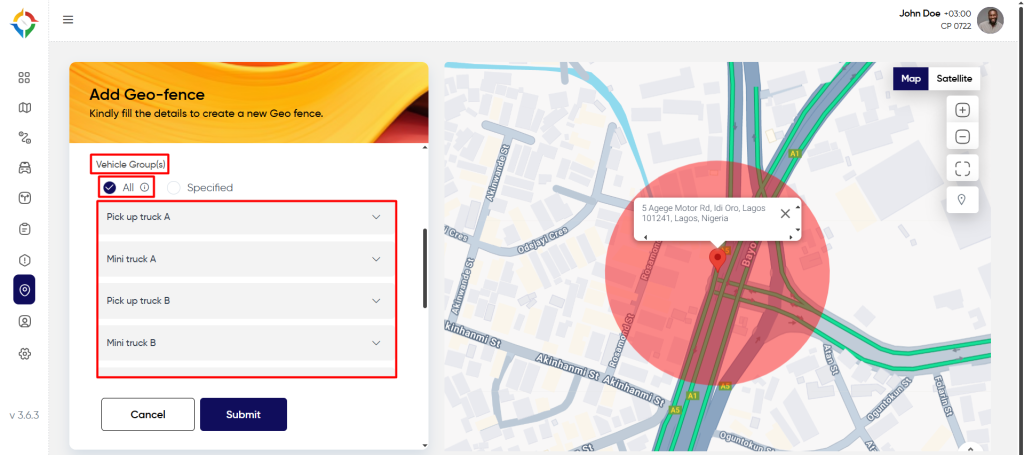
- Admin will be able to assign vehicle groups under geofences mentioned and shown below.
Case 1: If the “All” option is selected for the field Vehicle Group(s), then all the vehicle groups in the system will be assigned for the geo-fence automatically.
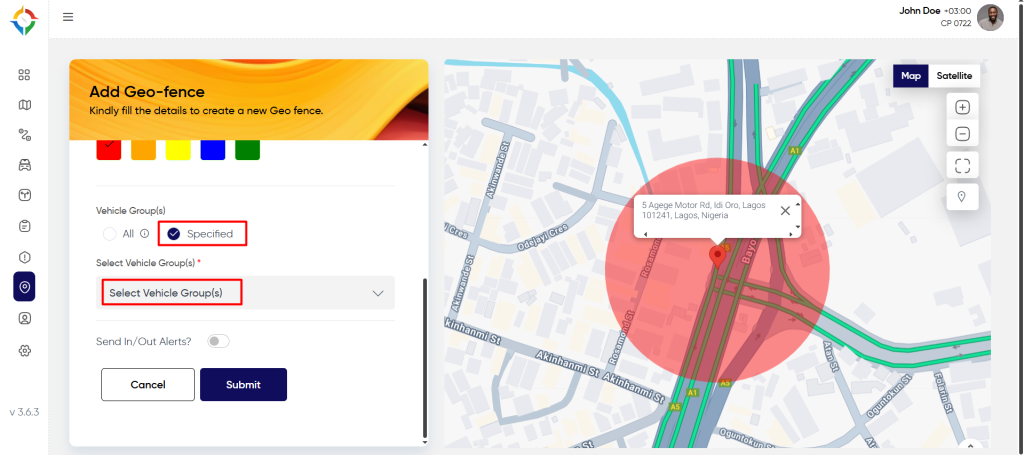
Case 2: If the “Specified” option is selected for the field Vehicle Group(s), then Admin will be able to select specific vehicle groups for the geo-fence.
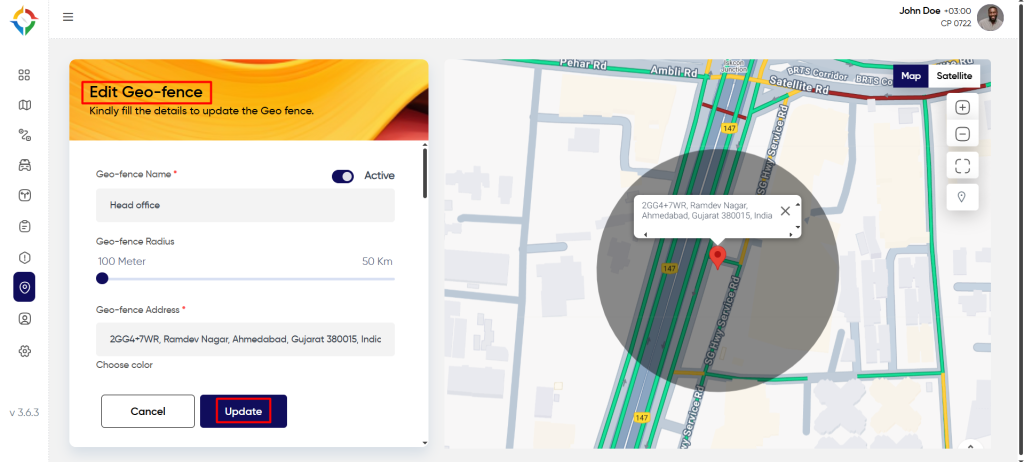
Update Geo-Fences
Step 1: Click on the “Geo-fence Name” from the geo-fences list as shown below.
Step 2: Update the geo-fence details as required and click on the “Update” button to successfully update the geo-fence details as shown below.