Identity Sticker
Introduction/Purpose:
The Identity Sticker Module provides a centralized system for managing unique identity stickers assigned to each vehicle, ensuring easy identification and tracking within the transport management system. These stickers serve as a unique identifier for vehicles, streamlining vehicle management and enhancing operational efficiency.
When adding a transporter, users can choose whether to automatically generate identity stickers. If “Yes” is selected, the system automatically generates stickers for the transporter’s vehicles without using this module. If “No” is selected, the Identity Sticker Module allows users to manually create and assign identity stickers to vehicles.
The module allows bulk creation of identity stickers by defining titles, the number of pages, and page types (such as A4), with each page generating a set number of identity sticker accounts. Once created, the stickers can be accessed and assigned to vehicles, ensuring that each vehicle is uniquely tracked through its assigned sticker.
How To Navigate To Identity Sticker:
The navigation includes the following steps for viewing the “Identity Sticker” in the transporter management system.
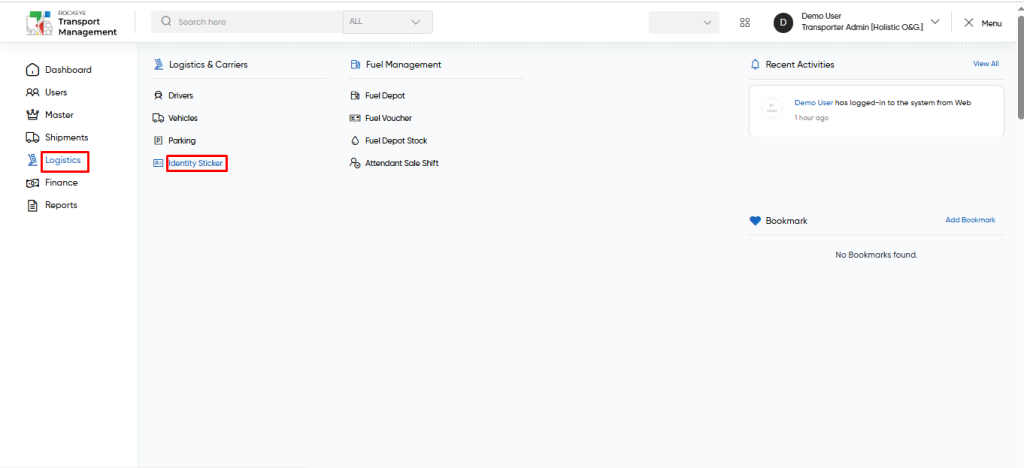
- Click on the Logistics tab: The users can be accessed by clicking on the logistics tab on the side menu.
- Click on Identity Sticker: The identity sticker can be accessed by clicking it from the “logistic section”.
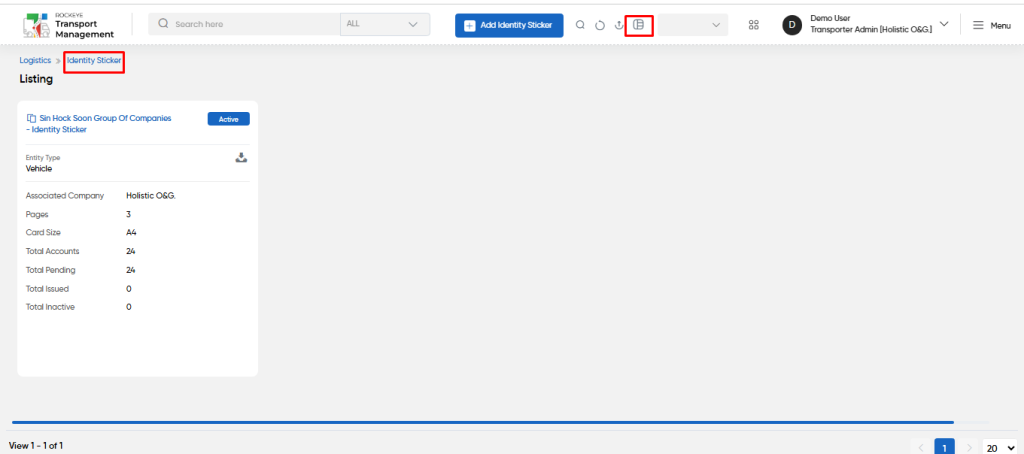
Logistics – Identity Sticker Titles Tab Listing:
An identity sticker title listing in a transporter management system is a feature that provides a list of all identity stickers titles.
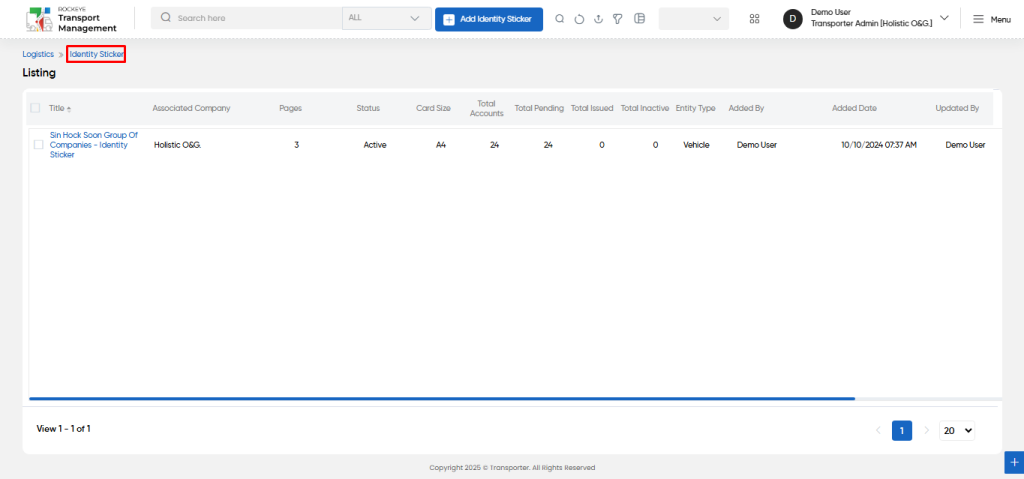
- Users can view the following information in the identity sticker title listing page
- Title
- Associated Company
- Pages
- Status
- Card Size
- Total Accounts
- Total Pending
- Total issued
- Total Inactive
- Entity Type
- Added By & Added Date
- Updated By & Updated Date
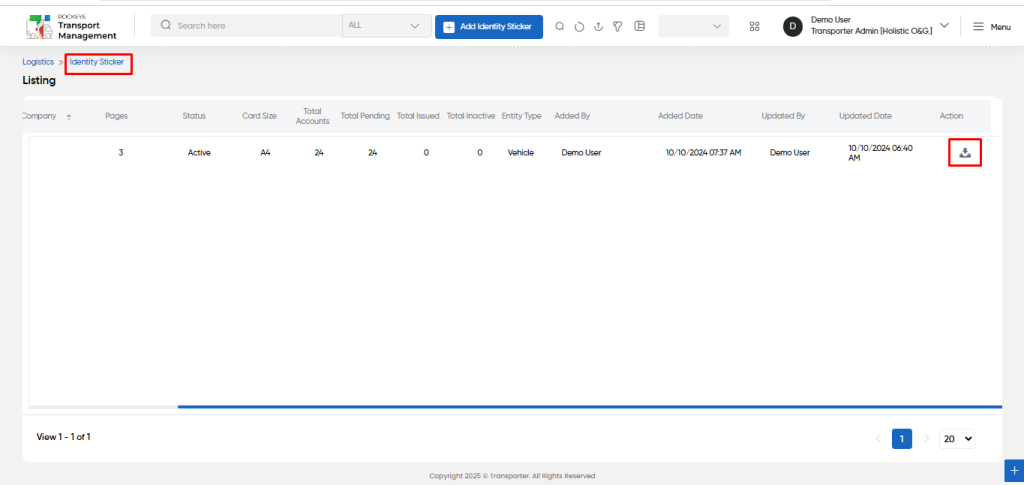
- Action to Download
- Users will be able to download the all identity stickers from the specific title from the action column as shown in below.
Identity Sticker – Add Form:
- Add new: The “Add new” function allows you to create and add identity stickers to the system.
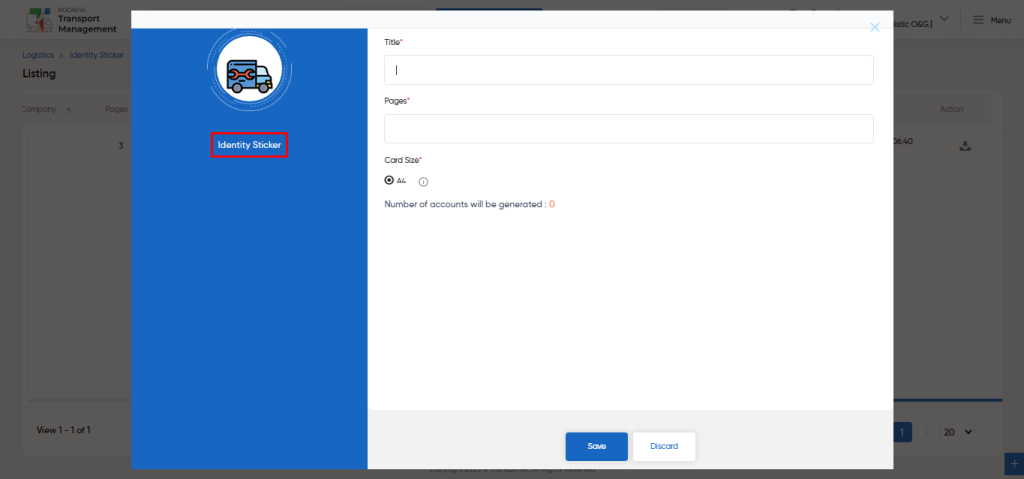
Fields available in the Add Identity Sticker Form :
- Title (Required): This is for specifying the Title of the identity sticker.
- Pages (Required): This is for specifying the no of pages of the identity sticker.
- Card Size (Required): This is for specifying the card size as A4 of the identity sticker.
- Number of Account will be generated (Required): In the Add form, Upon giving the title, pages, card size A4, by default, automatically the number of accounts (identity stickers) will be generated. For 1 page around 8 stickers will be generated. We can configure the system.
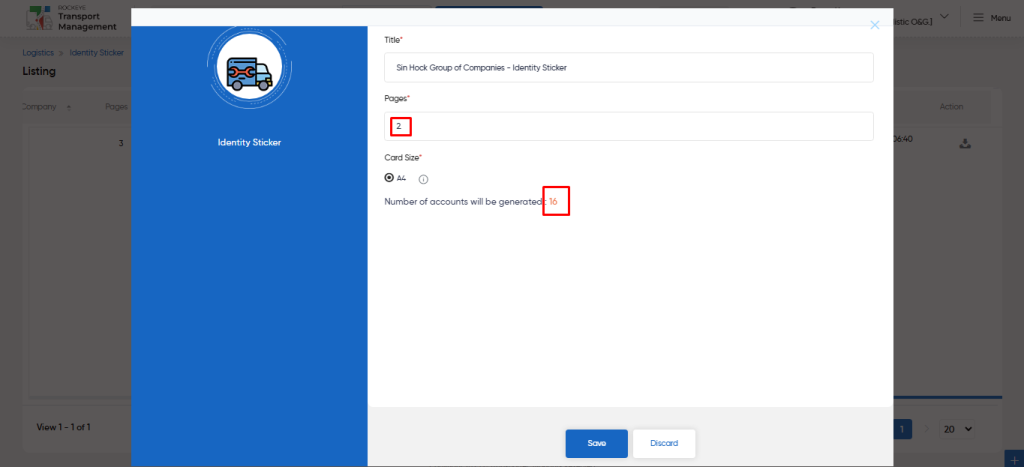
Users can perform the following actions:
- Save: The “Save” function allows the user to submit the required information while creating a new identity sticker title.
- Discard: The “Discard” function allows the user to cancel the submission of information provided at the time of creating a new identity sticker title.
User can perform the following actions from the listing page :
- Advanced Search : The “Advanced Search” function enables searching using multiple field names with multiple conditions to find specific data. The “Search” function allows the user to look for a specific entry within the available data and presents results that match the search parameters.
- Show all listing records: This functions like a refresh icon, retrieving and displaying all records in the listing.
- Export: The “Export” feature allows users to export selected or all data in CSV or PDF format.
- Filter (Quick Search): The “Filter” function in the “identity sticker” allows users to customize their view of the identity sticker title records based on specific criteria.
- Change View : The Change View feature allows identity sticker details to toggle the grid & table views in the listing data.

Change View :