Machine Master
Purpose
The purpose of the Machine Master is to serve as a centralized and structured system for managing all machines and equipment used in operations. It ensures streamlined tracking of critical machine details, such as manufacturing specifications, operational status, warranty periods, insurance coverage, and maintenance schedules. By consolidating this information into a single platform, the Machine Master enhances visibility, traceability, and accountability, enabling organizations to optimize machine utilization, reduce downtime, and plan for maintenance or replacements proactively. Furthermore, it supports compliance by managing warranties, insurance policies, and operational records, mitigating risks and ensuring seamless integration with other operational processes.
How to Navigate
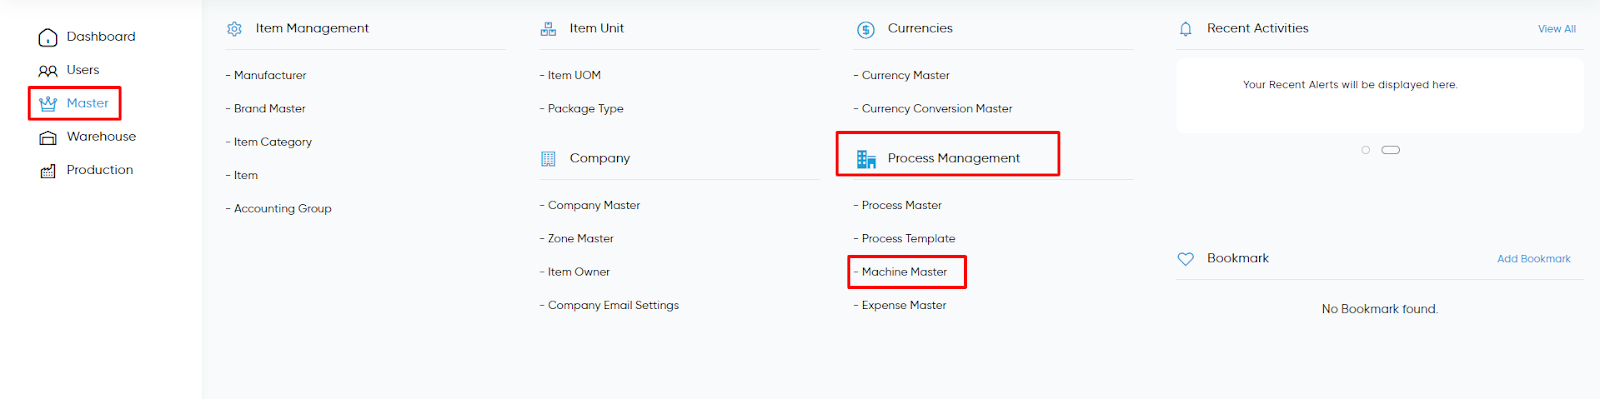
- Click on the Main Navigation Icon:
- The main navigation icon is typically located at the top right corner of the screen. Clicking on this icon will expand the navigation menu, displaying links to various sections of the production system.
- Select the Master Section:
- From the navigation menu, click on the Master section, usually located on the left-hand side. This will open a list of master modules associated with production and related operations.
- Locate the Process Management Section:
- Under the Master section, scroll down to find the Process Management category. This section contains tools and modules related to managing production processes.
- Click on the Machine Master Link:
- Within the Process Management section, click on the Machine Master. This will take you to the Machine Master listing screen, where you can view existing methods or create new ones.
By following these steps, users can seamlessly navigate to the Machine Master module, enabling them to create, edit, and manage standardized process workflows for enhanced production efficiency.
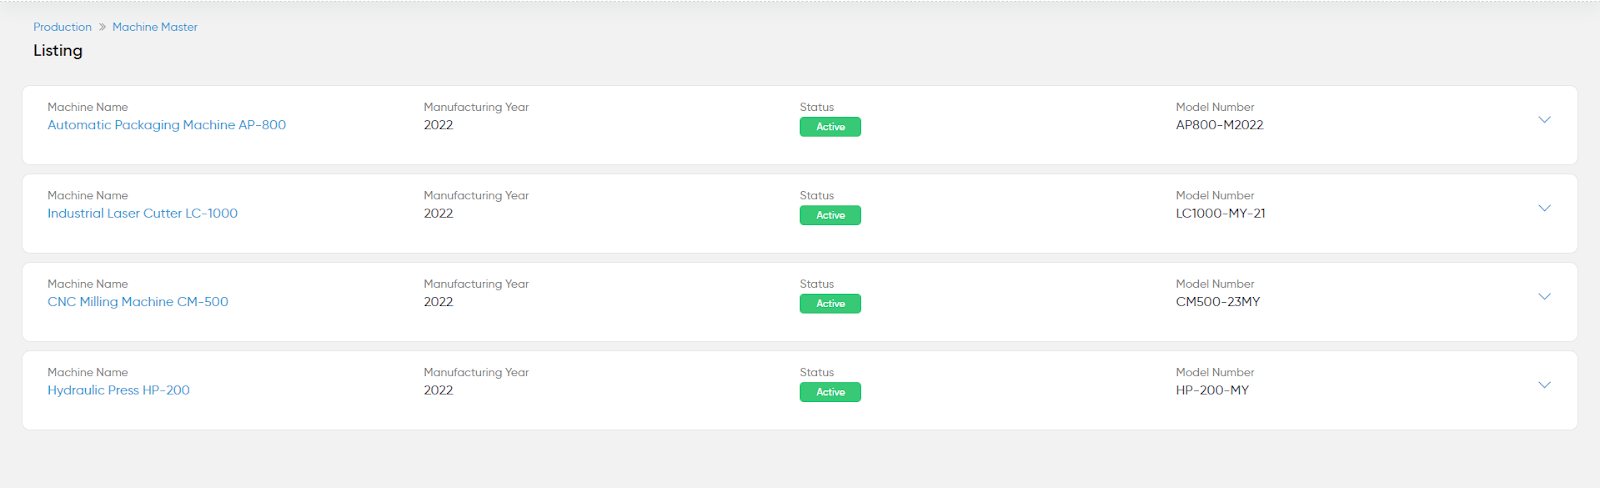
Listing Screen:
User will be able to view the machine listing with Machines. The user will be able to search, filter and bookmark the module.
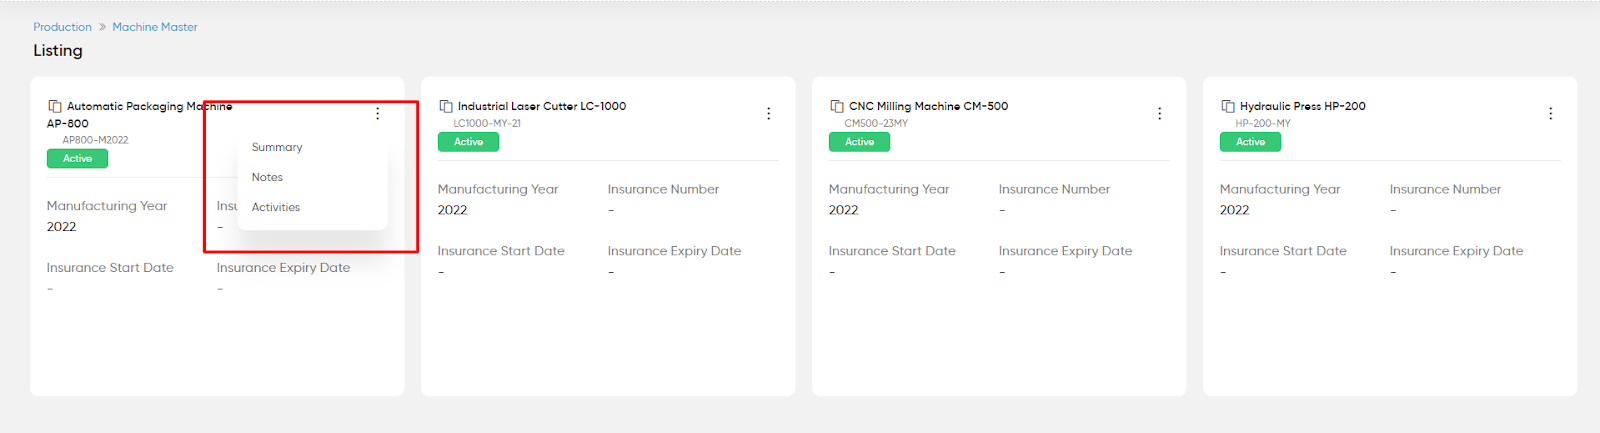
By clicking on the three dots the user can view the summary, notes and activities for the selected machine.
- If the user wants to edit the machine details, they can update and manage the details of the machines and equipment. The user can either click on the summary or on the name to view the details page of the machine, as shown below.
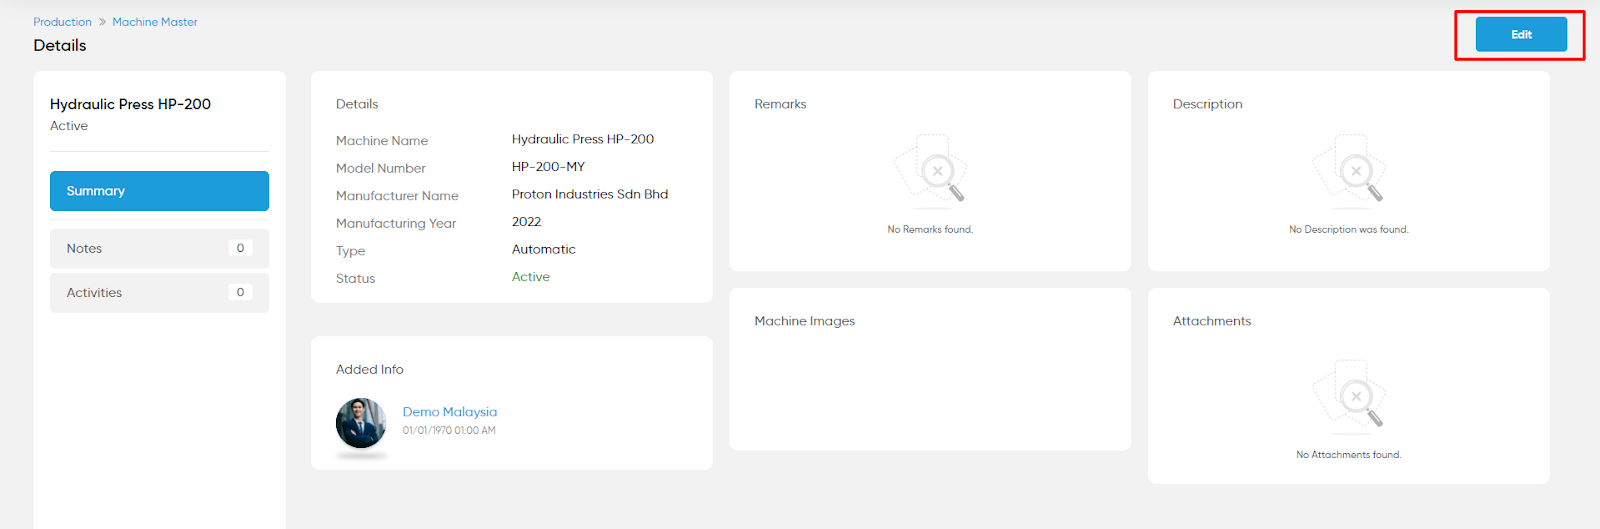
- The user can edit the machine details by clicking on the Edit button.
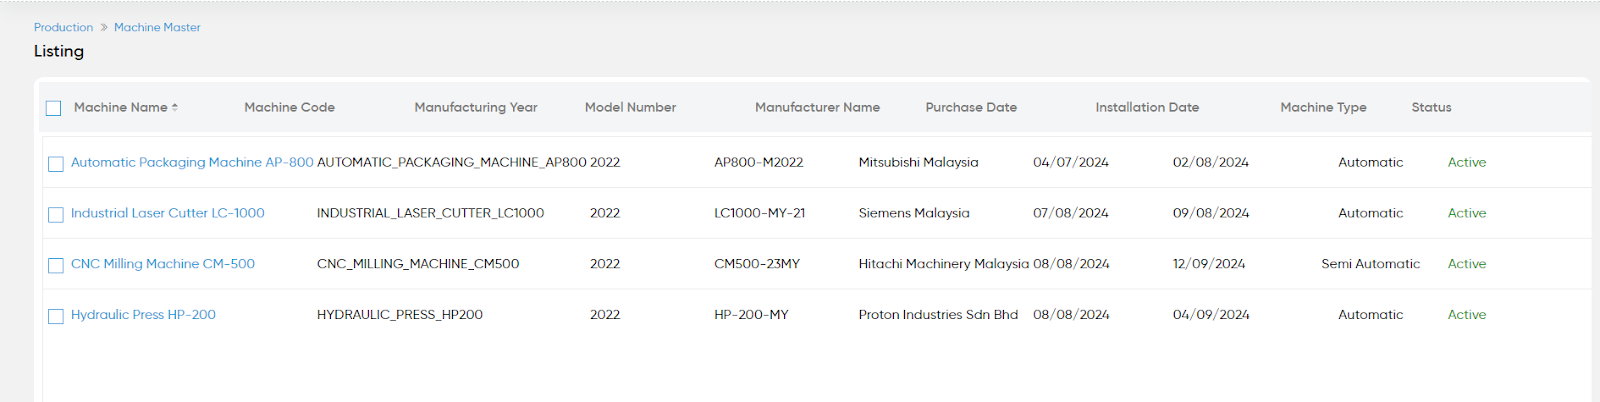
Change View:

Table View:
List View:
Grid View:

Add Machine:

- On clicking on the Add Machine Button the user can add the machine details as shown below.
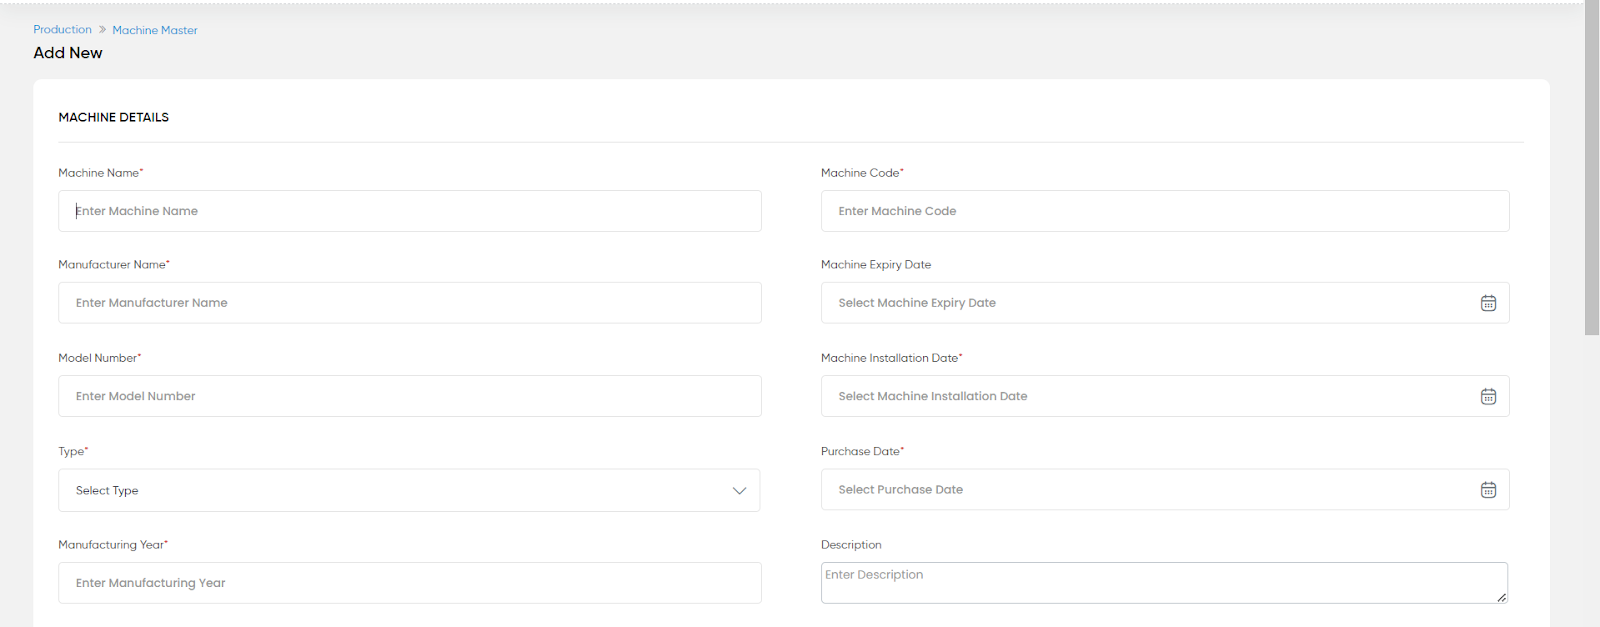
Machine Name (Required):- Enter the name of the machine for identification purposes.
Machine Code (Required):- Provide a unique code for the machine.
Manufacturer Name (Required):- Enter the name of the company that manufactured the machine.
Machine Expiry Date:- Select the date when the machine is expected to reach the end of its operational life.
Model Number (Required):- Enter the model number provided by the manufacturer, helping to identify the specific machine version.
Machine Installation Date (Required):- Select the date when the machine was installed.
Type (Required):- Specify the machine type, categorizing it for easier classification as (Manual, Semi Automatic or Automatic)
Purchase Date (Required):- Enter the date when the machine was purchased.
Manufacturing Year (Required):- Specify the year the machine was manufactured.
Description:- Enter a detailed description of the machine, including its capabilities, features, or special instructions.
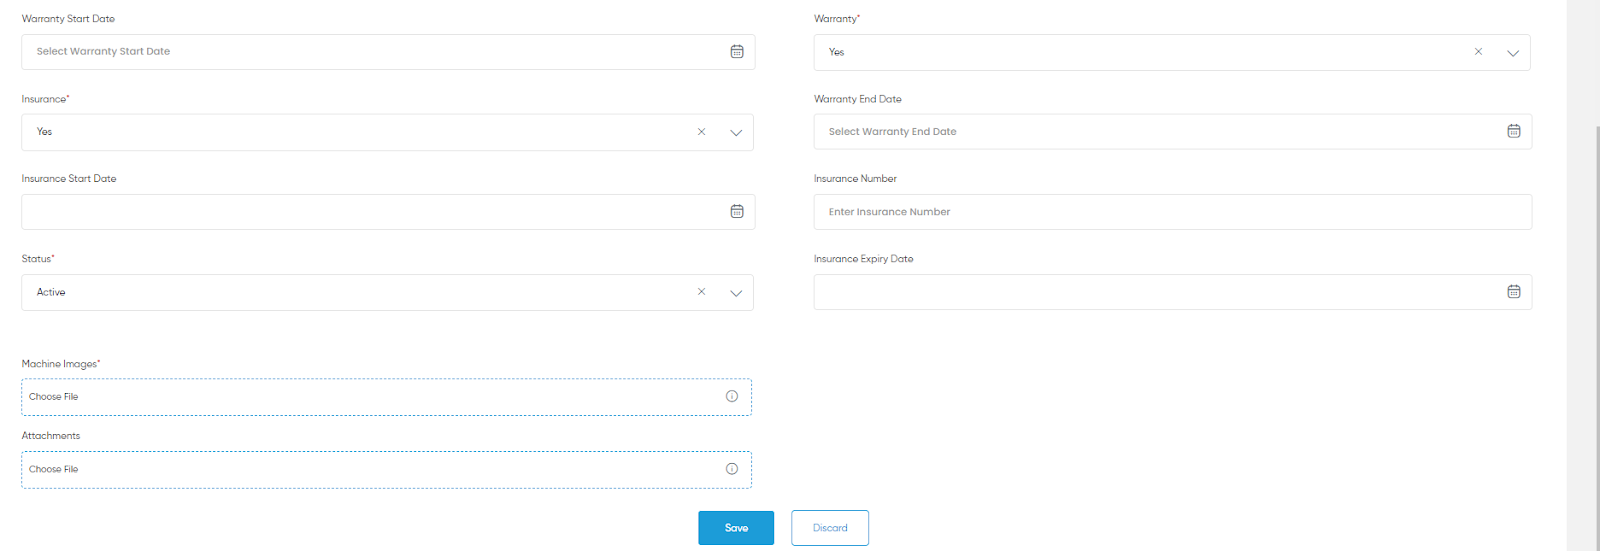
Warranty Start Date:- Select the start date of the machine’s warranty to track the coverage period.
Warranty (Required):- Specify if the machine is under warranty, ensuring timely claims for repairs or replacements.
Insurance (Required):- Specify whether the machine is insured, helping manage risk and potential liabilities.
Warranty End Date:- Select the end date of the machine’s warranty to track when coverage expires.
Insurance Start Date:- Select the start date of the machine’s insurance policy.
Insurance Number:- Enter the insurance policy number.
Status (Required):- Select the current operational status of the machine, such as Active or Inactive.
Insurance Expiry Date:- Select the date when the machine’s insurance coverage expires.
Machine Images (Required):- Upload images of the machine to visually document its condition and specifications.
Attachments:- Attach relevant documents such as manuals, certifications, or service records, for easy reference.
Save:- On clicking the Save button the user can save the machine details.