Item Owner
Purpose:
The Item Owner Master serves as a centralized framework for defining, managing, and associating individuals or entities responsible for specific items within the system. This feature is critical for ensuring accountability and traceability across various business processes, such as inventory management, sales, and production. By linking each item to an assigned owner, it facilitates efficient management, clear ownership, and enhanced operational transparency. The Item Owner Master enables seamless tracking, supports decision-making by providing clear ownership records, and fosters accountability by ensuring that every item in the system is aligned with a designated owner or entity.
How to Navigate:
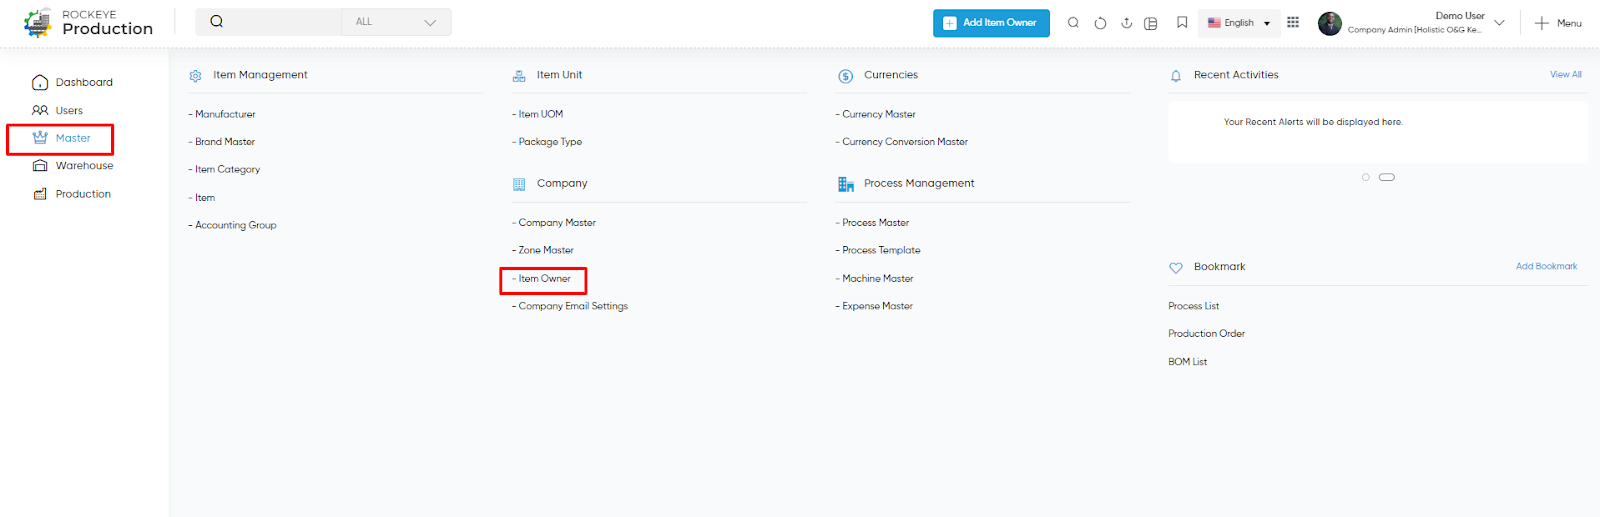
- Click on the Main Navigation Icon:
- The main navigation icon is typically located at the top right corner of the screen. Clicking on this icon will expand the navigation menu, displaying links to various sections of the production system.
- Select the Master Section:
- From the navigation menu, click on the Master section, usually located on the left-hand side. This will open a list of master modules associated with production and related operations.
- Locate the Company Section:
- Under the Master section, scroll down to find the company category. This section contains tools and modules related to managing production processes.
- Click on the Item Owner Link:
- Within the Company section, click on the Item Owner. This will take you to the Item Owner listing screen, where you can view existing methods or create new ones.
By following these steps, users can seamlessly navigate to the Item Owner module, enabling them to create, edit, and manage standardized process workflows for enhanced production efficiency.
Listing

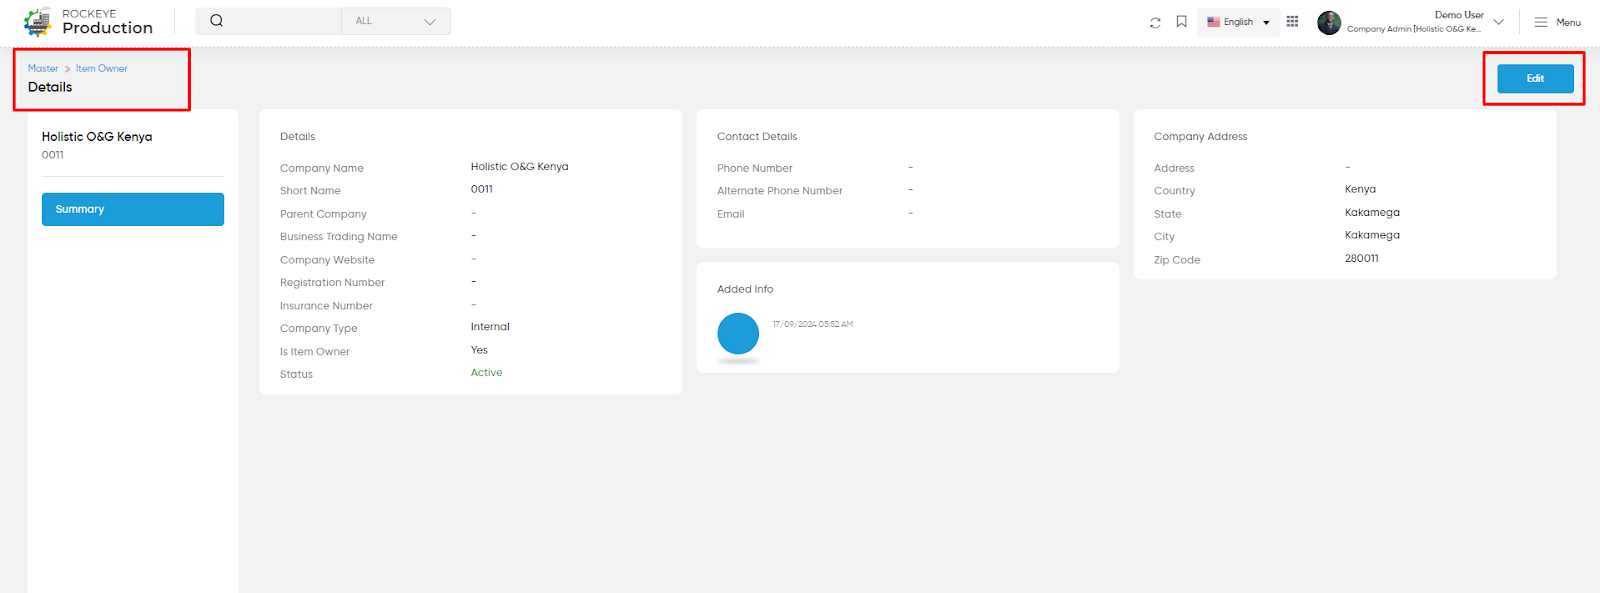
In listing user will be able to view below details
- Company Name
- Short name
- Company Phone
- Company Email
- Item Owner
- Action
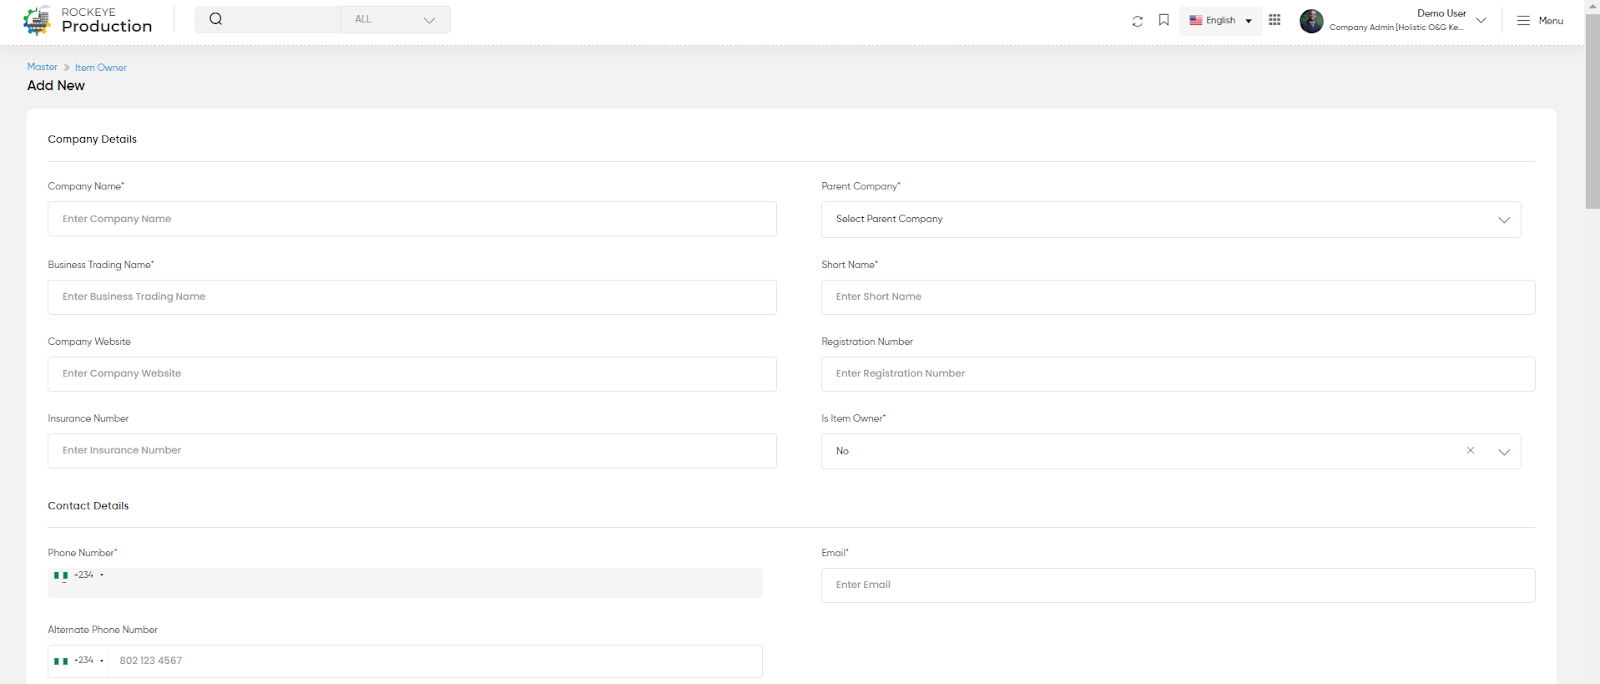
Add Item Owner
Clicking on the Add button user will have to add below details
Company Information:
- Company Name*: Enter the full name of the company.
- Parent Company*: Specify the parent company, if applicable.
- Business Trading Name*:Enter the trading name used by the business.
- Short Name*:Provide a short name for quick reference.
- Company Website:Enter the company’s website URL.
- Registration Number:Input the official company registration number.
- Insurance Number:Enter the company’s insurance number.
- Is Item Owner*:Select if this company will act as an Item Owner, responsible for overseeing and managing specific items within the system.
Contact Details:
- Phone Number*:Enter phone number with the country code.
- Email*:Enter the primary contact email.
- Alternate Phone Number:
Company Address:
- Address:Enter the company’s location (e.g., street address, building).
- Country*:Select the country from the dropdown
- State*:Select the state.
- City:Enter the city.
- Zip Code:Enter the postal code.
- Region:Specify the region, if applicable.
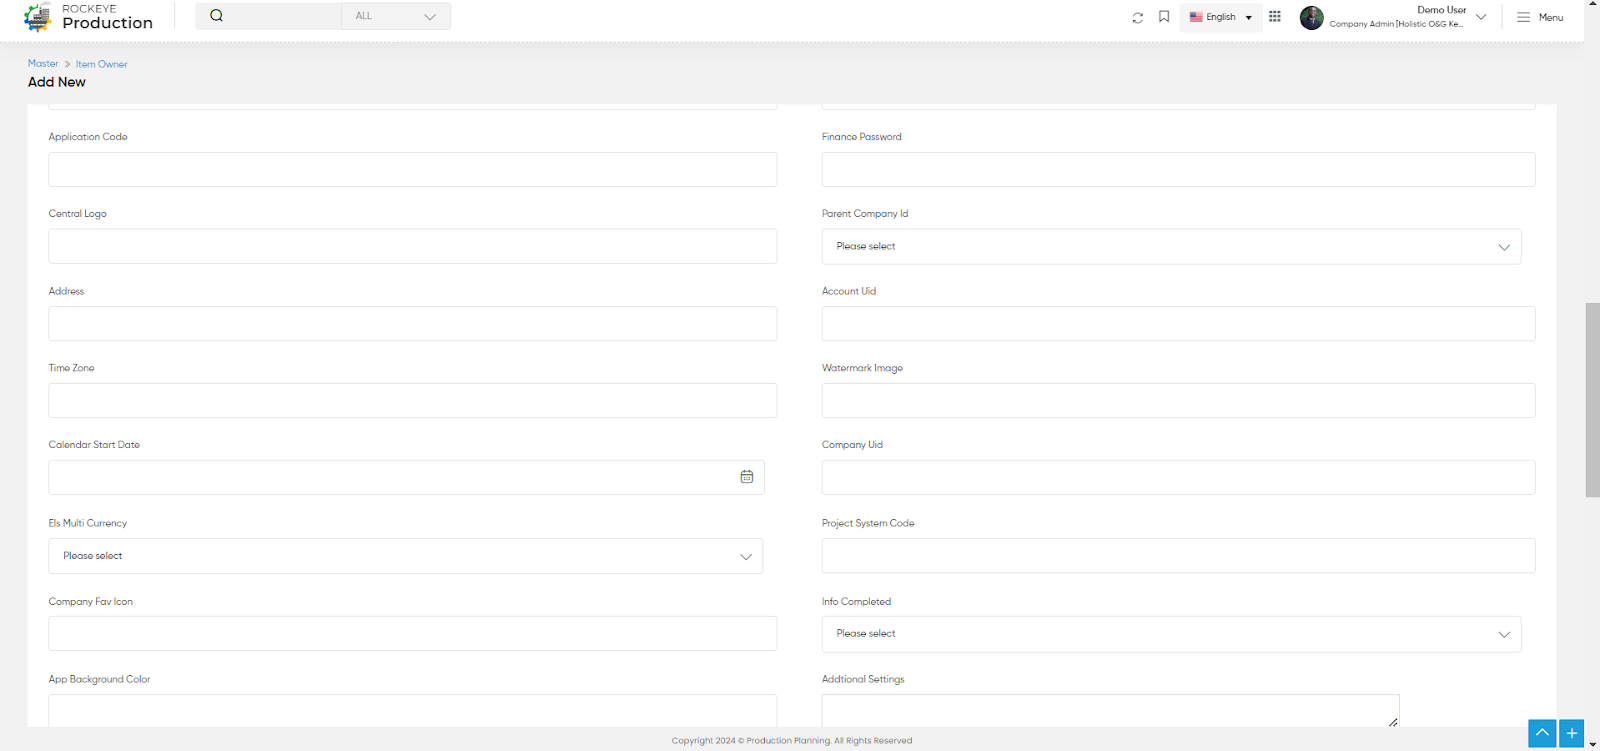
Additional Information:
- Status*:Specify the current status of the company (e.g., Active, Inactive).
- System Code:Internal system code for the company.
- Application Id:Unique identifier for the company’s application.
- Finance Username:Enter the finance system’s user name.
- Application Code:Input the code related to the company’s application.
- Finance Password:the finance system’s password.
- Central Logo:Upload the company’s central logo.
- Parent Company Id:Provide the identifier for the parent company.
- Address:Repeat the address details if necessary.
- Account Uid:Enter the account’s unique identifier.
- Time Zone:Specify the company’s time zone.
- Watermark Image:Upload a watermark image for company branding.
- Calendar Start Date:Set the start date for the company’s operational calendar.
Company Identifiers:
- Company Uid:Unique identifier for the company.
- Els Multi-Currency:Specify if the company uses multiple currencies.
- Project System Code:Provide the project system code.
- Company Icon:Upload the company’s favorite icon.
- Info Completed:Status flag to show if all company information is completed.
- App Background Color:Choose the background color for the company’s application.
Additional Settings:
- Primary Text Color:Choose the primary text color for the company interface.
- Language:Set the default language for the company.
- Procurement Auth Token:Input the procurement authorization token.
- Date Format:Choose the preferred date format.
- Tertiary Color:Select the tertiary color for the company theme.
- Is Multi-Branch:Specify if the company operates across multiple branches.
- Unselected Color:Set the color for unselected elements in the interface.
- Central Company Code:Provide the code for central company management.
- Watermark:Upload or configure the company watermark.
- Currency:Set the default currency used by the company.
- Account Id:Enter the company’s account ID.
- Financial Year Start Date:Set the start date for the company’s financial year.
HR Management Integration:
- HRms Endpoint URL:Provide the endpoint URL for HR management systems.
- HRms Account Code:Enter the account code for HR management.
- HRms Restrict Endpoint URL:Provide the restricted endpoint URL for HR management.
Application Design & Customization:
- App Primary Color:Choose the primary color for the application theme.
- Extra Settings:Add any extra configuration settings.
- Secondary Text Color:Set the secondary text color for the application.
- Is Multi-Currency:Toggle if the company supports multiple currencies.
- Logo:Upload the company’s logo.
- Central Company Image:Upload a central image for the company.

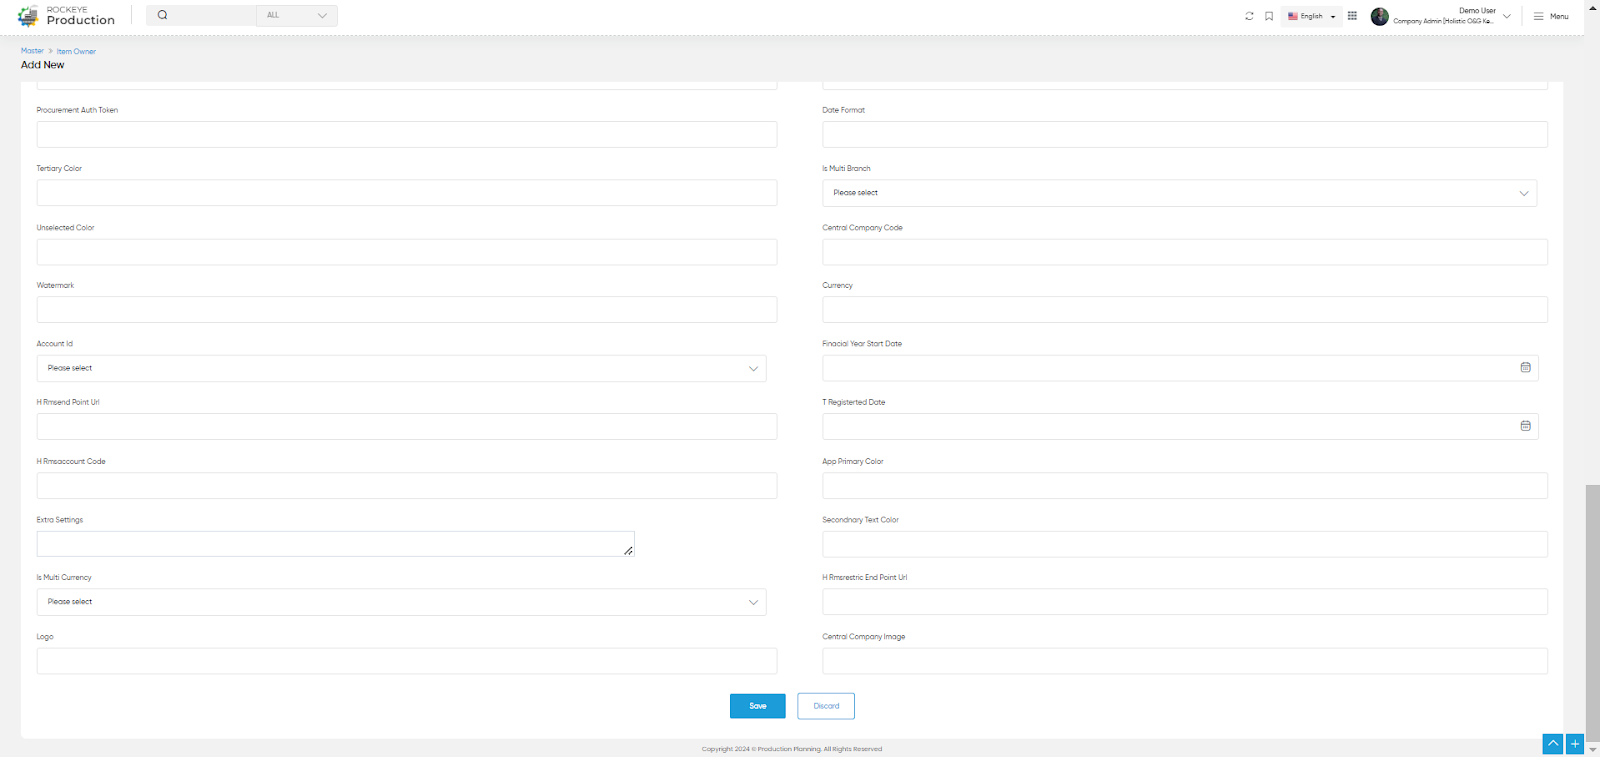
Once the details are added after submitting this item owner will be displayed in the listing