Maintenance & Service
How To Navigate To Import Master Data
The navigation includes the following steps for viewing the import master data in the computerized maintenance management system.
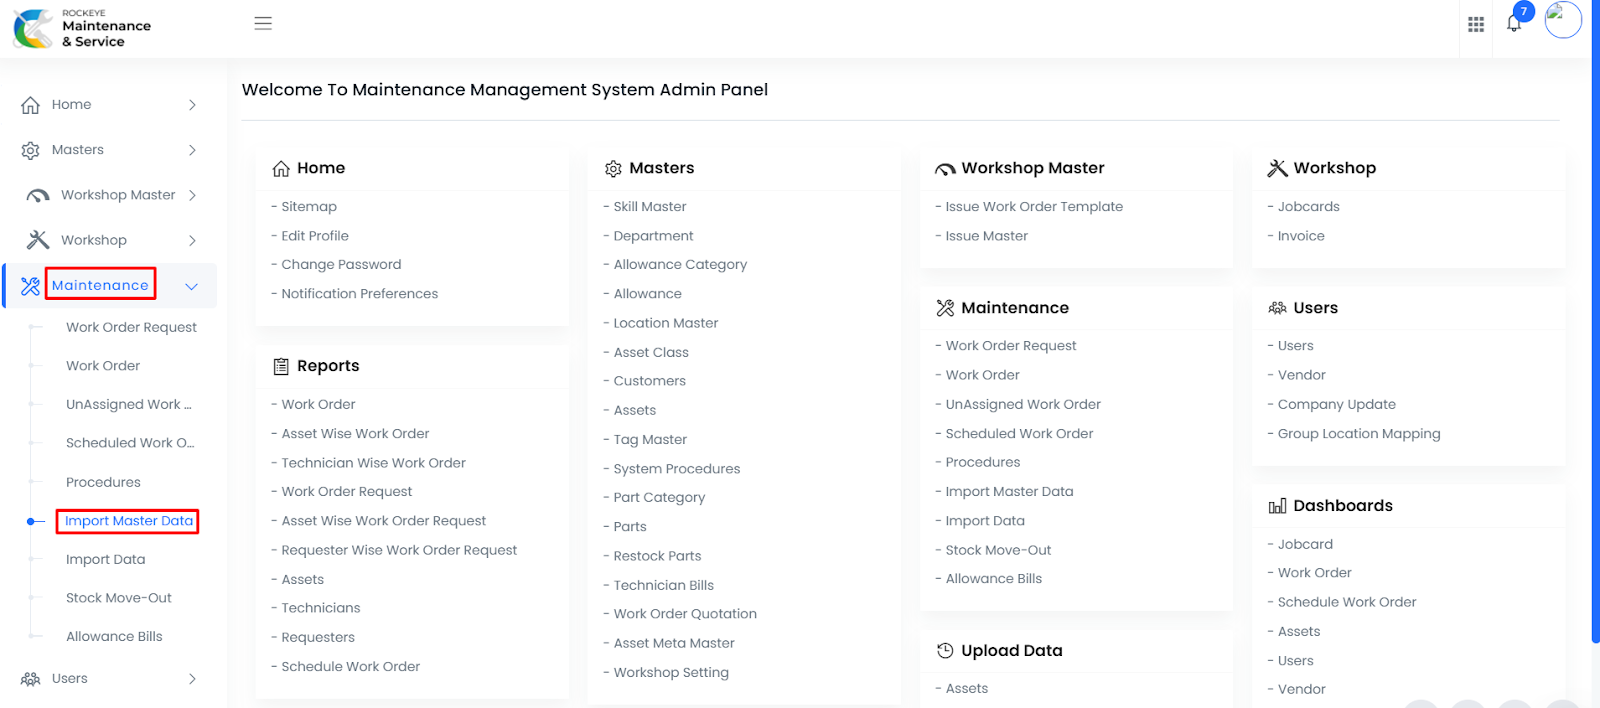
- Click on the Maintenance tab: The maintenance can be accessed by clicking on the maintenance tab on the side menu.
- Click on Import Master Data: The Import Master Data can be accessed by clicking it from the maintenance section.
Import Master Data Tab Add form
Add new: The “Add new” function allows you to create and add new import master data to the system as shown in the below screen.
- File Name (Required) :
- This is specifying the upload file name of the import data master.
- Module Category (Required):
- This is specifying to select the modules for the import master data using checkboxes.
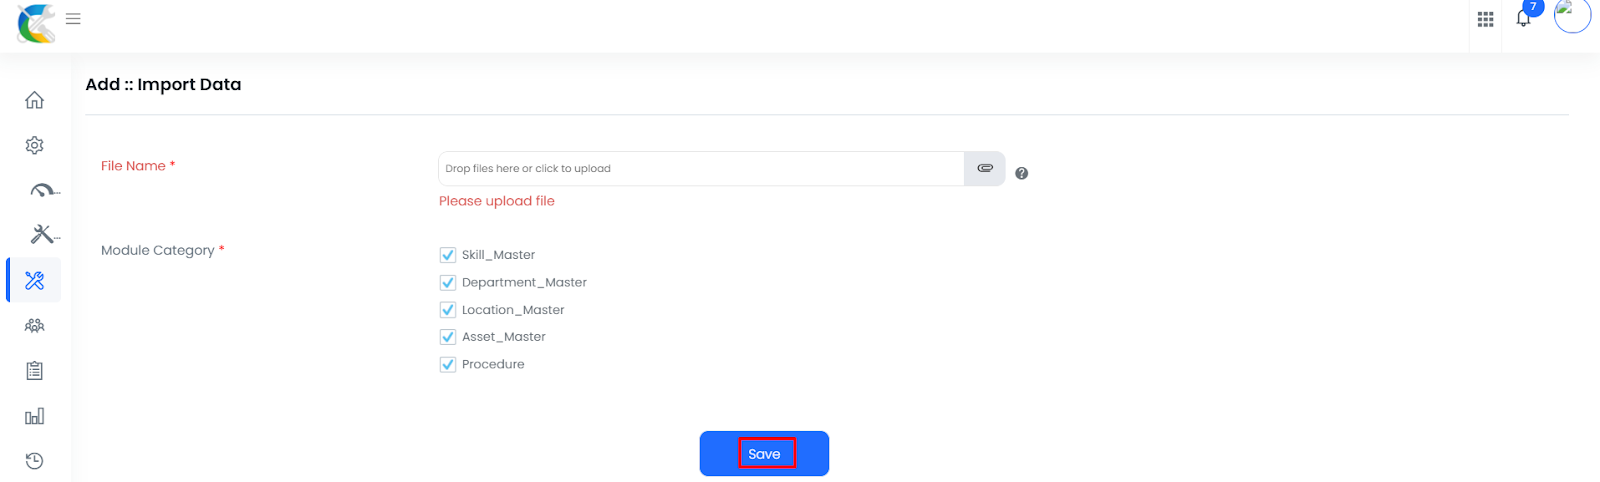
Key Points :
- Based on the uploaded file and the module selection, the data will be imported in the import master data.
Import Data
How To Navigate To Import Data
The navigation includes the following steps for viewing the import data in the computerized maintenance management system.
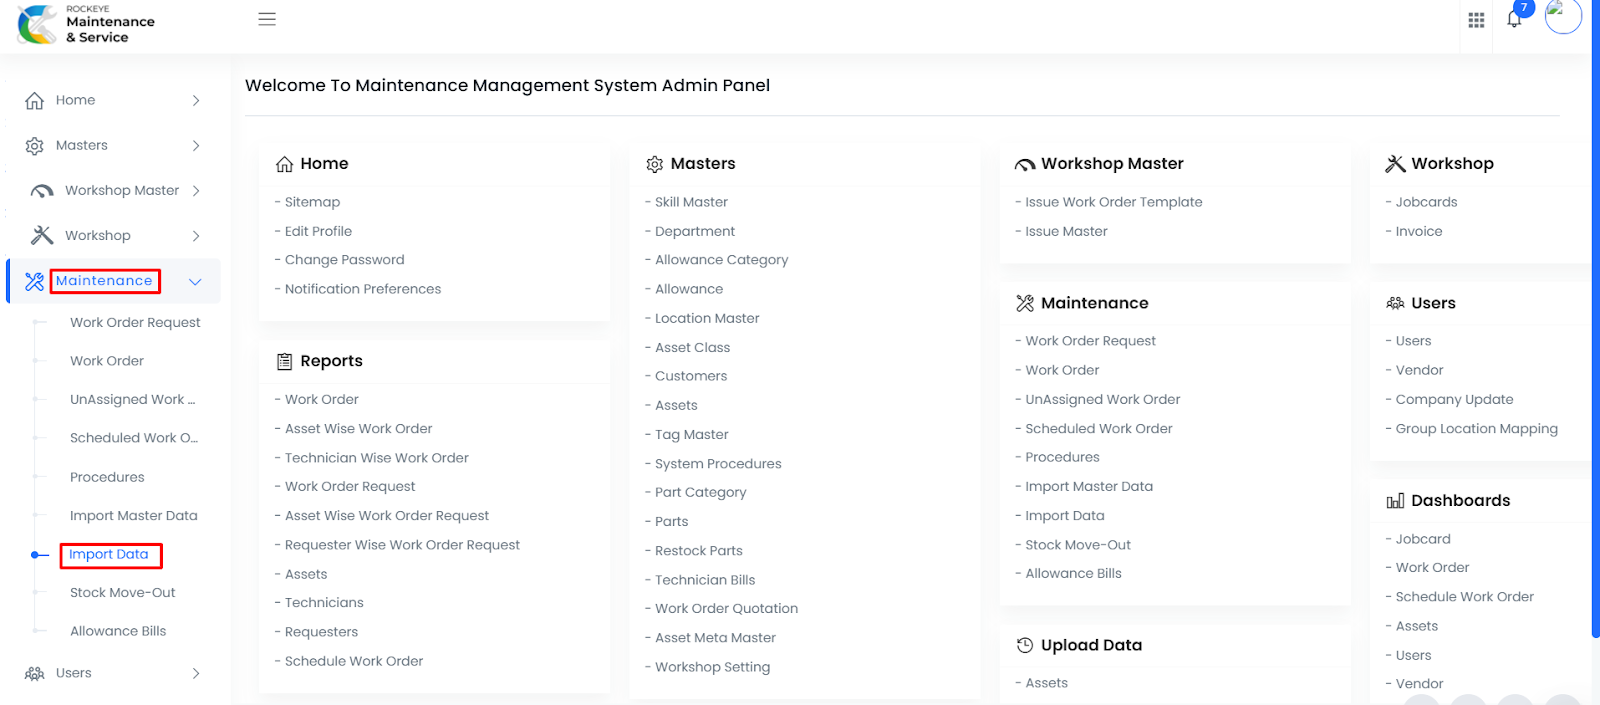
- Click on the Maintenance tab: The maintenance can be accessed by clicking on the maintenance tab on the side menu.
- Click on Import Data: The Import Data can be accessed by clicking it from the maintenance section.
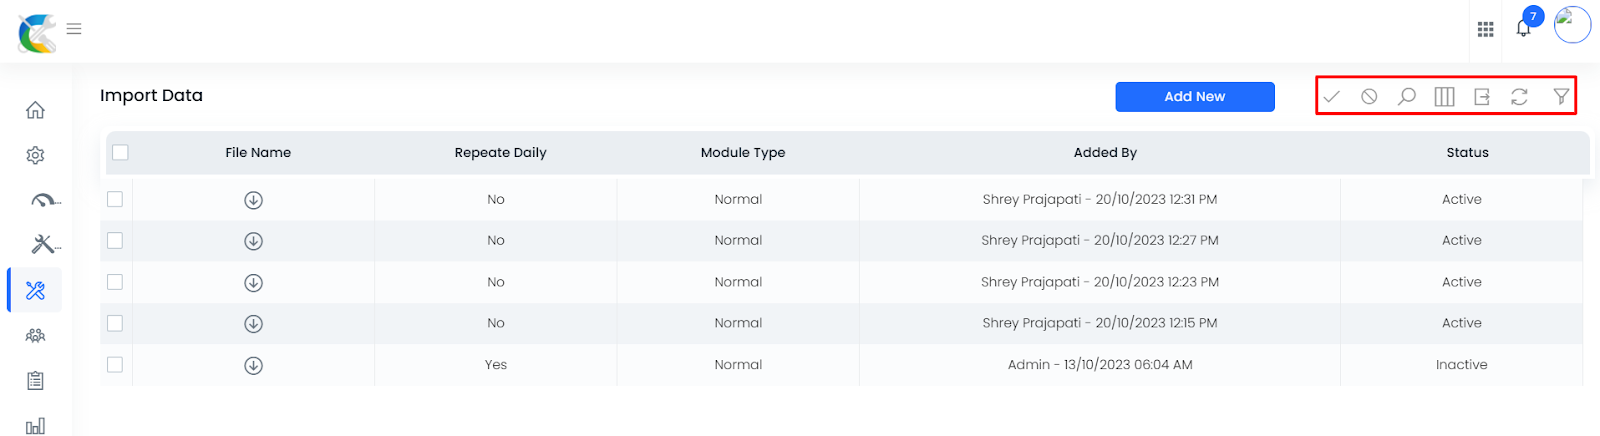
Import Data Tab Listing
An import data listing in a computerized maintenance management system is a feature that provides a list of all “import data”.
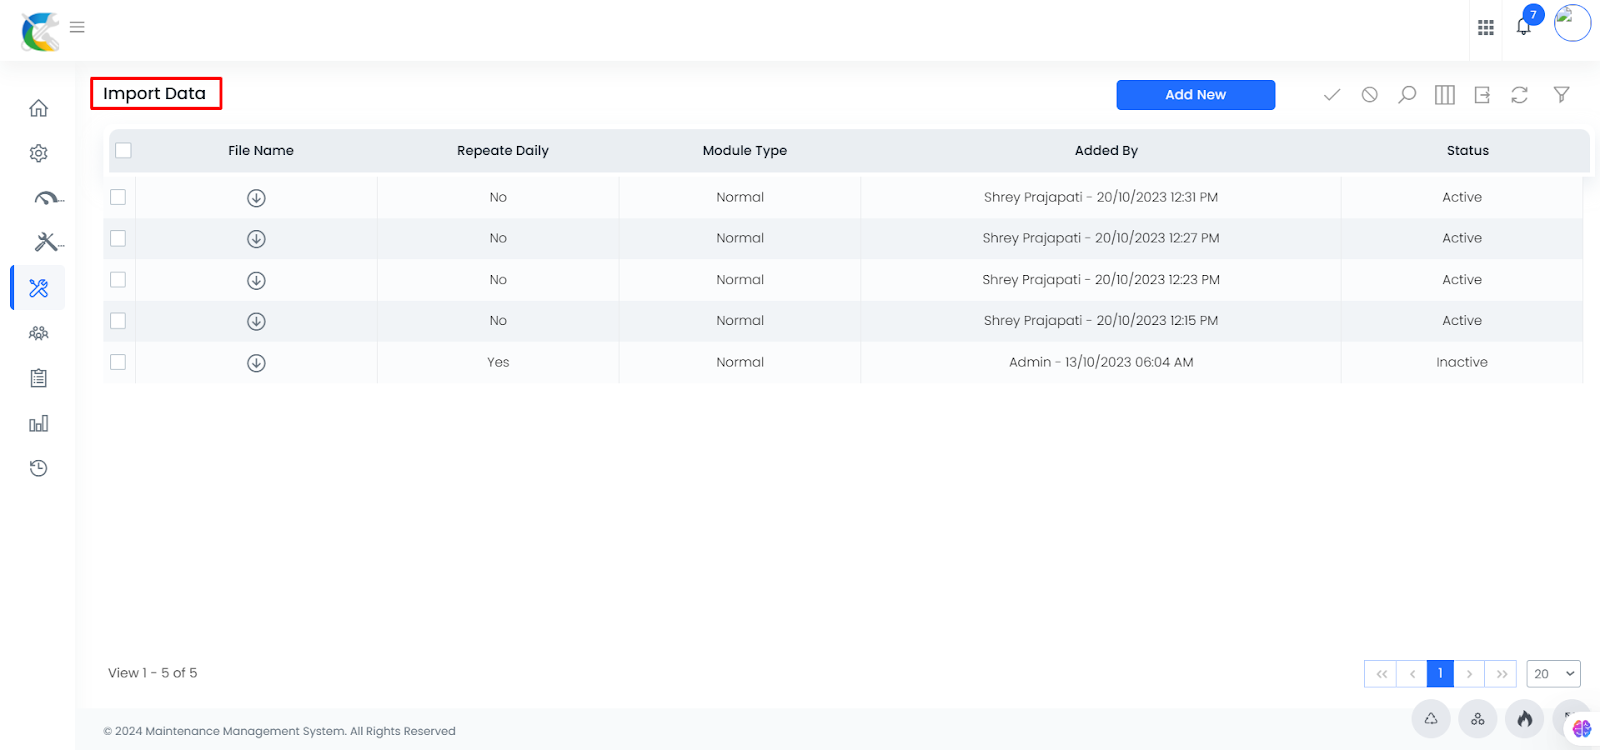
- Users can view the following information in the “import data” listing page
- File Name
- Repeat daily
- Module type
- Added by
- Status
Import Data Tab Add form:
Add new: The “Add new” function allows you to create and add new import data to the system as shown in the below screen.
- File Name (Required) :
- This is specifying the upload file name of the import data.
- Repeat Daily :
- This is specifying to choose the repeat daily as Yes / NO using the dropdown list.
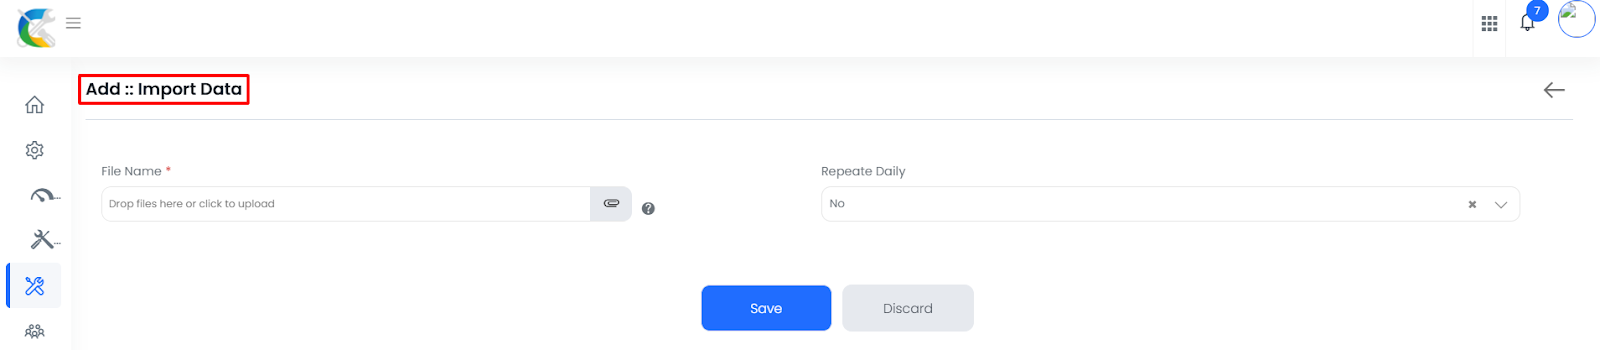
Key Points :
- Based on the uploaded file, the data will be imported in the import data.
User can perform the following actions
- Active / Inactive : User will be able to activate or inactive the specific imported data.
- Advanced Search : The “Advanced Search” function enables searching using multiple field names with multiple conditions to find specific data. The “Search” function allows the user to look for a specific entry within the available data and presents results that match the search parameters.
- Hide / Show Columns : This function allows users to hide or show the specific columns by checking the checkboxes. Users can also access the “check all” and “uncheck all” columns.
- Export: The “Export” feature allows users to export selected or all data in CSV or XLS or PDF format.
- Show all listing records: This functions like a refresh icon, retrieving and displaying all records in the listing.
- Quick Search : This “Quick Search” feature allows users to search the data from individual fields.
- File Name (Download Option) : User will be able to download the file name from the file name field in the listing page.
Users can perform the following actions:
- Save: The “Save” function allows the user to submit the required information while creating a new “import data”.
- Discard: The “Discard” function allows the user to cancel the submission of information provided at the time of creating a new “import data”.