Maintenance & Service
How To Navigate To Group Location Master
The navigation includes the following steps for viewing the “group location master” in the computerized maintenance management system.
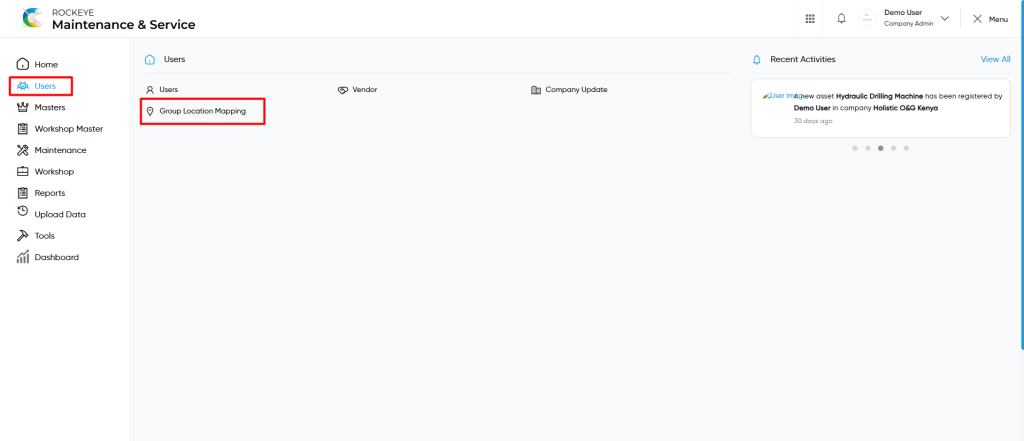
- Click on the Users tab: The users can be accessed by clicking on the user tab on the side menu.
- Click on Group Location Master: The “group location master” can be accessed by clicking it from the user section.
Group Location Master Tab Listing
A group location master listing in a computerized maintenance management system is a feature that provides a list of all group locations.
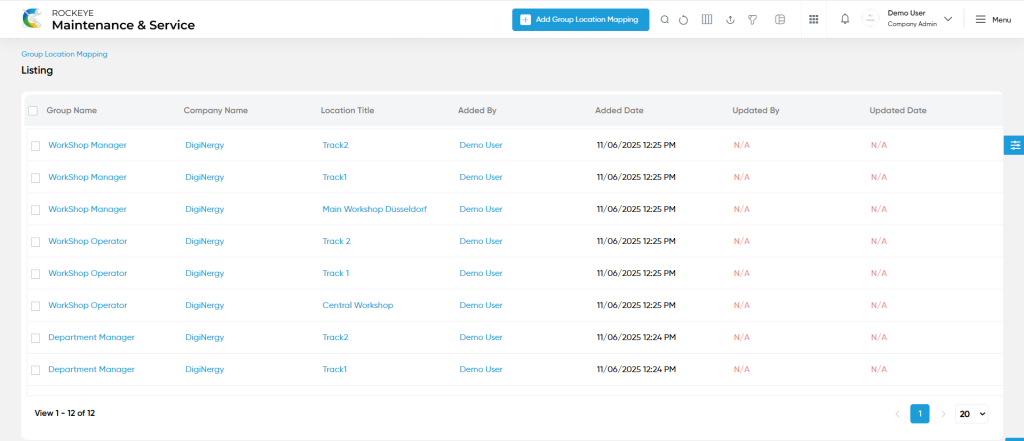
- Users can view the following information in the invite users listing page
- Group Name
- Company Name
- Location Title
- Added By & Added Date
- Updated By & Updated Date
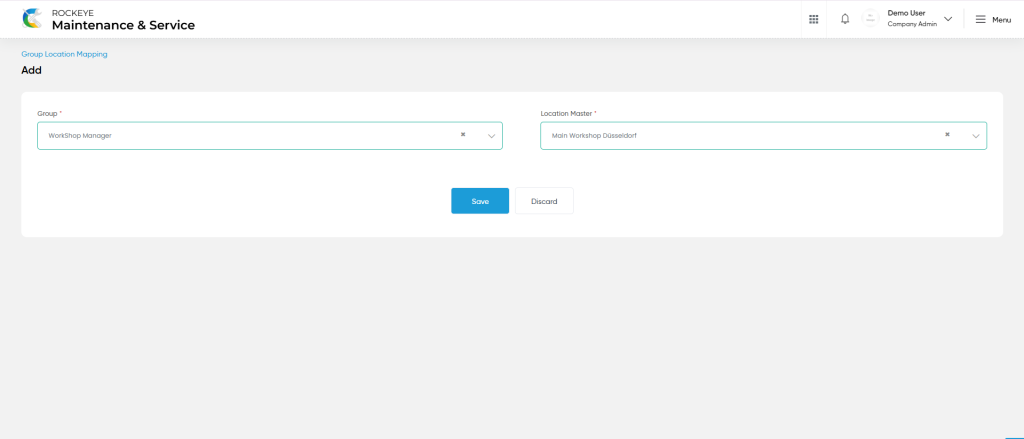
Group Location Mapping – Add Form
- Add new: The “Add new” function allows you to create and add a new “group location master” to the system as shown in the below screen.
- User will be able to add the “group location master” with the following fields
- Company (Required) :
- This is specifying the company name of the group location master.
- Location Master (Required) :
- This is specifying to choose the location master of the group location master.
- Group (Required) :
- This is specifying to choose the group of the “group location master” using the dropdown list.
- Company (Required) :
User can perform the following actions
- Advanced Search : The “Advanced Search” function enables searching using multiple field names with multiple conditions to find specific data. The “Search” function allows the user to look for a specific entry within the available data and presents results that match the search parameters.
- Show all listing records: This functions like a refresh icon, retrieving and displaying all records in the listing.
- Hide / Show Columns : This function allows users to hide or show the specific columns by checking the checkboxes. Users can also access the “check all” and “uncheck all” columns.
- Export: The “Export” feature allows users to export selected or all data in CSV or XLS or PDF format.
- Filter (show left panel search): The “Filter” function in the “group location master” allows users to customize their view of all “group locations” based on specific criteria.
Users can perform the following actions:
- Save: The “Save” function allows the user to submit the required information while creating a new “group location masters”.
- Discard: The “Discard” function allows the user to cancel the submission of information provided at the time of creating a new “group location masters”.