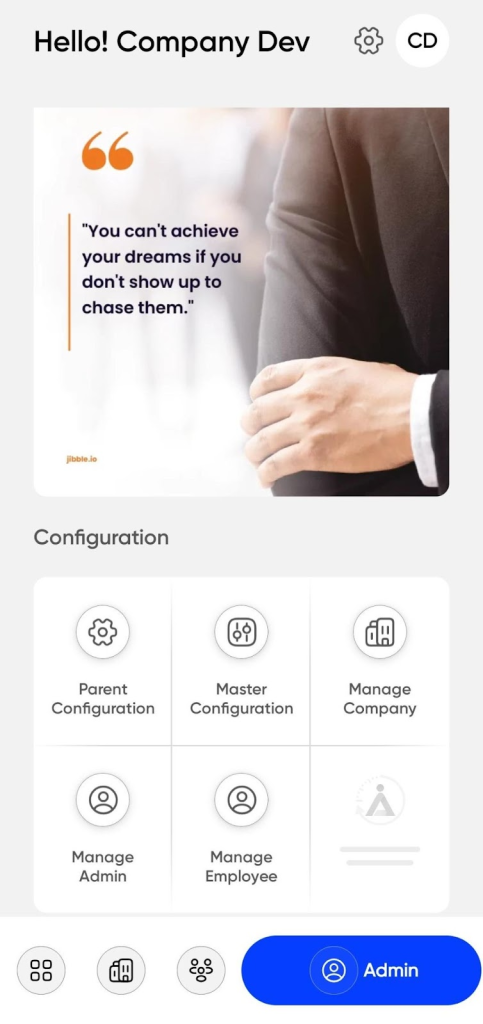
Admin Panel
Navigation
- Login > Admin
Purpose
- This section allows admins to configure core system settings and features.
Note : Available only to admins, this section provides core setup configuration and displays inspirational quotes in the top banner to promote a positive system environment.
Available Configuration Options:
- Parent Configuration:
- Used to define and manage parent account parameters, applicable across multiple companies or branches.
- Master Configuration:
- Enables the setup and customization of system-wide masters such as Company, Employee,Leave types,Visitor and Meeting rooms.
- Manage Company:
- Allows administrators to create, update, and maintain details of one or multiple companies under the system.
- Manage Admin:
- Facilitates the assignment and control of admin roles, including access rights and privileges.
- Manage Employee:
- Provides tools to, edit, or deactivate employee records, and to manage their associated configurations such as roles, and reporting lines.
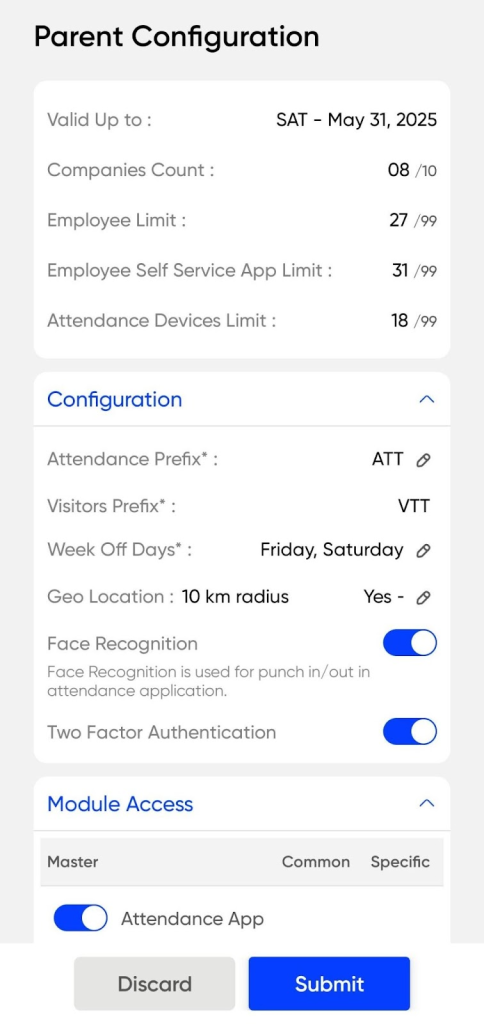
Parent Configuration
This section allows the admin to configure essential operational and system control settings for the parent company within the Attendance Management System.
- Valid Up To: Specifies the final date until which the company’s attendance system will remain valid and operational, after which access may be restricted unless renewed.
- Employee Limit: Defines the maximum number of employees that can be added under the company’s attendance system.
- ESS App Limit: Limits the number of users allowed to access the Employee Self-Service (ESS) mobile application for functions like check-in, leave, and attendance tracking.
- Attendance Device Limit: Controls the number of attendance-capturing devices, such as biometric or facial recognition units, that can be associated with the company.
- Attendance Prefix: Sets a custom prefix that will appear in all attendance-related entries or records to help uniquely identify them.
- Visitor Prefix: Assigns a prefix for all visitor-related entries to distinguish and manage visitor logs easily, which is used in all visitor logs to differentiate records by company or location.
- Week Off: Defines the weekly off day for the company, which will be considered while calculating employee attendance and working days.
- Geo Location: Enables geo-fencing for attendance, allowing employees to mark attendance only within a specified geographical boundary.
- Face Recognition: Activates face recognition as a method for marking employee attendance
- Face Liveness:Adds liveness detection to ensure real-time facial recognition security.
- Two-Factor Authentication: Enables a secondary layer of authentication (like OTP or biometric) for secure access to the system.
- Email: Allows the system to send automated email notifications for key events such as check-in/out, leave requests, and approvals.
- SMS: Enables SMS alerts for important updates or reminders related to attendance, leave, or other system activities.
- Employee Code Limit: Sets a cap on the number of unique employee codes that can be generated under the company for employee identification.
- Visitor Code Limit: Sets the maximum number of unique visitor IDs that can be generated and stored in the visitor log system.
Parent Configuration Module Access
This section allows the parent company admin to manage access to different modules and their respective masters:
Admin can enable or disable modules (e.g., Attendance, Leave, Visitor, etc.) across the organization. Disabling a module will automatically restrict its associated
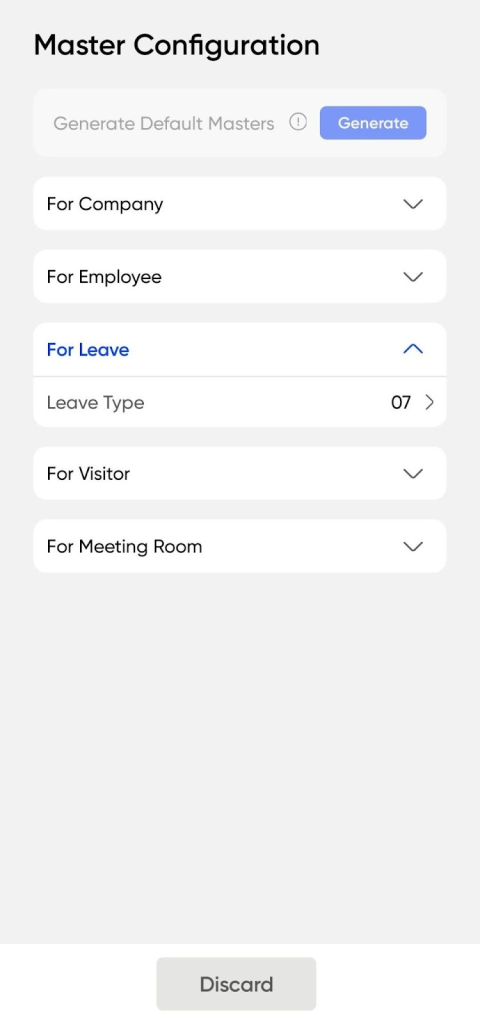
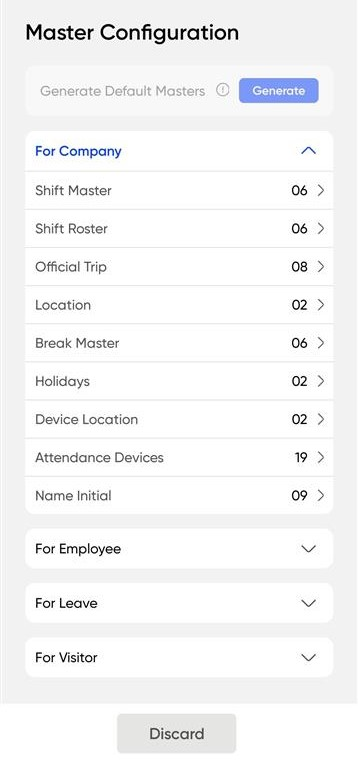
Master Configuration
This section helps set foundational configurations that apply company-wide :
Navigation :
Login > Admin > Master Configuration
- Shift Master
- Create and manage work shifts assigned to employees.
- User will be able to view list of all the shifts added in the system with below details
- Shift Name
- Effective From Date
- Effective To Date
- Timings
- Status
- Edit Option
- Shift Roster – Define and maintain rotation patterns of shifts.
- User will be able to view list of all the shifts roster added in the system with below details
- Shift Roster Name
- Effective From Date
- Valid UpTo Date
- Shift Type
- Status
- Edit Option
- User will be able to view list of all the shifts roster added in the system with below details
- Official Trip—Configure official trip types and set attendance rules for each.
- User will be able to view list of all the official trip added to the system with below details
- Official trip Name
- Short Name
- Description
- Status
- Edit Option
- User will be able to view list of all the official trip added to the system with below details
- Location—Add and maintain company locations for tracking and assignment.
- User will be able to view list of all the locations added in the system with below details
- Location name
- Address
- City
- Geo Location Punch in
- Week Off
- Edit Option
- Status
- User will be able to view list of all the locations added in the system with below details
- Break Master—Set different types of employee breaks (e.g., lunch, personal)
- User will be able to view list of all the Breaks added in the system with below details
- Break Name
- Type
- Location
- Edit Option
- Status
- User will be able to view list of all the Breaks added in the system with below details
- Holidays – Define annual holiday lists with specific dates.
- User will be able to view list of all the Holidays added in the system with below details
- Holiday Name
- Holiday Date
- Location
- Edit Option
- Status
- User will be able to view list of all the Holidays added in the system with below details
- Device Location – Specify physical locations where attendance devices are placed.
- User will be able to view list of all the Device Location added in the system with below details
- Device Name
- Location
- Edit Option
- Status
- User will be able to view list of all the Device Location added in the system with below details
- Attendance Device – Review and approve device registration requests via company code.
- User will be able to view list of all the Attendance Devices Location added in the system with below details
- Device Name
- Location
- Edit Option
- Status
- User will be able to view list of all the Attendance Devices Location added in the system with below details
- Name Initials – Maintain a list of initials used for consistent name formatting.
- User will be able to view list of all the Initials added in the system with below details
- Initial Name
- Edit Option
- Status
- User will be able to view list of all the Initials added in the system with below details
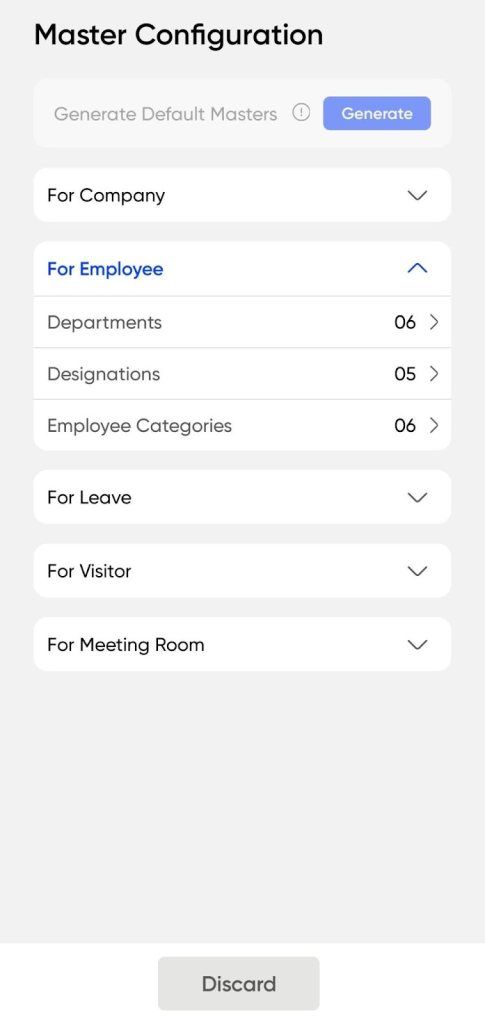
Master Configuration – For Employee
Department Master
- Add and manage different departments within the organization.
- Assign specific shift rosters to each department for better scheduling and planning
Designation Master
- Create and organize various designations as per company structure.
- Helps maintain role clarity and hierarchical consistency.
- Need to enter below details to create new Designation
- Designation name
- Designation Code
- Status
Employee Category
- Define employee types (e.g., Full-time, Contractual, Intern).
- Categorization assists in applying relevant attendance, payroll, and leave policies.
- Add New Employee Category
- Need to Enter Below Details
- Category Name
- Category Code
- Status
Note: Every master module includes built-in search and filter options for quick access and streamlined management.

Master Configuration – For Leave
Under this section, the Leave Type Master is maintained.
It enables the admin to add, edit, and manage various leave types applicable to employees.
To Add New User will have to enter below details :
- Leave Type
- Leave Code
- Description
- Status
Note: Every master module includes built-in search and filter options for quick access and streamlined management.
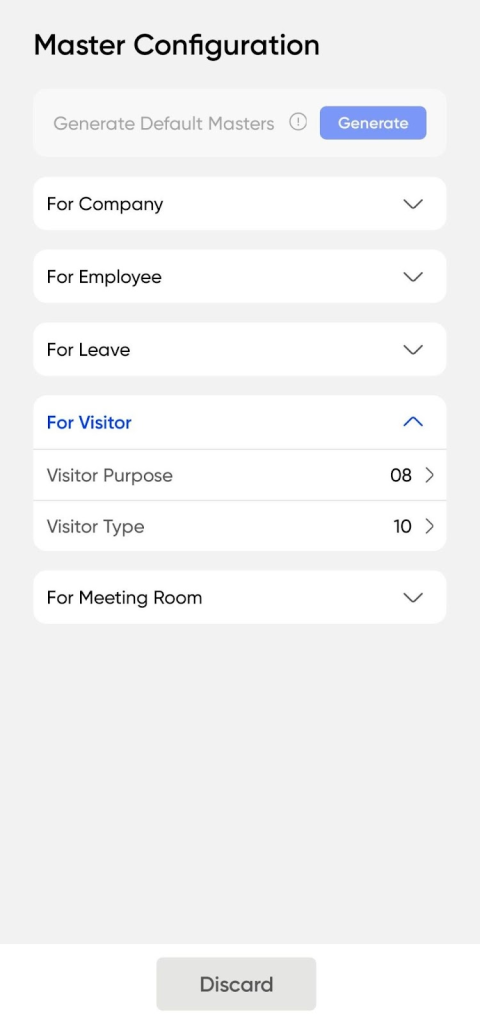
Master Configuration – For Visitor
This section manages two important masters related to visitor handling:
Visitor Purpose :
Used to define the reason for a visitor’s arrival, such as meetings, audits, interviews, or site visits.
Helps in categorizing and tracking visits based on intent.
To Add new Visitor Purpose below details need to be entered
- Visitor Purpose
- Purpose Code
- Status
Visitor Type :
Maintains the classification of visitors, e.g., job applicants, vendors, customers, government officials, event attendees.
Ensures proper handling, logging, and permissions based on visitor profile.
To Add new Visitor Type below details need to be entered
- Visitor Type
- Visitor Type Code
- Status
Note: Every master module includes built-in search and filter options for quick access and streamlined management.
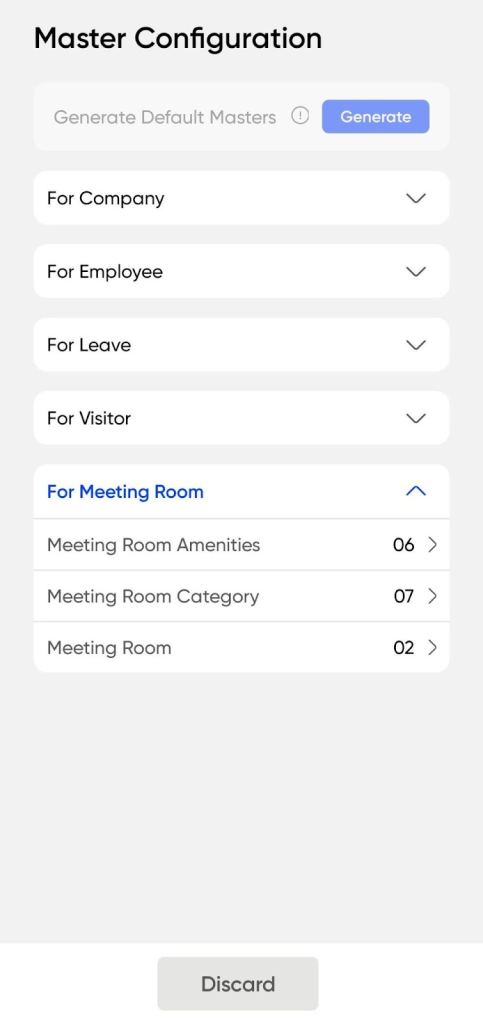
Master Configuration – For Meeting Room
- This section consists of three core masters used to efficiently manage all meeting room-related data across the organization :
- Meeting Room Amenities : Maintain a master list of all available amenities provided in meeting rooms. For each amenity, an image and available quantity can be configured and managed.
- To add new Amenities need to enter below details
- Amenity Name
- Amenity Code
- Image
- Description
- Quantity
- Availability
- Status
- Action Buttons
- Discard – Cancel the process and clear all fields.
- Submit – Save and finalize the meeting room Amenities.
Meeting Room Category : Add and manage various meeting room categories. These are created in a predefined sequence for consistent classification.
To Add new Category need to enter below details
- Category Name
- Category Code
- Sequence
- Status
- Action Buttons
- Discard – Cancel the process and clear all fields.
- Submit – Save and finalize the meeting room Category.
Meeting Room Master : All meeting rooms can be added and configured in this master. Key configuration includes –
- Selection of associated category
- Selection of location
- Capacity of the meeting room.
- Operational hours (Start time & End time)
- Booking the meeting room will require ‘Approval’
- List of Amenities available in the meeting room
To Add new Meeting Room User will have to enter below details
- Image
- Meeting Room Name
- Meeting Room Code
- Category
- Location
- Capacity
- Start Time
- End Time
- Is Approval Require (Toggle for Yes /No )
- Description
- Meeting Room Amenities
- Attachment
- Status
- Action Buttons
- Discard – Cancel the process and clear all fields.
- Submit – Save and finalize the meeting room.
Manage Company
Purpose
This section provides visibility and control over all sub-companies created under the parent organization:
Navigation :
Login > Admin > Manage Company
- View All Sub-Companies: A list of all registered sub-companies is displayed here.
- Add New Company : Click the ‘+’ icon to register a new sub-company.
- Edit Existing Companies : Use the edit icon to modify company details as needed.
- Search & Filter Enabled : Quickly locate specific companies using built-in search and filter tools.
Note: Every master module includes built-in search and filter options for quick access and streamlined management.
Add Company
The Add Company form allows the admin to create a new subsidiary company under the parent company. The following inputs are required :
- Company Name & Logo :
- Enter the full name of the company.
- Upload the official company logo.
- Company Details :
- Company Short Code: Unique short identifier for internal references.
- Address Information :
- Complete company address.
- Select Country from the dropdown.
- Enter State, City, and Zip Code accordingly.
Configuration section defines the operational mode and policy-related configurations for the newly added company :
- Mode Selection : Choose between Demo or Live operation mode.
- Validity Duration : Set the Start Date and Valid Upto Date for company operations.
- Company Limits: (Maximum value: 99 for each)
- Employee Limit – Max number of employees allowed.
- Employee Self Service App Limit – Max users allowed mobile access.
- Attendance Device Limit – Max attendance devices to be linked.
- Code Prefixes : Set Attendance Prefix and Visitor Prefix for company-specific codes.
- Policy Settings : Select Week Off Days as per organizational policy.
- Face recognition and Two factor authentication can be enabled / disabled through the toggle.
- Toggle to set company status as Active or Inactive.
- Action Buttons
- Discard – Cancel the process and clear all fields.
- Submit – Save the Company Details.
Manage Admin
Purpose :
- The Manage Admin screen offers a consolidated view of all admin users registered in the system.
Navigation :
Admin >Manage Admin >Listing
Each admin card presents key information, including:
- Admin ID
- Name and Initials
- Email Address and Contact Number
- Role or Access Type
- Company Name
- Current Status (Active or Inactive)
Available Actions:
- Edit admin details using the edit icon
- Search admins using the Search Bar
- Filter admin records using the Filter icon
- Add new admins using the ‘+’ button
Add Admin
The Add Admin page allows authorized users to modify an existing admin’s details, control their system access, and perform account-related actions.
- Access Type
- Defines the admin’s role or level of access (e.g., Super Admin, Reporting Senior).
- Employee
- Links the admin role to an existing employee profile. Employee selection is optional – admin ID can be created independently.
- Name
- Allows adding name or display name for the admin.
- Email
- Allows adding Email ID for the admin. Used as identifier during the login process.
- Code & Phone Number
- In the Code field, users can search for and select the appropriate country code, while the Phone Number field is used to enter admin phone number.
- Status
- Enables or disables the admin account (Active/Inactive).
- Additional Controls:
- Reset Password
- Provides the option to initiate a password reset for the admin account.
- Discard cancels the changes without saving.
- Update saves and applies the modified details.
- Provides the option to initiate a password reset for the admin account.
- Reset Password
- Action Button :
- Discard – Cancel the process and clear all fields.
- Submit – Save the Admin Details.
Manage Employee
Purpose
- Manage Employee screen provides a centralized view of all registered employees within the organization.
Navigation
Admin> Manage Employee > Employee List
Each employee card displays essential information including:
- Employee ID
- Name and Initials
- Email Address and Contact Number
- Company Name
- Employee Type
- Last Login Status
- Current Status (Active or Inactive)
Users can:
- Edit employee details using the icon.
- Search for specific employees using the search bar.
- Add new employees via the ‘+’ button.
- Filter employee records using the Filter icon.
Add Employee –
The Add Employee form is used to register a new employee in the system. The first section captures Personal Information, which includes :
Personal Information :
- Capture / Upload Image :
- The admin has the option to either capture a photo or upload an image of the employee directly within the application.
- Name Details :
- Input fields for First Name and Last Name.
- Demographics :
- Select the Gender and input the Birthdate of the employee.
- Contact Information :
- Phone Number: Choose the Country Code using search and selection on the code field and Enter the Phone Number.
- Provide the Email ID for employee registration.
- Employee Code Setup :
- If multiple Attendance Prefixes exist, the correct one must be selected.
- For Employee Code, admin can.Click the ↻ icon to auto-generate a unique employee code.
Add Employee – Other Information
The second section of the Add Employee form captures the Other Information necessary for employee setup :
- Organizational Assignment :
- Joining Office Location: Select from the dropdown.
- Department, Designation & Shift Roaster:
- Each to be selected from respective dropdowns.
- Employee Category:
- Choose from options like Permanent, Consultant, Intern/Trainee, or Contract.
- Reporting Structure :
- Reporting Senior:
- Select from the dropdown. Can be left blank if the employee is the reporting senior.
- Reporting Senior:
- Employment Details :
- Joining Date: Select using the date picker.
- Employee Type: Choose the relevant type from the dropdown.
- Access Type: Select whether the user is an Employee or a Reporting Senior.
- System Access & Preferences :
- Use toggles to configure: Mobile App Access, Required Check-In, Weekoff Preference (if enabled, select preferred days from dropdown), Status (Active / Inactive)
- Action Button :
- Discard – Cancel the process and clear all fields.
- Submit – Save the Employee Details.